Introduction
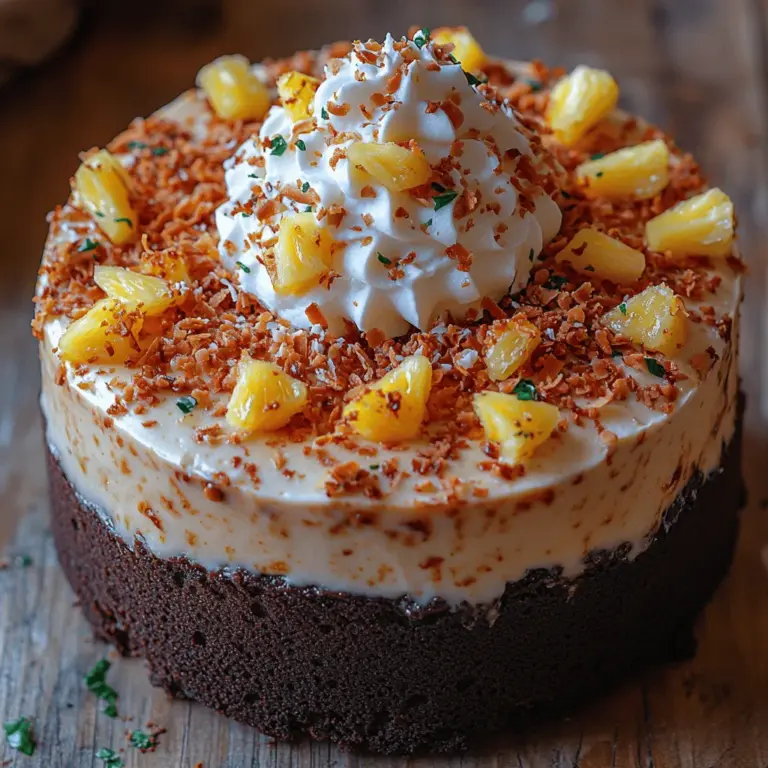
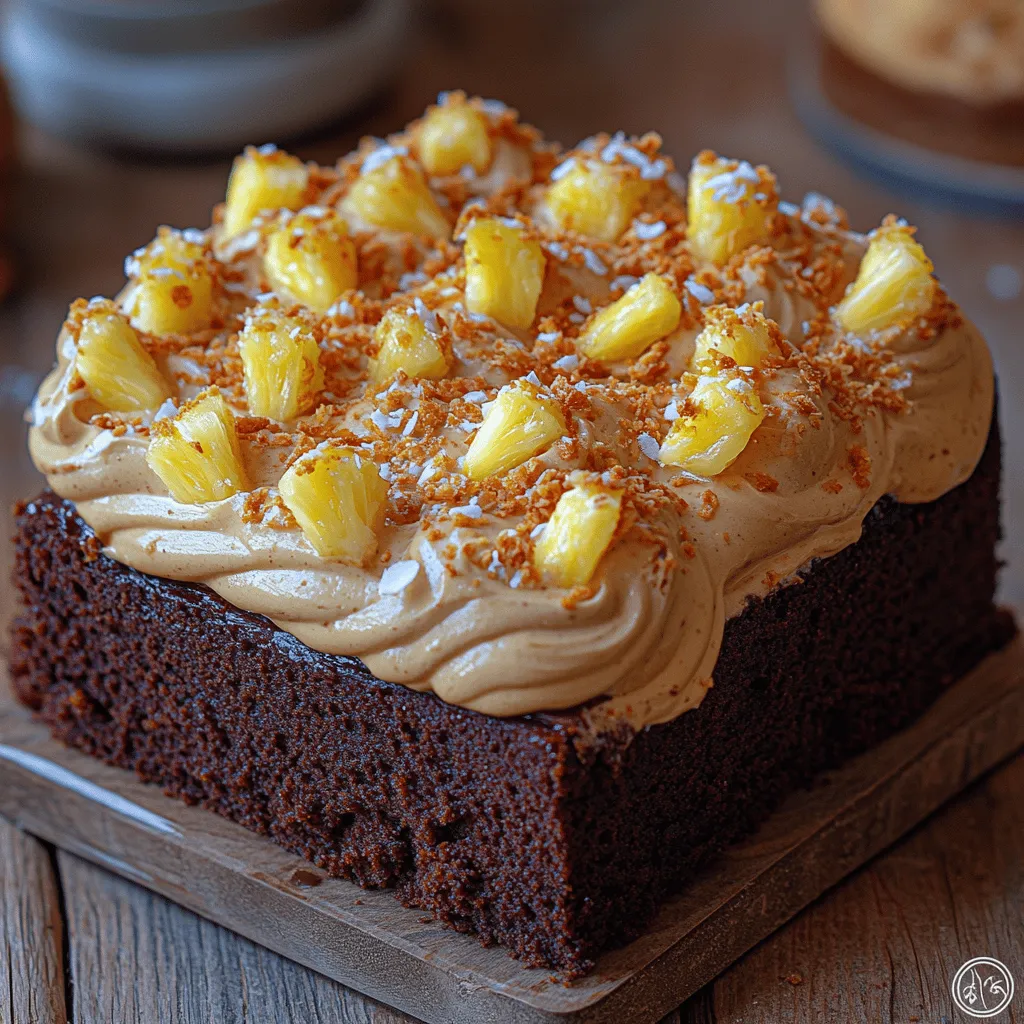
If you’re looking to take your taste buds on a delightful tropical getaway, look no further than the Tropical Bliss Pineapple Condensed Milk Cake. This heavenly dessert marries the sweet, juicy flavors of pineapple with the rich creaminess of sweetened condensed milk, resulting in a cake that is both moist and indulgent. The blend of tropical flavors not only evokes images of sun-soaked beaches but also brings a refreshing twist to the traditional cake experience.
Tropical flavors have seen a rise in popularity in baking, and for good reason. They offer a unique combination of sweetness and acidity that can elevate any dessert from ordinary to extraordinary. When baked into a cake, these flavors create a moist, flavorful treat that is perfect for special occasions or simply enjoying at home with family and friends.
To achieve the best results in your baking, it’s essential to use quality ingredients. The freshness of your pineapple, the richness of your butter, and the creaminess of your sweetened condensed milk all contribute to the cake’s overall flavor and texture. In this article, we’ll walk you through each step of creating this delicious cake, from understanding the key ingredients to preparing the batter for baking.
Understanding the Ingredients
The Tropical Bliss Pineapple Condensed Milk Cake is built on a base of simple yet impactful ingredients. Each component plays a crucial role in creating the cake’s signature flavor and texture.
Key Ingredients
1. Sweetened Condensed Milk: This ingredient is a game-changer in baking. Sweetened condensed milk adds sweetness and moisture, resulting in a luscious texture that keeps the cake from drying out. It also enhances the cake’s overall flavor profile, making it richer and creamier than cakes made with regular sugar and milk.
2. Crushed Pineapple: Pineapple not only provides a burst of tropical flavor but also contributes to the cake’s moisture. When using crushed pineapple, it’s important to drain it well to avoid excess liquid, which can lead to a soggy cake. The natural acidity of pineapple also balances the sweetness of the condensed milk, creating a harmonious flavor experience.
3. Unsweetened Cocoa Powder: While it may seem counterintuitive to include cocoa powder in a tropical cake, it adds depth and complexity to the flavor profile. The slight bitterness of cocoa powder contrasts beautifully with the sweetness of the condensed milk and pineapple, creating a well-rounded taste that keeps your palate intrigued.
4. Butter: Butter is a cornerstone of cake baking. It contributes to the cake’s richness and moisture, creating a tender crumb. For the best results, use unsalted butter to control the salt levels in your recipe. Make sure your butter is at room temperature before mixing for optimal incorporation into the batter.
5. Optional Ingredients – Shredded Coconut: For those who wish to elevate their Tropical Bliss Pineapple Condensed Milk Cake, shredded coconut is a fantastic addition. It enhances the cake’s texture, giving it a delightful chewiness and a deeper tropical flavor. Plus, coconut pairs beautifully with both pineapple and chocolate.
Preparing for Baking
Before you dive into mixing your ingredients, it’s important to prepare your baking environment. A little preparation goes a long way in ensuring your cake turns out perfectly.
Preheating the Oven
First and foremost, preheat your oven to the temperature specified in your recipe. Preheating ensures that your cake bakes evenly and rises properly. If you place your cake batter in a cold oven, it can result in uneven baking and a dense texture.
Choosing the Right Cake Pan
The choice of cake pan can impact the baking process and the final appearance of your cake. For this recipe, you can opt for either a round or square cake pan, depending on how you plan to serve it. Round pans are ideal for layering cakes or for a more classic presentation, while square pans can make cutting and serving easier for gatherings. Whichever you choose, make sure the pan is the right size for the amount of batter you have.
Greasing and Lining the Pan
To prevent your cake from sticking to the pan, it’s crucial to grease it properly. Use a generous amount of butter or cooking spray to coat the bottom and sides of the pan. For added security, you can also line the bottom with parchment paper. This will not only make it easier to remove the cake from the pan after baking but will also help maintain its shape and integrity.
Mixing the Cake Batter
With your ingredients ready and your pan prepared, it’s time to mix your cake batter. This step is where the magic begins, and getting it right is essential for achieving that perfect cake texture.
Step-by-Step Guide
1. Gather Your Ingredients: Make sure all your ingredients are at room temperature. This includes your butter, eggs, and any other refrigerated items. Having them at the same temperature helps them mix together seamlessly.
2. Combine Dry Ingredients: In a large mixing bowl, sift together your dry ingredients, including all-purpose flour, cocoa powder, baking powder, and any spices you might be using. Sifting helps to aerate the flour and remove lumps, creating a lighter batter.
3. Mix Wet Ingredients: In another bowl, beat together your room-temperature butter and sweetened condensed milk until the mixture is smooth and creamy. This can take a few minutes, so don’t rush this step—properly creamed butter and milk provide the foundation for a light and fluffy cake.
4. Incorporate Eggs: Add your eggs to the wet mixture one at a time, mixing well after each addition. This helps to emulsify the ingredients, ensuring a uniform batter.
5. Combine Dry and Wet Mixtures: Gradually add your dry ingredients to the wet ingredients, mixing gently with a spatula or a wooden spoon. Be careful not to overmix—this is where many bakers go wrong. Overmixing can lead to a dense cake, as it develops gluten in the flour.
6. Fold in Add-Ins: Once your batter is just combined, gently fold in the crushed pineapple and shredded coconut if you choose to use it. The key here is to mix just enough to distribute the add-ins without deflating the batter.
Tips for Achieving the Perfect Cake Texture
– Do Not Overmix: As mentioned earlier, overmixing can lead to a dense cake. Mix until the dry ingredients are just incorporated, and you notice no visible flour left in the batter.
– The Science of Folding: When folding in add-ins like pineapple and coconut, use a gentle motion from the bottom of the bowl upward. This technique helps maintain the airiness of the batter.
– Consistency Check: Your cake batter should be thick yet pourable. If it seems too thick, you can add a tablespoon or two of milk to loosen it slightly.
With your cake batter perfectly mixed, you’re now ready to move on to the baking process. Stay tuned for the next part, where we’ll guide you through the final steps of baking the Tropical Bliss Pineapple Condensed Milk Cake to perfection.
How to Check for Doneness: Toothpick Test Explained
Determining when your Tropical Bliss Pineapple Condensed Milk Cake is perfectly baked is crucial for achieving that moist, tender texture. The classic method to check for doneness is the toothpick test. Here’s how to do it:
1. Timing: Start checking the cake about five minutes before the recommended baking time ends. For this cake, that usually means around the 25-30 minute mark if you are baking at 350°F (175°C).
2. Insert the Toothpick: Take a clean toothpick and insert it into the center of the cake.
3. Check the Results: If the toothpick comes out clean or with a few moist crumbs (but no wet batter), your cake is done. If it comes out sticky or with batter clinging to it, give it a few more minutes in the oven. Remember, the cake will continue to cook slightly after being removed from the oven due to residual heat.
Understanding Baking Times: Why They May Vary
Baking times can vary significantly based on several factors. Understanding these can help you achieve the perfect cake:
– Oven Calibration: Not all ovens are created equal. Yours may run hotter or cooler than the dial indicates. Investing in an oven thermometer can help you gauge the true temperature.
– Pan Size: The type of baking pan you use can affect cooking times. A thinner pan will bake faster than a deeper pan, so adjust your baking time accordingly.
– Ingredient Temperature: Using room temperature ingredients, especially eggs and butter, can lead to a more even bake. Cold ingredients can increase baking time.
– Humidity and Altitude: High humidity can affect moisture levels in the batter, while high altitude can change the way cakes rise and bake. Be prepared to make adjustments in these conditions.
Cooling the Cake: Importance of Cooling for Frosting Application
Once your cake is baked to perfection, allow it to cool properly before frosting. Here’s why this step is essential:
– Preventing Melting: If you frost a warm cake, the frosting can melt and slide off, leading to a messy presentation. It’s crucial to let your cake cool completely on a wire rack, which allows air to circulate and prevents sogginess.
– Flavor Development: Cooling the cake also allows flavors to settle, enhancing the overall taste.
– Stability: A cooled cake is more stable and easier to handle when frosting. It reduces crumbling and ensures a smooth application of your whipped pineapple frosting.
Creating the Whipped Pineapple Frosting
To elevate your Tropical Bliss Pineapple Condensed Milk Cake, a delightful whipped pineapple frosting is a must. Here’s how to create this delightful topping:
Ingredients Needed for the Frosting
– 1 cup heavy whipping cream: For that luscious, creamy texture.
– 1/2 cup powdered sugar: Sweetness that balances the tanginess of the pineapple.
– 1/2 teaspoon vanilla extract: For added flavor depth.
– 1/2 cup crushed pineapple, drained: Infuses the frosting with a tropical punch.
– 2 tablespoons cream of coconut (optional): Adds a richer coconut flavor.
Techniques for Whipping Cream to Achieve Stiff Peaks
1. Chill Your Equipment: For best results, chill your mixing bowl and whisk or beaters in the refrigerator for about 15 minutes before whipping. Cold equipment helps the cream whip faster and increases stability.
2. Start Slow: Begin whipping the cream on low speed to prevent splattering. Gradually increase to medium-high speed.
3. Add Sugar Gradually: Once the cream starts to thicken, slowly add in the powdered sugar and vanilla extract. This helps to incorporate the sweetness without deflating the cream.
4. Look for Stiff Peaks: Continue whipping until stiff peaks form, meaning the cream holds its shape when you lift the whisk. Be cautious not to over-whip, as this can turn the cream into butter!
Incorporating Pineapple into the Frosting for Added Flavor
Once your whipped cream has reached the desired consistency, gently fold in the crushed pineapple (and cream of coconut if using). Use a spatula to carefully combine, being cautious not to deflate the whipped cream. This will give your frosting a delicious tropical flavor and a delightful texture.
Frosting the Cake
Now that your cake has cooled and your frosting is ready, it’s time to assemble your Tropical Bliss Pineapple Condensed Milk Cake.
Best Practices for Applying Frosting Evenly
1. Level the Cake: If your cake has domed slightly, use a serrated knife to level the top. This will make stacking easier and ensures a neat appearance.
2. Use a Offset Spatula: Start by applying a small amount of frosting on the top center of the cake, then spread it outward using an offset spatula. This tool helps to achieve a smooth finish.
3. Layering: If you’re making a layered cake, add frosting between each layer for a harmonious blend of flavors.
4. Smooth the Sides: Once frosted, use the spatula to smooth the sides of the cake for an even finish.
Tips for Garnishing with Toasted Coconut
For that extra tropical touch, garnish your frosted cake with toasted coconut:
– Toasting Coconut: Spread shredded coconut evenly on a baking sheet and bake at 350°F (175°C) for 5-10 minutes, stirring occasionally, until golden brown. Keep a close eye as coconut can burn quickly.
– Applying Coconut: After frosting the cake, gently press the toasted coconut onto the sides and top of the cake, allowing it to adhere to the frosting. This not only adds flavor but also creates an appealing texture.
Presenting the Cake for Optimal Visual Appeal
Presentation is key when it comes to impressing your guests. Here are some tips:
– Cake Stand: Use a decorative cake stand to elevate your cake, literally and figuratively.
– Fresh Fruit Garnish: Consider adding some fresh pineapple slices or cherries on top for a pop of color and freshness.
– Slice with Precision: Use a hot, clean knife to slice the cake for neat pieces. Wipe the knife between cuts for a clean finish.
Serving Suggestions
Your Tropical Bliss Pineapple Condensed Milk Cake is not just a feast for the eyes; it’s also perfect for various occasions.
Ideal Occasions for Serving This Cake
– Birthday Parties: The vibrant flavors make it a hit at celebrations.
– Summer Gatherings: Its tropical essence is perfect for barbecues or pool parties.
– Holidays: Serve it at holiday dinners or potlucks for a unique twist on traditional desserts.
Pairing Recommendations: Beverages and Dessert Accompaniments
To enhance the experience, consider these pairing options:
– Beverages: A cold glass of sweet iced tea or a refreshing coconut water complements the cake beautifully. For a more adult option, serve with a tropical cocktail like piña colada or a light white wine.
– Dessert Accompaniments: Serve with a scoop of vanilla ice cream or coconut sorbet for a delightful contrast in temperature and texture.
Storing Leftovers: How to Keep the Cake Fresh
To ensure your cake remains delicious for days after baking:
– Cover Properly: Store leftover cake in an airtight container or cover it with plastic wrap. This prevents it from drying out.
– Refrigerate: Due to the whipped frosting, it’s best to keep the cake in the refrigerator. It can last for about 3-4 days.
– Freezing: If you want to store it longer, consider freezing the cake. Wrap it tightly in plastic wrap and then foil, and it can last for up to three months. Thaw in the refrigerator when ready to enjoy again.
Exploring Flavor Variations
While the Tropical Bliss Pineapple Condensed Milk Cake is delightful as is, consider these variations for added creativity:
Suggestions for Ingredient Substitutions
– Different Fruits: Swap out the pineapple for other tropical fruits like mango or passion fruit for a unique twist.
– Nut Variations: Add chopped macadamia nuts or pecans for a delightful crunch that complements the cake’s softness.
Exploring Different Frostings
To keep things exciting, try different frosting options:
– Chocolate Ganache: A rich chocolate ganache can provide a decadent contrast to the tropical flavors.
– Cream Cheese Frosting: For a tangy twist, consider a cream cheese frosting. It pairs well with the sweetness of the cake.
Adapting the Recipe for Dietary Restrictions
If you have guests with dietary restrictions, consider these adaptations:
– Gluten-Free: Substitute all-purpose flour with a gluten-free flour blend. Ensure that all other ingredients are gluten-free.
– Dairy-Free Options: Use coconut cream instead of heavy whipping cream for the frosting and replace the condensed milk with a plant-based alternative.
Conclusion
The Tropical Bliss Pineapple Condensed Milk Cake is a celebration of flavors that transports you to a tropical paradise with every bite. This moist, flavorful cake, paired with the light and airy whipped pineapple frosting, is sure to impress family and friends alike.
Don’t hesitate to experiment with tropical flavors in your baking—each variation can lead to a new favorite recipe. Remember, the joy of baking lies not just in the final product but in the moments shared with loved ones around the table. So gather your ingredients, fire up your oven, and embark on this delightful baking adventure!
