Introduction
Banana bread has secured its place as a beloved staple in many households, celebrated for its comforting flavor and versatility. Whether enjoyed as a breakfast option, a midday snack, or a delightful dessert, this classic loaf has a way of making any moment feel special. The addition of chocolate chips elevates this already delicious recipe, introducing a rich sweetness that blends perfectly with the natural banana flavor. The contrast of soft, moist banana bread against the gooey chocolate creates a delightful experience that keeps people coming back for more.
However, the key to a truly memorable banana bread lies in its texture. A perfectly moist banana bread is not just a matter of taste; it’s an essential factor that sets apart a good loaf from a great one. Dry, crumbly banana bread can be disappointing, while a moist, tender crumb is an invitation to indulge. In this guide, we will explore everything you need to know to achieve the ultimate moist chocolate chip banana bread, from understanding the ingredients to mastering the preparation steps.
Throughout this guide, readers can expect detailed insights into ingredient selection, mixing methods, and baking techniques that guarantee a delectable result. Whether you are a seasoned baker or a novice in the kitchen, this comprehensive resource will provide you with the knowledge and confidence to create banana bread that is both delicious and memorable.
Understanding the Ingredients
To craft the perfect chocolate chip banana bread, it’s essential to understand the role each ingredient plays in the final outcome. Let’s break down the key components of this delightful loaf.
The Role of Ripe Bananas
The foundation of banana bread lies in the bananas themselves. Ripe bananas are crucial for achieving the desired flavor and moisture. When bananas reach their peak ripeness, they develop a natural sweetness that enhances the overall taste of the bread. You will know they are ripe when their skins are predominantly yellow with brown spots. Overripe bananas, which are often seen with more brown than yellow, are even better for baking as they are at their sweetest and contribute to a moist texture. If you have bananas that are too ripe to eat, they are perfect for this recipe!
Choosing the Right Type of Flour
Flour is another vital component that affects the texture of your banana bread. For a moist loaf, all-purpose flour is typically the best choice. It provides enough structure to the bread while allowing it to remain tender. Some bakers prefer to use a blend of all-purpose flour and whole wheat flour for added nutrition and flavor. If you opt for whole wheat flour, consider using a recipe that is designed for it, as it can absorb more moisture and may require adjustments to the liquid ingredients.
The Significance of Sugar: Brown vs. White
Sugar not only sweetens the banana bread but also contributes to its moistness. Brown sugar is often preferred over white sugar in banana bread recipes due to its higher moisture content and rich flavor. The molasses present in brown sugar adds depth and enhances the overall taste. If you’re looking for a lighter option, you can use white sugar, but consider combining it with brown sugar for a balanced flavor profile.
Importance of Eggs
Eggs play a crucial role in banana bread, acting as a binding agent that holds the ingredients together. They also contribute to the moisture and richness of the bread. Using large eggs is standard for most baking recipes, and it’s best to bring them to room temperature before mixing. Room temperature eggs blend more easily into the batter, resulting in a smoother mixture.
The Impact of Butter and Oil: Which to Choose for the Best Results
The choice between butter and oil can significantly affect the final texture of the banana bread. Butter adds a rich flavor, while oil contributes to moisture. Many bakers choose to use a combination of both to achieve a perfect balance. For a healthier alternative, consider using coconut oil or vegetable oil, which can provide moisture without the saturated fat of butter. If you decide to use only butter, ensure it’s softened to room temperature to help achieve a smooth batter.
Enhancing Flavor with Vanilla Extract and Salt
Vanilla extract is a must-have ingredient for adding depth to the flavor of your banana bread. A teaspoon or two enhances the sweetness of the bananas and chocolate chips, creating a more complex taste. Additionally, a pinch of salt is essential for balancing the sweetness and enhancing all the flavors in the bread. It may seem counterintuitive to add salt to a sweet recipe, but it plays a crucial role in bringing out the best in each ingredient.
Optional Ingredients for Added Texture and Flavor
While chocolate chips are the star of the show, there are several optional ingredients that can enhance your banana bread further. Chopped nuts, such as walnuts or pecans, add a delightful crunch and nuttiness that pairs well with the soft banana bread. Spices like cinnamon or nutmeg can introduce warmth and depth, while shredded coconut adds a tropical flair. Feel free to experiment with these additions to create a banana bread that reflects your personal taste.
Preparation Steps
Now that we’ve covered the essential ingredients, let’s delve into the preparation steps that will lead you to bake the perfect chocolate chip banana bread. Following these steps will help ensure a moist, tender loaf that is bursting with flavor.
Preparing the Bananas: How Ripe Should They Be?
The first step in preparing your banana bread is to mash the bananas. As mentioned earlier, the riper the bananas, the better the flavor and moisture content. Ideally, you want to use bananas that are heavily speckled or even blackened. To prepare them, simply peel the bananas and use a fork or potato masher to mash them in a bowl until smooth. A few small chunks are acceptable, as they will break down during baking. You’ll need about 1 to 1.5 cups of mashed bananas for a standard loaf.
Choosing the Right Mixing Method: Hand-Mixing vs. Electric Mixer
When it comes to mixing the ingredients, you can choose between hand-mixing and using an electric mixer. If you prefer a more hands-on approach and enjoy the process of baking, using a mixing bowl and a wooden spoon or spatula can be satisfying. Hand-mixing allows for better control over the batter consistency and reduces the risk of overmixing.
However, if you’re short on time or prefer the convenience of an electric mixer, it can also be used. Just be cautious not to overmix the batter, as this can lead to a dense loaf. Mix until the ingredients are just combined, and you can achieve great results with either method.
Mixing the Dry Ingredients: Tips for a Lump-Free Batter
Before you combine the wet and dry ingredients, it’s essential to prep your dry ingredients properly. In a separate bowl, whisk together your flour, baking soda, and salt. This step ensures that the leavening agent is evenly distributed throughout the flour, preventing any lumps from forming in the batter. It also helps to aerate the flour, which can contribute to a lighter texture in the finished banana bread.
Combining Wet and Dry Ingredients: Avoiding Overmixing
Once your dry ingredients are mixed, it’s time to bring everything together. Start by adding the mashed bananas, sugar, eggs, melted butter (or oil), and vanilla extract into a large mixing bowl. Use a spatula or wooden spoon to gently fold the wet ingredients until just combined. Next, gradually add the dry ingredients to the wet mixture, folding gently until no dry flour is visible. Be careful not to overmix; a few small lumps are perfectly fine. Overmixing can lead to gluten development, resulting in a tough loaf instead of a moist one.
Adding Chocolate Chips: When and How to Fold Them In
Now comes the exciting part—adding the chocolate chips! You can use semi-sweet, dark, or even white chocolate chips based on your preference. For a fun twist, consider using peanut butter chips or toffee bits. Gently fold the chocolate chips into the batter using a spatula, ensuring they are evenly distributed throughout the mixture. This step should be done carefully to avoid overmixing the batter.
Baking Techniques for Success
With your batter prepared, it’s time to focus on the baking process, which is critical for achieving that perfect loaf of chocolate chip banana bread.
Preheating the Oven: Why It Matters
Before you pour your batter into the baking pan, make sure to preheat your oven to 350°F (175°C). Preheating the oven is essential because it ensures that the banana bread cooks evenly from the start, helping to create a nice rise and preventing undercooked centers. While the oven is heating, you can prepare your baking pan.
Selecting the Right Baking Pan: Metal vs. Glass
The type of baking pan you use can significantly influence the outcome of your banana bread. Metal pans are excellent for conducting heat and often yield a well-browned crust. Glass pans, while they can create a beautiful presentation, may require adjustments to the baking time since they heat more slowly. Regardless of the type of pan you choose, be sure to grease it thoroughly or line it with parchment paper to prevent sticking. A standard 9×5-inch loaf pan is ideal for this recipe, providing the perfect size for a thick and moist loaf.
As you embark on your journey to baking the perfect chocolate chip banana bread, remember that each step plays a pivotal role in achieving a moist and flavorful result. The combination of ripe bananas, the right ingredients, and careful mixing techniques will set you on the path to a delicious loaf that is sure to impress. Stay tuned for the remaining steps and tips that will ensure your baking success in the final part of this guide.
The Importance of Greasing and Lining the Pan
When it comes to baking a perfect Sweet Cinnamon Apple Dump Cake, one crucial step that should not be overlooked is the preparation of your baking pan. Greasing and lining your pan ensures that the cake releases easily once it’s baked, preventing any sticky disasters that could ruin your dessert. Use a generous amount of unsalted butter or a non-stick spray to coat the bottom and sides of your pan—this helps to create a barrier between the cake and the pan.
For added protection, especially if you’re using a glass or ceramic dish, consider lining the bottom with parchment paper. This not only provides an extra layer of non-stick assurance but also makes for easier clean-up. To line your pan, simply cut a piece of parchment paper to fit the bottom, place it inside, and grease it lightly. Following these simple steps will ensure that your Sweet Cinnamon Apple Dump Cake comes out beautifully and intact.
Baking Time and Temperature: Finding the Sweet Spot
The ideal baking temperature for your Sweet Cinnamon Apple Dump Cake is 350°F (175°C). This moderate temperature allows the cake to cook evenly throughout without burning the top. Depending on your oven, the baking time can vary, but typically, you should expect it to take around 45 to 55 minutes.
To find the sweet spot, start checking your cake at the 45-minute mark. Insert a toothpick into the center; if it comes out clean or with a few moist crumbs attached, your cake is ready. If the toothpick comes out wet with batter, give it an additional 5 to 10 minutes, checking at intervals. Remember, every oven is different, so keep an eye on your cake as it bakes to ensure perfect results.
Signs That Your Banana Bread is Ready to Come Out of the Oven
Knowing when your Sweet Cinnamon Apple Dump Cake is perfectly baked is essential to achieving that ideal texture and flavor. In addition to the toothpick test, there are several visual cues you can rely on. The cake should have risen and formed a golden brown crust on the top. You may also notice the edges pulling slightly away from the sides of the pan, which is another good indicator that your cake is ready to come out.
Another sign to look for is a slight jiggle in the center; a perfectly baked cake will have a gentle bounce, while an undercooked cake will appear wobbly. Trust your instincts and use these signs to guide you in achieving a deliciously baked Sweet Cinnamon Apple Dump Cake.
Cooling and Storing Your Sweet Cinnamon Apple Dump Cake
Once your cake has been removed from the oven, it’s essential to let it cool properly to maintain its moisture and flavor. Place the cake in the pan on a wire rack and allow it to cool for about 10 to 15 minutes. This short cooling time helps set the cake’s structure, making it easier to slice without crumbling.
Proper Cooling Techniques to Maintain Moisture
After the initial cooling period, carefully remove the cake from the pan. If you lined the pan with parchment paper, gently lift it out using the edges of the paper. If not, use a spatula to slide under the cake and transfer it to the wire rack for further cooling. Allow the cake to cool completely at room temperature before slicing, as this prevents excess moisture from escaping and keeps the cake delectably soft.
How to Store Sweet Cinnamon Apple Dump Cake for Freshness
To store your Sweet Cinnamon Apple Dump Cake and keep it fresh, wrap it tightly in plastic wrap or aluminum foil. This will help maintain its moisture and flavor. If you prefer to keep it in an airtight container, ensure that it is completely cooled before sealing it to prevent condensation from forming, which can lead to sogginess.
For best results, store the cake at room temperature for up to three days. If you find yourself with leftovers, that’s great because this cake is perfect for enjoying over a few days. However, if you want to extend its shelf life, consider freezing it.
Freezing Sweet Cinnamon Apple Dump Cake: Step-by-Step Guide
Freezing your Sweet Cinnamon Apple Dump Cake is simple and a great way to preserve its deliciousness. Here’s how to do it:
1. Cool Completely: Ensure the cake is completely cooled to avoid ice crystals forming during freezing.
2. Wrap Well: Wrap the cake tightly in plastic wrap or aluminum foil, ensuring there is no exposure to air. For extra protection, place the wrapped cake in a freezer-safe bag or container.
3. Label and Date: Use a permanent marker to label the package with the date. This will help you keep track of how long it has been in the freezer.
4. Freeze: Place the wrapped cake in the freezer. It can be stored for up to three months.
5. Thawing: When ready to enjoy, remove the cake from the freezer and let it thaw in the refrigerator overnight or at room temperature for a few hours.
Flavor Variations and Customizations
One of the best things about the Sweet Cinnamon Apple Dump Cake is its versatility. You can easily customize this recipe to suit your taste preferences or dietary needs.
Classic Chocolate Chip vs. Dark Chocolate and White Chocolate Blends
While the original recipe shines with its classic flavors, you can elevate your cake by incorporating chocolate. Use semi-sweet chocolate chips for a classic touch, or mix it up with dark chocolate chips for a richer flavor. A blend of dark and white chocolate chips can create a beautiful contrast, both visually and in taste.
Adding Nuts: Walnuts, Pecans, or Almonds?
For added texture and a nutty flavor, consider folding in some nuts. Walnuts and pecans are classic choices that complement the sweetness of the apples and the warmth of the cinnamon. If you prefer a milder flavor, slivered almonds are a great option. Just be sure to toast the nuts lightly before adding them to enhance their flavor.
Incorporating Spices: Cinnamon, Nutmeg, or Cardamom
Spices are another exciting way to inject flavor into your Sweet Cinnamon Apple Dump Cake. While cinnamon is a star ingredient, you can also try adding a pinch of nutmeg or cardamom for additional warmth and complexity. These spices work harmoniously with the apples and can take your cake to the next level.
Making It Healthier: Substitutions for a Lighter Version
If you’re looking to create a healthier version of the Sweet Cinnamon Apple Dump Cake, there are several substitutions you can make. Consider using whole wheat flour instead of all-purpose flour for added fiber. You can also replace some or all of the sugar with a natural sweetener like maple syrup or honey. For a lighter fat option, substitute unsweetened applesauce for some of the butter, which will keep the cake moist while reducing calories.
Serving Suggestions
Once your Sweet Cinnamon Apple Dump Cake is baked, cooled, and stored, it’s time to enjoy it! Here are some delightful serving suggestions to elevate your dessert experience.
Best Ways to Enjoy Sweet Cinnamon Apple Dump Cake: Plain, Toasted, or with Toppings
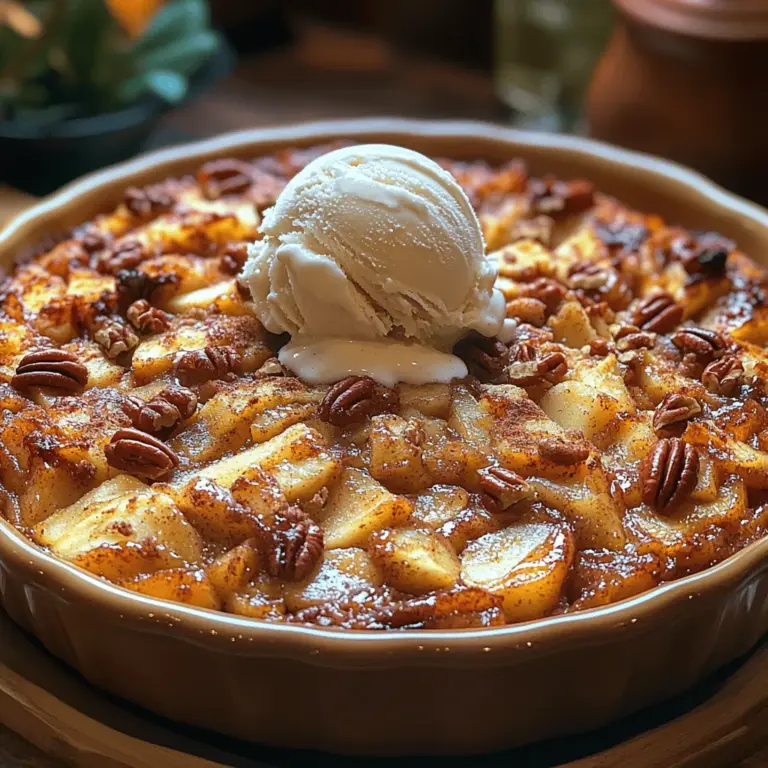
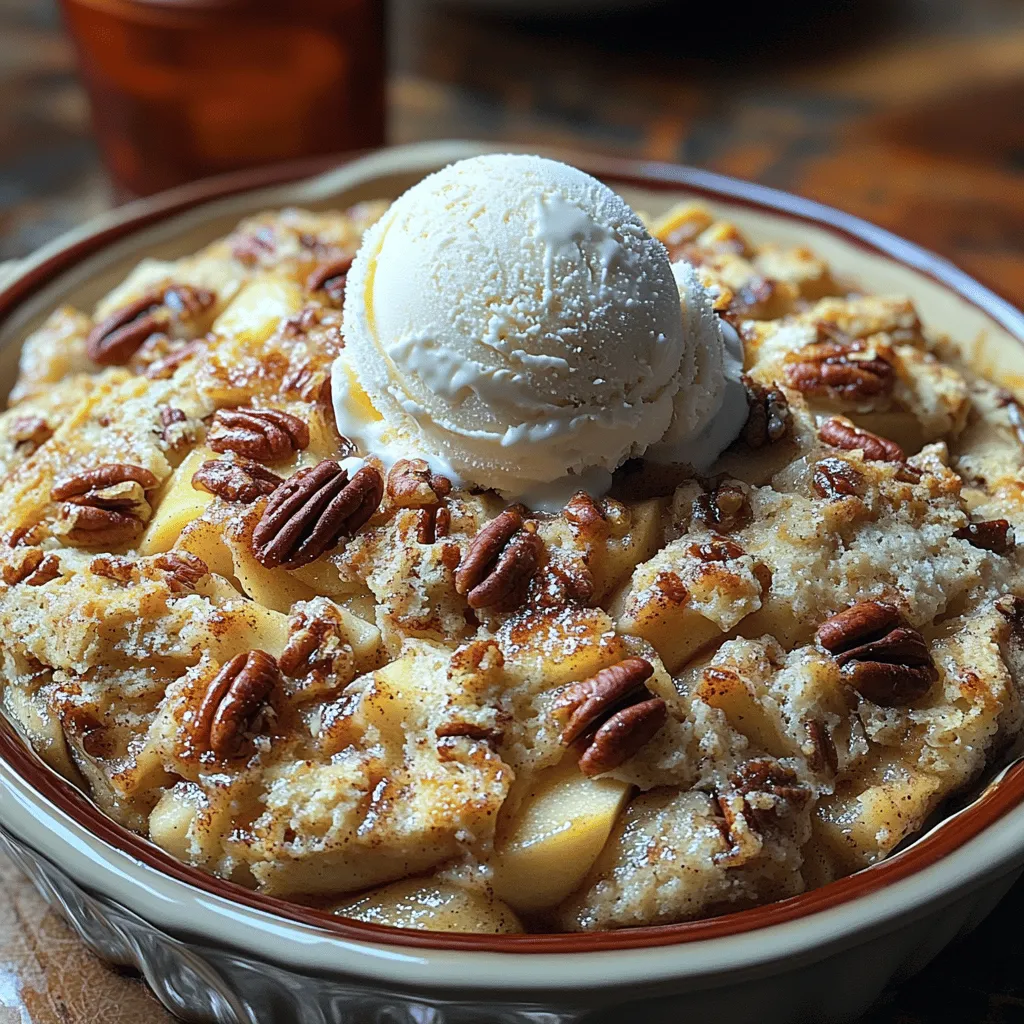
This cake is delicious on its own, but you can take it to new heights with a few simple additions. Serve it warm, straight from the oven, or toast slices for a crunchy exterior. Top it with a dollop of whipped cream or a scoop of vanilla ice cream to complement the warm spices and sweet apples. For an extra touch, drizzle some caramel sauce over the top for a decadent finish.
Pairing Ideas: Beverages That Complement Sweet Cinnamon Apple Dump Cake
Pairing beverages with your dessert can enhance the overall experience. A cup of hot coffee or spiced chai tea works beautifully, balancing the sweetness of the cake with a hint of bitterness. For a refreshing option, consider serving it with a glass of cold apple cider or a light, fruity white wine.
Creative Serving Ideas for Gatherings and Breakfast Spreads
Sweet Cinnamon Apple Dump Cake can also shine at gatherings or as part of a breakfast spread. Slice it into squares or wedges for easy sharing, and place it on a platter alongside other breakfast items like yogurt, fresh fruit, or a cheese board. It’s a delightful addition to brunch, and guests will appreciate the comforting flavors it brings.
Nutritional Information
Understanding the nutritional value of your Sweet Cinnamon Apple Dump Cake can help you enjoy it mindfully.
Breakdown of Key Nutrients in Sweet Cinnamon Apple Dump Cake
A typical serving of Sweet Cinnamon Apple Dump Cake contains essential nutrients like carbohydrates, fiber, and vitamins from the apples. The presence of nuts (if added) contributes healthy fats and protein, making it a more balanced treat.
Benefits of Apples and Spices
Apples are rich in dietary fiber, which promotes digestive health, and they contain antioxidants that are beneficial for overall health. The spices, particularly cinnamon, have been linked to anti-inflammatory properties and potential blood sugar regulation, making this cake not just delicious but also beneficial.
Caloric Content and Portion Control Tips
While it’s tempting to indulge, keeping portion sizes in check is vital. A standard piece of Sweet Cinnamon Apple Dump Cake can range from 200 to 300 calories, depending on the ingredients used. To enjoy it while being mindful of your intake, consider cutting smaller pieces and savoring each bite.
Conclusion
Creating a Sweet Cinnamon Apple Dump Cake is not just about the end result; it’s about the joy of baking, the warmth of spices, and the comforting aroma that fills your kitchen. This cake, with its delightful blend of flavors and textures, is perfect for any occasion, whether it’s a cozy family dessert night or a festive gathering with friends.
Encouragement to experiment with flavors and techniques can lead to new discoveries in your baking journey. Don’t hesitate to try different spice combinations, add-ins, or even healthier substitutions. The fun of baking lies in the creativity and the joy of sharing your delicious creations with loved ones.
Homemade Sweet Cinnamon Apple Dump Cake is a comforting treat that brings satisfaction, warmth, and happiness to your table. So preheat that oven, gather your ingredients, and embark on a delightful baking adventure that will surely become a cherished family recipe.