Introduction
As the temperatures rise and the days grow longer, nothing quite satisfies the sweet tooth like a refreshing no-bake dessert. These delightful treats offer a perfect way to indulge without heating up the kitchen, making them an ideal choice for summer gatherings, birthday parties, and family celebrations. Among the myriad of no-bake desserts, the Sweet Strawberry Dream Cake stands out as a bright, flavorful masterpiece that showcases the beloved strawberry—a fruit often hailed for its vibrant color, sweet taste, and versatility in desserts.
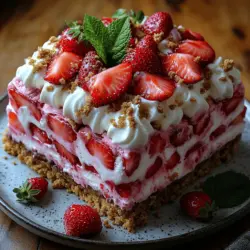
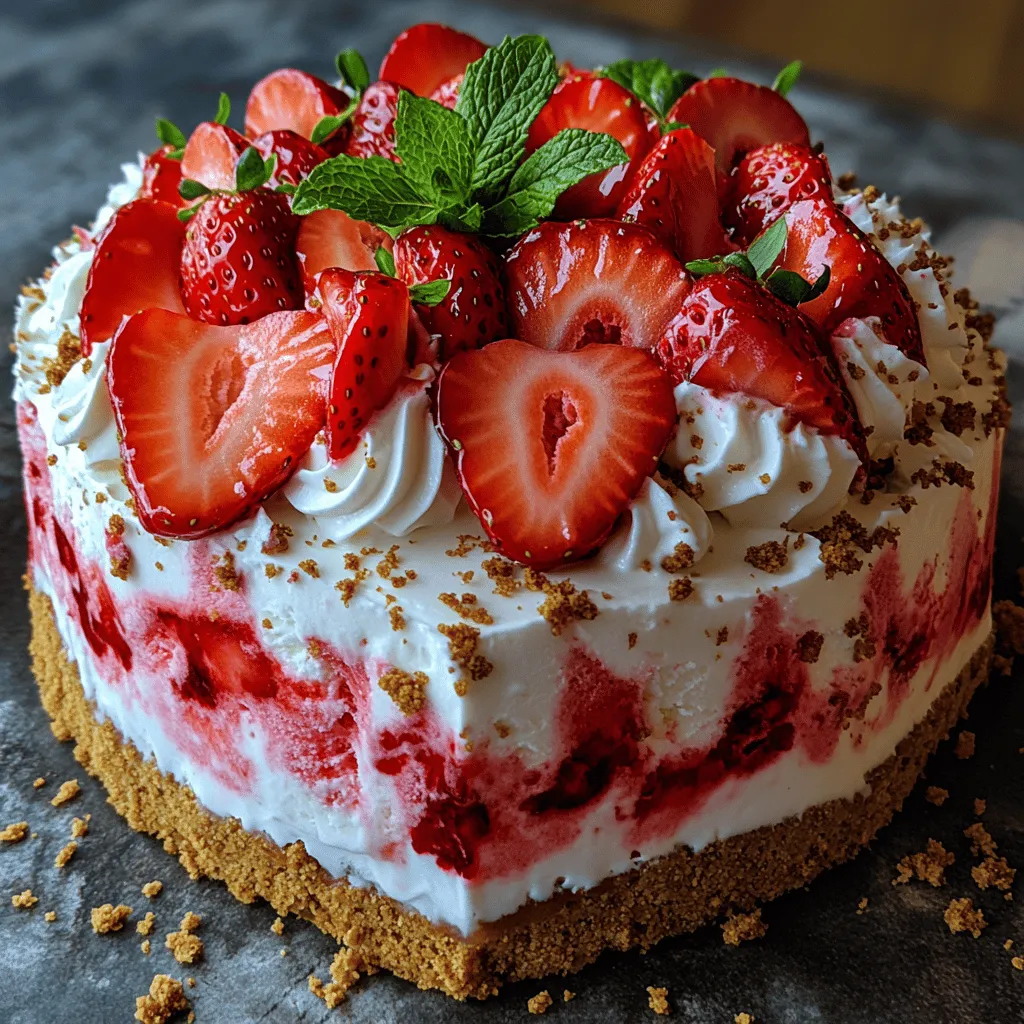
Strawberries have earned their place as a classic ingredient in many sweet confections, from pies to tarts and, of course, cakes. Their juicy texture and natural sweetness pair beautifully with creamy components, creating a blissful balance that is both satisfying and refreshing. The Sweet Strawberry Dream Cake is a perfect embodiment of this combination, featuring layers of luscious ice cream, a crispy graham cracker crust, and fresh strawberries. This cake is not only a feast for the taste buds but also a visual delight, making it the centerpiece of any dessert table.
In this article, we’ll guide you through the process of making this delightful no-bake dessert, breaking it down into easy-to-follow steps. Whether you’re hosting a backyard barbecue or simply looking to satisfy your sweet cravings, the Sweet Strawberry Dream Cake is sure to impress your guests and become a favorite in your dessert repertoire.
Understanding the Ingredients
Before we dive into the step-by-step process of making the Sweet Strawberry Dream Cake, it’s essential to understand the key ingredients that make this dessert so special. Each element plays a critical role in achieving the perfect balance of flavor, texture, and presentation.
Graham Crackers
At the heart of this cake lies the graham cracker crust. These crunchy, slightly sweet biscuits serve as a classic dessert base, providing a delicious contrast to the creamy layers above. The texture of the graham crackers not only adds a satisfying crunch but also helps to absorb moisture from the ice cream and strawberries, ensuring that the crust remains firm and does not become soggy.
Butter
Butter is another crucial component of the graham cracker crust. It binds the crushed graham crackers together, creating a rich and flavorful foundation for the cake. The melted butter adds a depth of flavor and richness that elevates the crust, making it a perfect complement to the sweet and creamy layers above.
Fresh Strawberries
When it comes to the Sweet Strawberry Dream Cake, fresh strawberries are the star of the show. Their bright red color and natural sweetness lend both flavor and visual appeal to the dessert. Using fresh strawberries not only enhances the taste but also provides a delightful texture that contrasts beautifully with the smooth ice cream layers. For the best results, choose ripe strawberries that are firm but not overripe, ensuring that they maintain their shape and juiciness in the cake.
Ice Cream
The choice of ice cream is fundamental to the success of this dessert. For the Sweet Strawberry Dream Cake, we recommend using both vanilla and strawberry ice creams. The vanilla ice cream serves as a neutral base that complements the other flavors, while the strawberry ice cream intensifies the fruity notes and adds a delightful pink hue to the layers. Using high-quality ice cream will enhance the overall taste and texture of your cake, so opt for brands that use natural ingredients whenever possible.
Heavy Whipping Cream
To create a luscious topping for the Sweet Strawberry Dream Cake, heavy whipping cream is essential. When whipped, it transforms into a light and fluffy topping that adds an indulgent finish to the cake. The richness of the heavy cream balances the sweetness of the ice cream and strawberries, creating a harmonious blend of flavors.
Powdered Sugar and Vanilla Extract
To elevate the whipped cream, a touch of powdered sugar and vanilla extract is added. The powdered sugar not only sweetens the cream but also helps stabilize it, ensuring that it holds its shape when spread on the cake. Meanwhile, the vanilla extract enhances the overall flavor profile, infusing the whipped cream with a subtle warmth that complements the other ingredients beautifully.
Step-by-Step Guide to Making Sweet Strawberry Dream Cake
Now that we’ve covered the essential ingredients, let’s dive into the step-by-step guide to creating the Sweet Strawberry Dream Cake. This no-bake dessert is not only easy to make but also allows for creative variations if you’re looking to put your own spin on it.
Preparing the Crust
The first step in creating your Sweet Strawberry Dream Cake is to prepare the graham cracker crust. Follow these simple steps to achieve the perfect base:
1. Crush the Graham Crackers: Start by placing the graham crackers in a large zip-top bag. Use a rolling pin or your hands to crush the crackers into fine crumbs. For a more uniform texture, you can also use a food processor to pulse the crackers until they resemble sand.
2. Mix with Melted Butter: In a medium-sized mixing bowl, combine the graham cracker crumbs with melted butter. Stir until all the crumbs are evenly coated, and the mixture resembles wet sand. This is crucial for forming a sturdy crust.
3. Press into a Pan: Transfer the graham cracker mixture into a 9×13-inch baking dish or a springform pan. Use the back of a measuring cup or your hands to firmly press the mixture into an even layer across the bottom of the pan. Make sure to pack it down well to create a solid base that won’t crumble when served.
4. Refrigerate to Set: Once the crust is pressed into place, refrigerate it for at least 30 minutes to allow it to firm up. This step is vital as it helps the crust hold its shape when layered with the ice cream.
Creating the Ice Cream Layers
With the crust set, it’s time to build the layers of ice cream that will make this cake a true delight.
1. Spread the Vanilla Ice Cream: Remove the crust from the refrigerator and let the vanilla ice cream sit at room temperature for a few minutes to soften slightly. Using a spatula, spread an even layer of vanilla ice cream over the chilled graham cracker crust. Aim for about half an inch in thickness, ensuring that it covers the crust entirely.
2. Firm Up the First Layer: Place the cake back in the freezer for about 30 minutes to an hour, allowing the vanilla ice cream to firm up. This will help create distinct layers in the cake and prevent the flavors from blending together too soon.
3. Add the Strawberry Ice Cream: After the vanilla layer has set, repeat the process with the strawberry ice cream. Let it soften slightly, then spread an even layer over the vanilla ice cream. Again, aim for a similar thickness to maintain consistency throughout the cake.
4. Freeze Again: Once the strawberry ice cream is spread, return the cake to the freezer for another 30 minutes to an hour to allow this layer to firm up as well. This step is crucial for achieving the cake’s signature layered look.
Layering Fresh Strawberries
The final step before topping the cake is to layer the fresh strawberries. This will not only add flavor but also create a visually stunning dessert.
1. Prepare the Strawberries: While the ice cream layers are setting, wash and hull the fresh strawberries. Slice them into thin rounds or quarters, depending on your preference. For a more elegant presentation, you can also leave a few whole strawberries for decoration.
2. Layer the Strawberries: Once the strawberry ice cream layer is firm, remove the cake from the freezer and carefully arrange the sliced strawberries on top of the strawberry ice cream layer. You can create a decorative pattern or simply scatter them evenly across the surface, ensuring that every slice of the cake will have a taste of the fresh fruit.
3. Return to the Freezer: After layering the strawberries, return the cake to the freezer to set for an additional 15-30 minutes. This will help the strawberries adhere to the ice cream and keep the cake looking beautiful when sliced.
As you prepare to finish your Sweet Strawberry Dream Cake, you’ll be ready for the final touches that will elevate this dessert to a whole new level of indulgence. Stay tuned for the next section, where we will delve into how to create the whipped cream topping and assemble the cake to perfection.
The Process of Adding Fresh Strawberries Between Ice Cream Layers
To create the Sweet Strawberry Dream Cake, the first step is to incorporate fresh strawberries between the ice cream layers. This not only adds a delightful burst of flavor but also enhances the cake’s visual appeal. Start by washing 1-2 cups of fresh strawberries thoroughly. Remove the stems and slice them into thin rounds or quarters, depending on your preference.
Once you have your strawberries prepared, take a layer of the soft vanilla ice cream and spread it evenly in the bottom of your cake pan. Next, gently press the strawberry slices into the ice cream layer, ensuring they are evenly distributed. This technique helps the strawberries adhere to the ice cream, preventing them from sinking to the bottom when the cake is frozen. Aim for a colorful layer of strawberries that will be visible when you slice into the cake.
Adding the Strawberry Ice Cream Layer
Following the strawberry layer, it’s time to add the strawberry ice cream layer. This layer is crucial for achieving a harmonious flavor balance in your dessert. Using about 2-3 cups of store-bought or homemade strawberry ice cream, scoop it out and place it on top of the strawberry layer. Use a spatula to spread the ice cream evenly across the cake.
The key here is to ensure a smooth transition between layers. If you find that the strawberry ice cream is too hard to spread, allow it to soften at room temperature for a few minutes before attempting to spread it. An evenly layered cake not only looks better but also ensures that each slice boasts a balanced flavor.
Whipping the Cream
Once your ice cream layers are assembled, it’s time to whip the heavy cream for the final layer. Start with 1-2 cups of heavy cream, which will give you a rich and fluffy topping. Pour the cream into a large mixing bowl. To achieve the right consistency, use an electric mixer or a whisk.
For the best results, ensure your mixing bowl and beaters are chilled. You can achieve this by placing them in the freezer for about 15 minutes before whipping. Cold tools help the cream whip up faster and attain a stable peak. Begin mixing on a low speed, gradually increasing to medium-high once the cream starts to thicken. Whip until soft peaks form, which means the cream should hold its shape but still be slightly droopy.
Final Assembly and Freezing
With the whipped cream ready, it’s time for the final assembly of your Sweet Strawberry Dream Cake. Gently spread the whipped cream over the top of the strawberry ice cream layer using a spatula, creating a smooth and even finish. Don’t worry if it’s not perfect; the beauty of this dessert is in its homemade charm.
Once the whipped cream is spread evenly, cover the cake with plastic wrap or a lid, and place it in the freezer. It’s essential to freeze the cake thoroughly for at least 4-6 hours, or ideally overnight. Freezing not only solidifies the layers but also allows the flavors to meld beautifully, enhancing the dessert’s overall taste and texture. When the cake is frozen, the layers will be firm, making it easier to slice.
Serving Suggestions and Presentation
When you’re ready to serve your Sweet Strawberry Dream Cake, it’s important to slice it properly to maintain its beautiful layers. Use a sharp knife that has been warmed under hot water, and wipe it clean between slices to ensure neat cuts. Aim for slices that are about 1-2 inches thick; this portion size allows everyone to enjoy the various flavors without overwhelming them.
For an added touch of elegance, consider garnishing each slice with fresh strawberry slices and a sprig of mint leaves. These garnishes not only enhance the visual appeal but also add a refreshing element to the dessert. A light dusting of powdered sugar on top can further elevate its presentation.
Pair your Sweet Strawberry Dream Cake with a glass of sparkling water, iced tea, or even a sweet rosé wine to complement the flavors. This dessert also goes well with a light fruit salad or a scoop of lemon sorbet, which can help cleanse the palate.
Nutritional Information
When it comes to dessert, it’s always good to consider nutritional value. Each slice of Sweet Strawberry Dream Cake offers a delightful combination of fresh strawberries and creamy layers. While the exact nutritional content can vary based on the specific brands of ice cream and cream used, here’s a general overview:
– Calories: Approximately 300-400 per slice
– Fat: 15-20g
– Carbohydrates: 30-40g
– Sugar: 20-30g
– Protein: 3-5g
When enjoying this cake, moderation is key. A standard serving size of 1 slice is generally satisfying. The use of fresh strawberries not only adds flavor but also provides essential vitamins and antioxidants, making this dessert a bit healthier than many other options.
Conclusion
The Sweet Strawberry Dream Cake is not only a feast for the eyes but also a delightful treat for the taste buds. Its simplicity lies in the use of fresh ingredients and straightforward assembly, making it an accessible dessert for any occasion. Whether you’re celebrating a special event or simply indulging in a sweet treat on a warm afternoon, this cake is sure to impress.
Sharing this dessert with family and friends creates lasting memories. The joy of watching loved ones enjoy a slice of your homemade cake is unparalleled. Don’t hesitate to experiment with variations of this recipe by incorporating different fruits like blueberries, raspberries, or even a hint of chocolate for a decadent twist. The possibilities are endless, and each variation can bring a new level of excitement to your dessert table.