Introduction: The Allure of Strawberry Shortcake
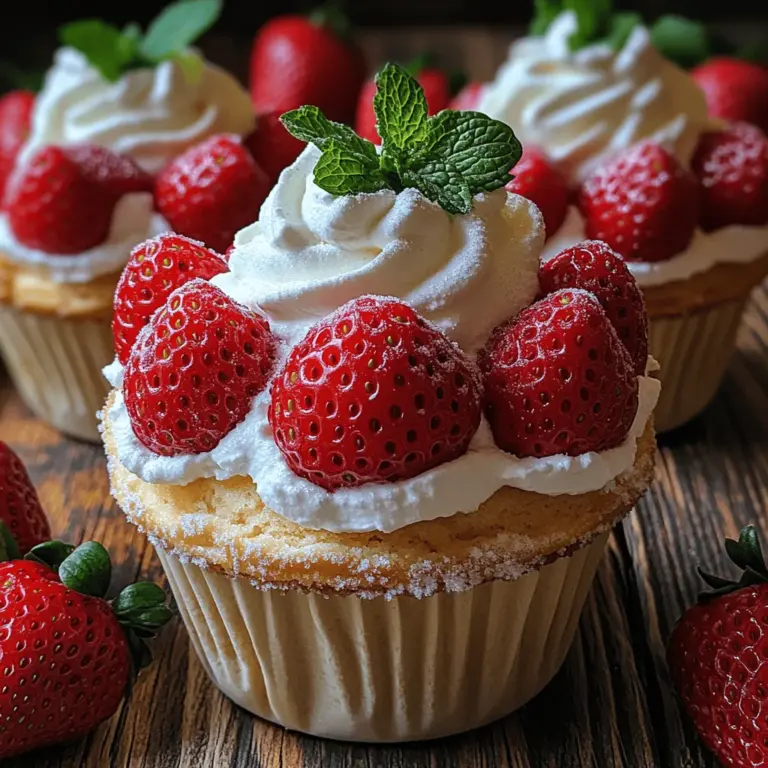
Strawberry shortcake is a beloved dessert that has graced dinner tables and celebrations for generations. Its delightful combination of fluffy cake, sweet strawberries, and rich whipped cream creates a symphony of flavors that captures the essence of summer and nostalgia in every bite. The simplicity of this dessert is part of its charm, making it a popular choice for gatherings, picnics, and family desserts alike.
While many people enjoy the convenience of store-bought desserts, there’s something incredibly satisfying about creating your own strawberry shortcake from scratch. Homemade strawberry shortcake not only allows you to control the quality of your ingredients but also offers a chance to put your own spin on a classic recipe. The art of making strawberry shortcake is not just about assembling the ingredients; it’s about crafting a dessert that reflects your personal taste and love for baking.
In this article, we will delve into the world of strawberry shortcake, focusing on the innovative twist of serving it in individual cups. This presentation not only makes for an elegant dessert but also adds a fun and interactive element to your dining experience. We will cover everything from the history of strawberry shortcake to crafting the perfect components for your dessert, including the cake, strawberries, and whipped cream. By the end of this guide, you’ll be equipped with all the knowledge you need to create luscious strawberry shortcake cups that will impress your family and friends.
Understanding the Basics of Strawberry Shortcake
The History of Strawberry Shortcake
The origins of strawberry shortcake can be traced back to 19th-century England, where similar desserts were made with biscuits, cream, and fruit. The modern version of strawberry shortcake that we know and love today began to take shape in the United States during the 1800s. The classic recipe evolved over time, with the introduction of sponge cakes and layer cakes becoming popular bases for this dessert.
Strawberries, in particular, became a favorite pairing due to their sweetness and vibrant color, making them a seasonal star in many households. The dessert quickly gained popularity, especially during the summer months when strawberries are at their peak. Today, strawberry shortcake is celebrated in many forms, from traditional layered cakes to individual servings that highlight the freshness of the fruit.
Key Components of Great Strawberry Shortcake
Creating a luscious strawberry shortcake cup involves mastering a few key components: the cake, the strawberries, and the whipped cream. Each element plays a crucial role in the overall taste and texture of the dessert, and balancing these components is essential for achieving the perfect strawberry shortcake experience.
Cake: The Foundation of Strawberry Shortcake
The cake serves as the base for your strawberry shortcake. Traditionally, shortcakes can be made from sponge cake, biscuit dough, or even pound cake. For our strawberry shortcake cups, a light and fluffy vanilla sponge cake is an excellent choice. It provides a soft texture that complements the juicy strawberries and creamy whipped topping.
Strawberries: The Star Ingredient
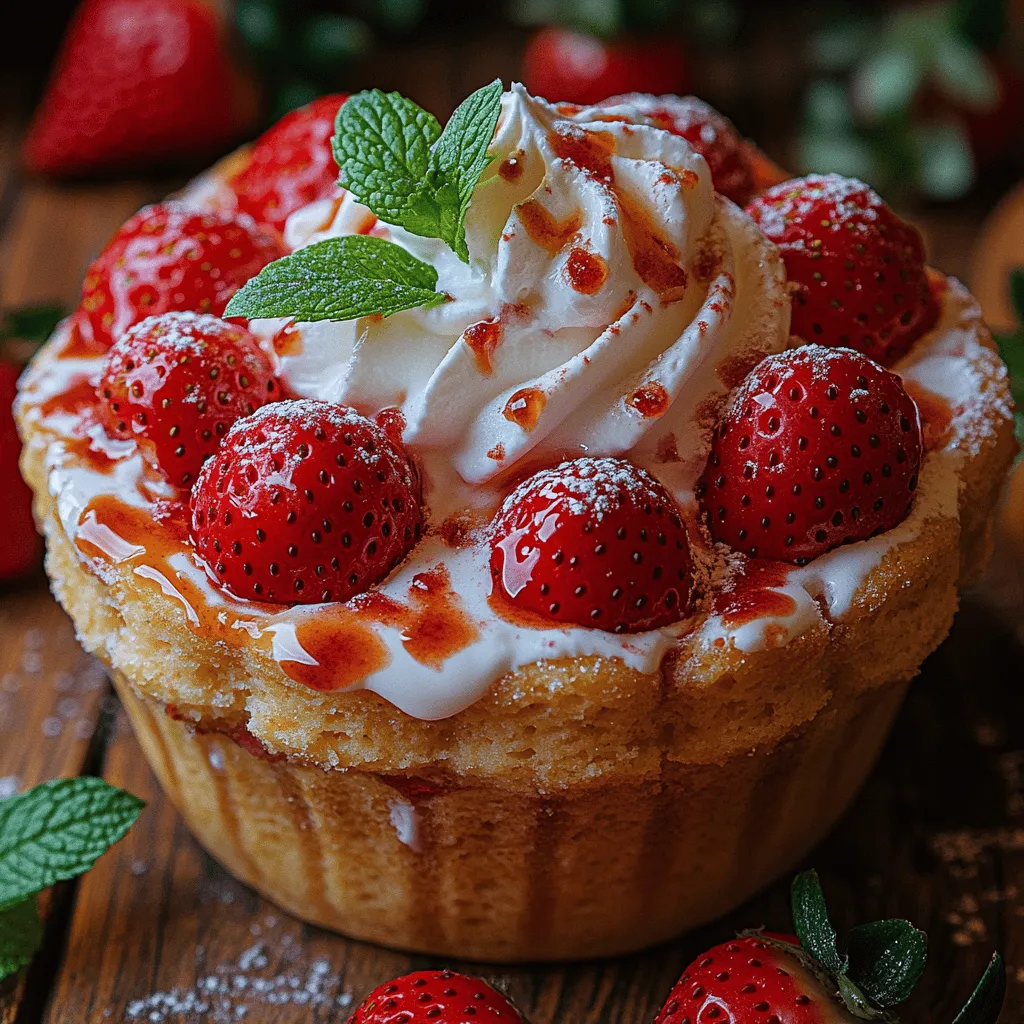
Fresh strawberries are undoubtedly the star of this dessert. Not only do they add a burst of color, but they also bring a sweet and tart flavor that balances the richness of the cake and cream. Choosing ripe, in-season strawberries will enhance the overall taste of your dessert.
To prepare the strawberries, they are typically sliced and tossed with a bit of sugar to draw out their juices. This process creates a delicious strawberry syrup that enhances the flavor and moisture of the dessert.
Whipped Cream: The Finishing Touch
A generous dollop of whipped cream is the finishing touch that ties all the elements of strawberry shortcake together. Whether you prefer sweetened whipped cream or a lighter version, the cream adds a luxurious texture that elevates the dessert. For our recipe, we’ll whip heavy cream until it’s light and airy, folding in a touch of vanilla extract for flavor.
As we begin crafting our luscious strawberry shortcake cups, let’s start with the first step: preparing the cake.
Crafting the Perfect Strawberry Shortcake Cake
Ingredients for the Cake
To create the perfect cake for our strawberry shortcake cups, you’ll need the following ingredients:
– 1 cup all-purpose flour: Provides the structure for our cake.
– 1 teaspoon baking powder: Helps the cake rise.
– 1/4 teaspoon salt: Balances the sweetness.
– 1/2 cup granulated sugar: Sweetens the cake.
– 1/4 cup unsalted butter, softened: Adds richness and moisture.
– 1 large egg: Binds the ingredients together.
– 1/2 cup milk: Keeps the cake moist.
– 1 teaspoon vanilla extract: Enhances the flavor.
Step-by-Step Cake Preparation
1. Preheat Your Oven: Begin by preheating your oven to 350°F (175°C). This ensures that your cake will bake evenly.
2. Prepare the Baking Dish: Grease an 8-inch round cake pan with butter or non-stick spray and lightly dust it with flour to prevent sticking.
3. Mix Dry Ingredients: In a medium bowl, whisk together the all-purpose flour, baking powder, and salt. This step ensures that the leavening agent is evenly distributed throughout the flour.
4. Cream Butter and Sugar: In a large mixing bowl, cream together the softened butter and granulated sugar using an electric mixer on medium speed. Beat until the mixture is light and fluffy, about 3-4 minutes.
5. Add Egg and Vanilla: Add the egg and vanilla extract to the butter-sugar mixture. Beat until fully incorporated.
6. Combine Wet and Dry Ingredients: Gradually add the dry ingredients to the wet mixture, alternating with the milk. Begin and end with the dry ingredients, mixing until just combined. Be careful not to overmix, as this can lead to a dense cake.
7. Bake the Cake: Pour the batter into the prepared cake pan and smooth the top with a spatula. Bake in the preheated oven for 25-30 minutes, or until a toothpick inserted into the center comes out clean.
8. Cool the Cake: Once baked, remove the cake from the oven and allow it to cool in the pan for 10 minutes. Then, carefully transfer it to a wire rack to cool completely.
Tips for Achieving the Best Cake
– Use Room Temperature Ingredients: For the best texture, ensure that your butter, milk, and egg are at room temperature before mixing. This helps create a smoother batter and a lighter cake.
– Don’t Overmix: When combining your wet and dry ingredients, mix just until everything is incorporated. Overmixing can lead to a tough cake.
– Check for Doneness: Ovens can vary in temperature, so keep an eye on your cake towards the end of the baking time. If it starts to brown too quickly, you can cover it with aluminum foil.
Now that our cake is baked and cooled, we can move on to preparing the strawberries for our luscious strawberry shortcake cups.
Making the Perfect Strawberry Filling
Ingredients for the Strawberries
To create a delicious strawberry filling, you will need:
– 2 cups fresh strawberries: Sliced for optimal flavor.
– 1/4 cup granulated sugar: To sweeten and draw out the juices.
– 1 teaspoon lemon juice: Enhances the flavor and balances sweetness.
Step-by-Step Strawberry Preparation
1. Wash and Slice Strawberries: Rinse the strawberries under cool water to remove any dirt or pesticides. Remove the green tops and slice the strawberries into quarters or halves, depending on their size.
2. Toss with Sugar and Lemon Juice: In a bowl, combine the sliced strawberries with granulated sugar and lemon juice. Toss gently to coat the strawberries evenly.
3. Let Them Marinate: Allow the strawberries to sit at room temperature for about 30 minutes. This process will draw out the juices, creating a natural syrup that adds flavor and moisture to your dessert.
By now, you should have a beautifully baked cake and a bowl of sweet, syrupy strawberries ready to go. Next, we’ll prepare the whipped cream that will crown our strawberry shortcake cups.
Making the Whipped Cream
Ingredients for the Whipped Cream
To prepare the whipped cream, gather the following ingredients:
– 1 cup heavy whipping cream: The base for our whipped topping.
– 2 tablespoons powdered sugar: For sweetness and stability.
– 1 teaspoon vanilla extract: For added flavor.
Step-by-Step Whipped Cream Preparation
1. Chill Your Mixing Bowl: For best results, place your mixing bowl and beaters in the freezer for about 10-15 minutes before whipping the cream. This helps to stabilize the cream and achieve a better texture.
2. Combine Ingredients: In the chilled bowl, pour in the heavy whipping cream, powdered sugar, and vanilla extract.
3. Whip to Stiff Peaks: Using an electric mixer, beat the mixture on medium-high speed until soft peaks form. Continue beating until stiff peaks are achieved. Be cautious not to overwhip, as this can turn the cream into butter.
With our whipped cream prepared, we are now ready to assemble our luscious strawberry shortcake cups. The individual servings make them perfect for sharing or enjoying on your own, and the vibrant layers are sure to impress.
Stay tuned for the next part of this article, where we will guide you through the assembly process and provide tips to elevate your strawberry shortcake cups to the next level!
Cheese Combinations for Flavor Depth
The cornerstone of any great pizza lies in its cheese selection. While mozzarella is the classic choice, combining different cheeses can create a flavor profile that elevates your homemade pizza to gourmet status. Here are some suggestions for cheese combinations that add depth and richness to your pie.
– Mozzarella and Parmesan: For a traditional approach, pair fresh mozzarella with a sprinkle of grated Parmesan. This combination provides a creamy texture while the Parmesan adds a salty, nutty flavor that enhances the overall taste.
– Ricotta and Gouda: If you’re looking for something different, a blend of creamy ricotta and smoked Gouda offers a unique twist. The ricotta’s lightness complements the smokiness of the Gouda, creating a delightful contrast.
– Fontina and Provolone: For a rich and robust flavor, try mixing Fontina with Provolone. The creamy Fontina melts beautifully, while the slightly sharp Provolone adds a depth that can transform your pizza.
– Goat Cheese and Feta: For those who enjoy tangy flavors, a combination of goat cheese and feta can provide a refreshingly sharp taste. This pairing works beautifully with fresh vegetables like spinach or arugula.
Exploring Topping Options
Once you have settled on your cheese blend, it’s time to think about toppings. The choices are nearly endless, but here we delve into the classic, regional, and unique options that will make your pizza stand out.
Classic Toppings
Classic toppings are beloved for good reason. They not only taste great but also pair perfectly with traditional sauces and cheeses. Consider these staples:
– Pepperoni: A fan favorite, pepperoni slices crisp up beautifully and add a savory, slightly spicy flavor.
– Mushrooms: Fresh mushrooms bring an earthy element, absorbing the pizza’s flavors while contributing their own.
– Bell Peppers: Sweet bell peppers add vibrant color and a crunchy texture, balancing the richness of the cheese.
Regional Favorites
Exploring regional pizza styles can inspire you to try different topping combinations:
– Hawaiian: This controversial favorite combines ham and pineapple for a sweet and savory experience. The juicy pineapple contrasts nicely with the salty ham.
– Margherita: Simple yet sublime, the Margherita features fresh basil, mozzarella, and a drizzle of olive oil. The ingredients celebrate the essence of pizza in its purest form.
Unique and Gourmet Toppings
For those looking to push the boundaries of traditional pizza, consider these unique options:
– Arugula: Adding fresh arugula post-baking provides a peppery bite that lightens the overall dish.
– Figs: Sliced figs can add a sweet, chewy texture, especially when paired with prosciutto or ricotta.
– Goat Cheese: For a tangy twist, crumble goat cheese on your pizza. It pairs excellently with roasted vegetables or caramelized onions.
Seasonal Ingredients for Freshness
Utilizing seasonal ingredients not only enhances flavor but also provides a freshness that is hard to beat. In summer, consider fresh tomatoes, zucchini, and basil. In the fall, roasted squash and sage can offer a warm, comforting taste. By incorporating seasonal produce, your homemade pizza will reflect the best of what nature has to offer throughout the year.
Assembling Your Perfect Pizza
Now that you have chosen your cheese and toppings, it’s time to assemble your pizza. This stage is all about creativity and technique.
Building the Pizza
1. Dough Stretching Techniques: Start with your pizza dough at room temperature for easier handling. Use your hands to gently stretch the dough from the center outward, allowing gravity to assist. Avoid using a rolling pin, which can deflate the dough’s air bubbles.
2. Sauce Application Tips: Spread your sauce evenly using the back of a spoon, leaving about an inch of crust around the edges. This method ensures that your sauce does not overwhelm the other flavors.
3. Cheese Layering Methods: Begin with a base layer of cheese for a gooey texture. Follow this with your chosen cheese blend, ensuring an even distribution to avoid hot spots.
4. Creative Topping Arrangements: For visual appeal, consider arranging your toppings in a pattern. For example, scatter pepperoni slices evenly and place mushrooms and bell peppers in a circular design. This not only makes for a beautiful presentation but also ensures that every slice has a balanced flavor.
Baking Techniques for Optimal Results
To achieve the perfect pizza, pay attention to your baking techniques:
– Home Oven Settings: Preheat your oven to the highest temperature it can reach, usually around 475°F to 500°F. This high heat mimics a traditional pizza oven, helping to achieve a crisp crust.
– Using a Pizza Stone vs. Baking Sheet: A pizza stone absorbs moisture and distributes heat evenly, resulting in a perfectly baked crust. If you don’t have one, a heavy baking sheet turned upside down can also work as a surface.
Experimenting with Pizza Styles
As you become more comfortable with your homemade pizza, consider experimenting with various styles, each with its unique characteristics.
Neapolitan Pizza
Neapolitan pizza is known for its simplicity and authenticity. It features a thin, soft crust and is traditionally cooked in a wood-fired oven. To replicate this at home, focus on the following:
– Characteristics and Traditional Methods: The dough is made with just flour, water, salt, and yeast. Allow it to rise slowly for a more complex flavor. Use fresh tomatoes and mozzarella for toppings.
– Cooking in a Wood-Fired Oven: If you have access to one, cooking your pizza in a wood-fired oven will give you that signature char and flavor. The high temperature cooks the pizza in under 90 seconds.
New York-style Pizza
New York-style pizza has a characteristic thin, yet foldable crust, making it perfect for on-the-go eating. Here are some tips:
– Thin Crust and Folding Techniques: Roll out your dough thinner than you would for a Neapolitan style. Once baked, it should be flexible enough to fold without cracking.
– Street Food Culture: This style of pizza is often sold by the slice, making it a favorite among city dwellers. Consider serving your homemade pizza this way for a fun twist.
Chicago Deep-Dish Pizza
Chicago deep-dish pizza is known for its thick crust and layers of toppings. To master this style:
– Layering Method and Baking Times: Start with a thicker dough that rises to create a deep crust. Layer your ingredients starting with cheese on the bottom, followed by toppings, and finally sauce on top.
– Unique Sauce Placement: Unlike other styles, Chicago deep-dish pizza is topped with a chunky tomato sauce, which helps prevent the crust from becoming soggy.
Serving and Enjoying Your Homemade Pizza
The final touches to your homemade pizza experience lie in its presentation and enjoyment.
Presentation Tips for Serving
To make your pizza visually appealing, consider using a pizza peel or cutting board for serving. Slice your pizza using a sharp pizza cutter or a chef’s knife for clean cuts. For a rustic touch, serve with fresh herbs or a drizzle of olive oil on top.
Slicing Techniques for Different Styles
Different styles of pizza require different slicing techniques. For Neapolitan and New York-style pizzas, cut into triangular slices. For Chicago deep-dish, square slices work best to accommodate the thicker crust.
Pairing with Beverages: Wine, Beer, or Soda
The right beverage can enhance your pizza experience. Pair classic Margherita pizza with a light white wine like Pinot Grigio. For pepperoni, consider a robust red like Chianti. If you’re serving a deep-dish pizza, a cold beer can complement the flavors perfectly.
The Social Aspect of Pizza
Making pizza is more than just a cooking task; it’s an experience best shared with others.
Pizza Parties and Family Gatherings
Hosting a pizza-making party can be a fun and interactive way to bring friends and family together. Set up a pizza bar with various toppings, allowing everyone to customize their own pie.
Making Pizza a Communal Activity
Encourage guests to get involved in the process. From stretching dough to selecting toppings, everyone can contribute to creating a unique culinary masterpiece.
Conclusion: The Joy of Homemade Pizza
Crafting your homemade pizza is not just about the final product; it’s about enjoying the entire journey from dough to deliciousness. The satisfaction of creating something from scratch, combined with the opportunity to experiment with flavors and styles, makes pizza-making an enriching experience.
As you explore different combinations of cheeses and toppings, don’t hesitate to make the recipe your own. Pizza is a canvas for creativity, and the possibilities are endless. So gather your ingredients, invite some friends, and dive into the joy of homemade pizza. Whether you stick to the classics or venture into gourmet territory, the love for pizza and cooking at home will always shine through.
