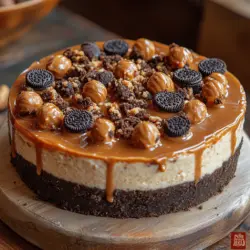
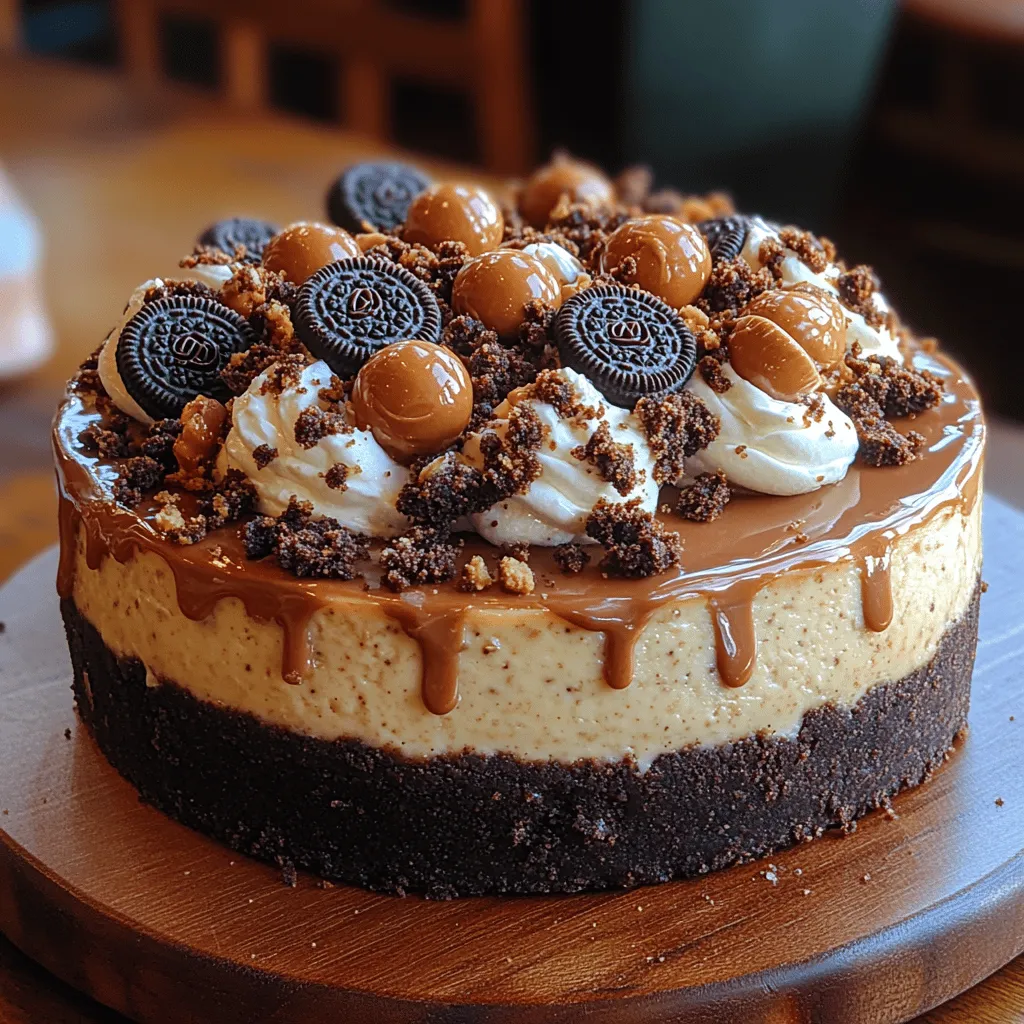
Indulge in the heavenly flavors of a Dreamy No Bake Oreo Peanut Butter Cup Cheesecake, a dessert that brings together the beloved tastes of Oreo cookies, creamy peanut butter, and rich chocolate. This indulgent cheesecake is not only a treat for your taste buds but also a visual delight, making it a perfect centerpiece for gatherings or an exquisite dessert for a quiet night in. Its no-bake nature makes it incredibly easy to prepare, which is why it appeals to both novice cooks and seasoned bakers alike. In this article, we will delve into the steps and techniques needed to create this delectable dessert, explore its ingredients, and offer creative variations to suit different palates.
The Allure of No-Bake Desserts
Understanding the Popularity of No-Bake Desserts
No-bake desserts have surged in popularity over the years, and it’s easy to see why. These desserts are not only simple to prepare, but they also eliminate the need for an oven, making them ideal for warm weather or for those who may not have access to one. The ease of preparation often translates to more time spent enjoying the dessert rather than laboring over it. Additionally, no-bake desserts can be incredibly versatile, allowing for an array of flavor combinations and creative presentations.
Benefits of No-Bake Recipes: Time-Saving and Simple
One of the most significant benefits of no-bake recipes is their time-saving nature. Unlike traditional baked cheesecakes that require a lengthy cooking time and cooling period, no-bake cheesecakes can be whipped up in a fraction of the time. This allows you to create delicious desserts with minimal fuss. The simplicity of the process means that even those who may feel intimidated by baking can confidently create a stunning cheesecake that will impress family and friends.
Ideal Occasions for No-Bake Cheesecake
No-bake cheesecakes are versatile enough to fit any occasion. Whether you’re hosting a birthday party, a holiday gathering, or simply looking to satisfy a sweet tooth, this cheesecake is an excellent choice. Its rich and creamy texture makes it a hit with both children and adults, and its impressive presentation will leave guests in awe. Plus, it can be prepared ahead of time, freeing you to enjoy the festivities rather than being stuck in the kitchen.
Ingredient Breakdown for Dreamy No Bake Oreo Peanut Butter Cup Cheesecake
To create the perfect Dreamy No Bake Oreo Peanut Butter Cup Cheesecake, it’s essential to understand the role of each ingredient in the recipe. Here’s a breakdown of the key components that come together to create this delightful dessert.
Oreo Cookies: The Perfect Base
Oreo cookies serve as the star ingredient for the crust of this cheesecake. Their rich chocolate flavor and creamy filling create a deliciously sweet and slightly crunchy base that beautifully contrasts with the smooth and creamy filling. The combination of these cookies provides the perfect foundation, ensuring that each bite is packed with the iconic taste that Oreos are known for.
Cream Cheese: The Creamy Foundation
Cream cheese is a crucial ingredient in any cheesecake, providing that rich and creamy texture we all love. It serves as the primary base for the filling, creating a smooth and luscious consistency. When combined with sugar and peanut butter, it creates a delightful creaminess that elevates the overall flavor profile of the cheesecake. To achieve the best results, it’s important to use full-fat cream cheese, as it contributes to the cheesecake’s rich texture.
Peanut Butter: The Star Flavor
No Dreamy No Bake Oreo Peanut Butter Cup Cheesecake would be complete without peanut butter. This ingredient adds a nutty depth of flavor that harmonizes perfectly with the sweetness of the cream cheese and the chocolatey notes from the Oreos. Choosing a creamy peanut butter will ensure that it blends smoothly into the filling, creating a cohesive flavor throughout the dessert. For those who prefer a little crunch, chunky peanut butter can be swapped in for extra texture.
Heavy Whipping Cream: Adding Lightness and Texture
Heavy whipping cream plays a pivotal role in achieving the light and airy texture of this cheesecake. When whipped to perfection, it adds volume and a cloud-like quality to the filling, making each bite feel indulgent without being overly dense. The key to successfully incorporating whipped cream into the cheesecake is to fold it gently into the mixture, ensuring that you maintain the airiness.
Mini Reese’s Peanut Butter Cups: A Delicious Surprise
As a delightful finishing touch, mini Reese’s Peanut Butter Cups are mixed into the cheesecake filling. Their presence introduces additional layers of texture and flavor, with the chocolate and peanut butter combination further enhancing the overall experience. Not only do they add a fun surprise for your taste buds, but they also contribute to the cheesecake’s visual appeal with their charming little shapes peeking through the creamy filling.
Step-by-Step Guide to Making the Cheesecake
Now that we have a better understanding of the ingredients, let’s dive into the step-by-step process of creating the Dreamy No Bake Oreo Peanut Butter Cup Cheesecake. This guide will ensure that you achieve the best results, making the preparation as straightforward as possible.
Preparing the Oreo Crust
The first step in making your cheesecake is to create the Oreo crust. This step is critical, as it provides the base for your cheesecake and sets the tone for the entire dessert.
Crushing the Cookies with Precision
To prepare the crust, start by placing the Oreo cookies in a food processor. Pulse them until they reach a fine crumb consistency. If you don’t have a food processor, you can achieve the same result by placing the cookies in a resealable plastic bag and using a rolling pin to crush them. Aim for fine crumbs to ensure a smooth crust that holds together well.
Achieving the Right Consistency with Butter
Once the cookies are crushed, transfer them to a mixing bowl and add melted butter. The butter acts as a binding agent, holding the cookie crumbs together. Mix the crumbs and melted butter until the mixture resembles wet sand. You should be able to press the mixture together and have it hold its shape. If it feels too dry, add a little more melted butter until you reach the right consistency.
Next, press the cookie mixture into the bottom of a springform pan, ensuring an even layer across the base. Use the bottom of a measuring cup or your fingers to pack the crumbs tightly, creating a solid crust that won’t crumble when sliced. Once the crust is ready, place the pan in the refrigerator to chill while you prepare the filling. This will help it set and maintain its shape.
Crafting the Cream Cheese Filling
With the crust chilling, it’s time to focus on the creamy filling that will make this cheesecake truly decadent.
Mixing Techniques for a Smooth Consistency
In a large mixing bowl, combine the softened cream cheese and granulated sugar. Using an electric mixer, beat the mixture on medium speed until it is completely smooth and free of lumps. This step is crucial, as any lumps in the cream cheese will affect the texture of your cheesecake. Take your time with this process, scraping down the sides of the bowl to ensure everything is well combined.
Once the cream cheese and sugar are thoroughly mixed, add the creamy peanut butter. Continue mixing until the peanut butter is fully incorporated and the mixture is creamy and well-combined. The smoothness of the filling is key to achieving that luxurious cheesecake experience.
Achieving the Perfect Balance with Peanut Butter and Sugar
After the peanut butter is fully blended into the cream cheese mixture, it’s time to taste for sweetness. Depending on your preference and the brand of peanut butter used, you may want to adjust the amount of sugar. A good starting point is to use about ¾ cup of granulated sugar, but feel free to add more or less based on your taste.
Whipping Cream to Perfection
The final step in crafting the filling is to whip the heavy whipping cream. In a separate mixing bowl, pour in the heavy cream and whip it until stiff peaks form. This means that when you lift the whisk or mixer, the cream holds its shape without collapsing. Be cautious not to over-whip, as this can turn the cream into butter.
Once the cream is whipped, gently fold it into the cream cheese and peanut butter mixture. Use a spatula to carefully combine the two, making sure to maintain the lightness of the whipped cream. This folding technique is essential for incorporating air into the filling, which contributes to the cheesecake’s airy texture.
Adding the Mini Reese’s Peanut Butter Cups
As a final touch, fold in the mini Reese’s Peanut Butter Cups. Their addition not only enhances the flavor but also adds a delightful surprise in every bite. Ensure that the cups are evenly distributed throughout the filling for a cohesive flavor profile.
At this point, your filling is ready to be poured into the prepared Oreo crust. Spread it evenly over the crust, smoothing the top with a spatula. Once the filling is evenly distributed, cover the cheesecake with plastic wrap and refrigerate for at least four hours, or overnight if time allows. This chilling period is crucial for the cheesecake to set properly.
With these initial steps, you are well on your way to creating a Dreamy No Bake Oreo Peanut Butter Cup Cheesecake that is sure to delight anyone fortunate enough to take a bite. Stay tuned for the next part where we will explore creative variations and finishing touches to elevate this already incredible dessert.
Techniques for Stiff Peaks
Achieving stiff peaks is crucial for the texture of your Dreamy No Bake Oreo Peanut Butter Cup Cheesecake. To start, make sure that your mixing bowl and beaters are completely clean and dry. Any grease or moisture can prevent the cream from whipping properly. Use heavy whipping cream, as it contains a higher fat content, which is essential for creating those stiff peaks.
Begin by pouring the heavy whipping cream into the mixing bowl and start mixing on low speed to avoid splattering. Gradually increase the speed to medium-high as the cream begins to thicken. Watch closely; after a few minutes, you’ll notice soft peaks forming. Continue to beat the cream until you reach stiff peaks, which means that when you lift the beaters, the peaks should stand upright without drooping. This process usually takes about 3 to 5 minutes, depending on your mixer. Be cautious not to overbeat, as this can turn the cream into butter.
Folding Method: Maintaining Airiness
Once your whipped cream has reached stiff peaks, it’s time to incorporate it into your cheesecake mixture. This step is vital for maintaining the light and airy texture of your cheesecake. The key here is to use the folding method. Start by taking a small amount of the whipped cream and adding it to the peanut butter and cream cheese mixture. Use a spatula to gently fold the whipped cream into the mixture by scooping from the bottom and folding it over the top.
Continue this process, adding the rest of the whipped cream in increments. This technique minimizes the risk of deflating the whipped cream, ensuring your cheesecake remains fluffy and light. Be patient and gentle, as this step is essential for achieving that dreamy texture.
Incorporating Chocolate with Mini Reese’s Cups
To elevate your cheesecake even further, it’s time to incorporate the chocolate element with mini Reese’s Cups. Chop the mini Reese’s Cups into small pieces, ensuring you have a mix of larger chunks and smaller bits for texture. You want these pieces to distribute evenly throughout the cheesecake filling, enhancing every bite with rich chocolate and peanut butter flavors.
Add the chopped Reese’s Cups to the cream cheese mixture after you’ve folded in the whipped cream. Gently stir them in with a spatula, ensuring they are well-distributed. This step adds not only a delightful surprise in every slice but also additional texture that complements the smoothness of the cheesecake filling.
Tips for Even Distribution in the Filling
When adding any mix-ins, including the mini Reese’s Cups, it’s essential to ensure even distribution within the cheesecake filling. One effective technique is to sprinkle the chopped ingredients evenly across the surface of the cheesecake mixture after folding in the whipped cream. This allows you to visually gauge where the chunks are going and helps in mixing them in without overworking the filling.
Another tip is to reserve a few pieces of the chopped Reese’s for later. This way, you can sprinkle them on top of the cheesecake before it sets, creating an appealing visual element that showcases the delicious chocolatey goodness inside.
Assembling the Cheesecake Layers
Now that your cheesecake filling is prepared, it’s time to assemble the layers. Begin by ensuring your crust is set and firm. If you followed the initial instructions, you should have a well-pressed cookie crust ready in your springform pan.
Pour the cheesecake filling into the crust, using a spatula to spread it evenly. Start from the center and gently push the filling towards the edges, smoothing it out as you go. This helps avoid air pockets and ensures an even surface. Once the filling is poured, use the spatula to smooth the top, creating a beautiful, flat surface ready for garnishing later.
Refrigeration Time: Importance of Setting
Refrigeration time is crucial for your cheesecake to set properly. After assembling, cover the cheesecake with plastic wrap or a lid and refrigerate it for at least 4 to 6 hours, or ideally overnight. This allows the filling to firm up, making it easier to slice and serve without collapsing.
During this time, the flavors will meld beautifully, enhancing the overall taste of your Dreamy No Bake Oreo Peanut Butter Cup Cheesecake. Patience is key here; the longer it sets, the better the texture will be!
Garnishing Your Cheesecake
Once your cheesecake has set, it’s time to add the finishing touches. Garnishing not only enhances the appearance but also adds extra flavor and texture to your dessert.
Creative Garnishing Ideas
– Using Extra Oreo Crumbs for Texture: Take some additional Oreo cookies and crush them into fine crumbs. Sprinkle these crumbs over the top of your cheesecake for a beautiful contrast against the creamy filling. This not only adds texture but also reinforces the Oreo flavor profile, making each slice even more indulgent.
– Enhancing with Whole Mini Reese’s Peanut Butter Cups: For a delightful presentation, place whole mini Reese’s Peanut Butter Cups on top of the cheesecake. You can arrange them in a circular pattern or scatter them randomly for a more casual look. This will make your cheesecake visually appealing and invite guests to dig in.
Serving Suggestions for the Ultimate Experience
The way you serve your Dreamy No Bake Oreo Peanut Butter Cup Cheesecake can elevate the overall experience for your guests.
Best Practices for Serving and Presentation
– Ideal Serving Temperature: For the best taste and texture, serve your cheesecake chilled but not frozen. Let it sit at room temperature for about 10 to 15 minutes before slicing. This allows the creaminess to shine through while making it easier to cut clean slices.
– Pairing Suggestions: Drinks that Complement: Consider pairing your cheesecake with a rich coffee or a glass of milk. For a more festive flair, a dessert wine or a creamy liqueur can enhance the experience. If you prefer non-alcoholic options, a cold glass of vanilla almond milk or a rich hot chocolate can also complement the flavors beautifully.
Storage and Leftover Tips
To keep your Dreamy No Bake Oreo Peanut Butter Cup Cheesecake fresh and delicious, proper storage is essential.
Optimal Storage Solutions for No-Bake Cheesecake
Store any leftovers in the refrigerator in an airtight container or cover the cheesecake with plastic wrap. This protects it from absorbing any unwanted odors from the fridge and keeps it fresh.
How Long Will It Last?
When stored properly, your cheesecake can last for up to 5 days in the refrigerator. However, the texture and flavor are best enjoyed within the first three days.
Creative Ways to Use Leftovers
If you find yourself with leftover cheesecake, consider repurposing it into other treats. Crumble the cheesecake over a bowl of ice cream for a delicious sundae, or blend it into a milkshake for a decadent drink. You could even use it as a filling for cupcakes or layer it in a parfait with additional crushed Oreos and whipped cream.
Conclusion
The Dreamy No Bake Oreo Peanut Butter Cup Cheesecake is not just a dessert; it’s an experience that brings joy to those who savor it. With its creamy texture, delightful crunch, and rich flavors, this cheesecake is sure to impress your friends and family. By following this detailed guide, you can create a dessert that is not only visually stunning but also deliciously satisfying. Whether it’s a special occasion or a simple treat, this cheesecake will undoubtedly become a go-to recipe in your dessert repertoire. Embrace the joy of baking and indulge in this delightful creation that combines the best of chocolate and peanut butter with the classic charm of cheesecake. Enjoy every dreamy bite!