Introduction
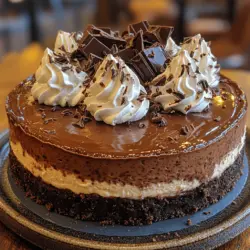
There’s an undeniable allure surrounding chocolate desserts that captivates the hearts and taste buds of many. From rich molten lava cakes to indulgent brownies, chocolate has a unique ability to elevate any dessert into a realm of pure delight. Among these, the Godiva Chocolate Cheesecake stands out as a luxurious option, perfect for special occasions or simply for those moments when you crave something truly indulgent. This cheesecake is not just any dessert; it is a celebration of rich flavors and creamy textures, promising to leave a lasting impression on anyone fortunate enough to enjoy a slice.
What sets this cheesecake apart is its reliance on high-quality ingredients, particularly the exquisite Godiva chocolate. Known for its rich, smooth texture and deep flavor, Godiva chocolate serves as the cornerstone of this decadent dessert, enhancing every bite and transforming a classic cheesecake into a gourmet experience. With each forkful, you can expect a harmonious blend of creamy cheesecake and luscious chocolate that will make you forget any other dessert you’ve ever tried.
Whether you are celebrating a milestone or simply treating yourself on a quiet Sunday afternoon, the Godiva Chocolate Cheesecake is a delightful choice that embodies indulgence and sophistication. In this article, we will explore the essential ingredients, the intricate process of crafting the perfect chocolate crust, and the steps for creating a silky, rich cheesecake filling that will have your guests asking for seconds.
Understanding the Ingredients
To craft the perfect Godiva Chocolate Cheesecake, it is crucial to understand the role that each ingredient plays in this luxurious dessert. This knowledge not only ensures the best possible results but also enhances your baking skills for future endeavors.
Chocolate Cookie Crumbs for the Crust
The foundation of any cheesecake is its crust, and for this recipe, chocolate cookie crumbs are the star. These crumbs provide a flavorful and textural contrast to the creamy filling. The chocolate flavor complements the rich Godiva chocolate, creating a seamless blend of tastes that will tantalize your palate. The key here is to use high-quality chocolate cookies, preferably Oreos or similar varieties. When crushed, these cookies create a crumbly yet cohesive texture that forms a sturdy base for your cheesecake.
Cream Cheese for Creamy Texture
The primary ingredient in any cheesecake is cream cheese, and for our Godiva Chocolate Cheesecake, it must be of the highest quality. Cream cheese is responsible for the cheesecake’s signature creamy texture and tangy flavor. When selecting your cream cheese, opt for full-fat varieties to achieve that luscious mouthfeel. Be sure to bring the cream cheese to room temperature before mixing; this will ensure a smooth and lump-free filling.
Sour Cream and Heavy Cream for Richness
Adding sour cream and heavy cream to the cheesecake filling introduces an additional layer of richness and creaminess. Sour cream contributes a slight tang, balancing the sweetness of the chocolate, while heavy cream enhances the overall texture, making the cheesecake velvety smooth. This combination creates a depth of flavor that elevates the cheesecake from ordinary to extraordinary.
Eggs for Structure
Eggs play a vital role in providing structure to the cheesecake. They act as a binding agent, holding the ingredients together and giving the cheesecake its stability. It’s important to use fresh eggs and incorporate them at room temperature to ensure even mixing. When adding the eggs to the filling, be careful not to overmix, as this can introduce air into the batter and lead to cracks in the finished cheesecake.
Godiva Chocolate and Its Flavor Profile
Finally, the star of the show: Godiva chocolate. Known for its unparalleled quality, Godiva chocolate has a rich, smooth flavor that is simply unmatched. Using this premium chocolate not only enhances the taste of the cheesecake but also lends it an air of sophistication that is often reserved for high-end desserts. The chocolate should be melted and allowed to cool slightly before being mixed into the filling, ensuring that it integrates seamlessly and maintains its luscious texture.
Crafting the Perfect Chocolate Crust
Creating the ideal chocolate crust is an essential step in making your Godiva Chocolate Cheesecake. A well-prepared crust adds flavor, texture, and stability to the cheesecake. Here’s how to achieve that perfect crust with step-by-step details.
Step 1: Prepare the Chocolate Cookie Crumbs
Start by crushing your chocolate cookies into fine crumbs. You can do this easily by placing the cookies in a food processor and pulsing until you achieve a fine, sand-like consistency. Alternatively, you can place the cookies in a zip-top bag and crush them with a rolling pin. Whichever method you choose, ensure that the crumbs are uniform in size to avoid any inconsistencies in texture.
Step 2: Combine with Melted Butter
Once you have your chocolate cookie crumbs ready, transfer them to a mixing bowl. To bind the crumbs together, add melted butter. The butter not only helps to hold the crumbs together but also adds richness to the crust. The typical ratio is about 1/2 cup of melted butter for every 2 cups of cookie crumbs. Mix the crumbs and butter thoroughly until the mixture resembles wet sand.
Step 3: Pressing the Crust into the Pan
Next, it’s time to form the crust in your cheesecake pan. Depending on your preference, you can use a springform pan or a standard pie dish. If using a springform pan, line the bottom with parchment paper for easier removal later. Transfer the crumb mixture into the pan and use the back of a measuring cup or your fingers to press the crumbs evenly across the bottom and up the sides, creating a firm layer. Make sure to apply enough pressure so that the crust holds together during baking.
Step 4: Baking the Crust
Preheat your oven to 350°F (175°C). Once your crust is firmly packed, place it in the preheated oven and bake for about 8 to 10 minutes. Baking the crust helps to set it and enhances the flavor by toasting the cookie crumbs slightly. Keep an eye on it to ensure that it does not burn; you want it to be firm yet not overly crispy.
Step 5: Cooling the Crust
After baking, remove the crust from the oven and allow it to cool completely at room temperature. This step is essential, as a warm crust can cause the cheesecake filling to become overly soft and result in a less desirable texture. Once cooled, the crust will be ready to hold the rich cheesecake filling.
Creating the Cheesecake Filling
Now that you have your perfect chocolate crust, it’s time to turn your attention to the cheesecake filling—a blend of cream cheese, chocolate, and other rich ingredients that will create a heavenly dessert experience. Here’s how to create the filling step by step.
Step 1: Soften Your Ingredients
Before you begin mixing the filling, ensure that your cream cheese, sour cream, and eggs are at room temperature. This is crucial for achieving a smooth and creamy texture, as cold ingredients can lead to lumps in the batter. Allow these ingredients to sit out for about 30 minutes before you start.
Step 2: Mixing the Cream Cheese
In a large mixing bowl, add the softened cream cheese. Using an electric mixer, beat the cream cheese on medium speed until it is smooth and creamy. This process usually takes about 2-3 minutes. Make sure to scrape down the sides of the bowl periodically to ensure that all the cream cheese is fully incorporated.
Step 3: Add the Sugar and Sour Cream
Once the cream cheese is smooth, gradually add granulated sugar and continue to mix until fully combined. The addition of sugar will sweeten the filling while contributing to its creamy texture. Next, add the sour cream and mix until combined. This step helps to enhance the flavor profile of the cheesecake while maintaining its rich consistency.
Step 4: Incorporate the Eggs
Now it’s time to add the eggs. Crack them into a separate bowl to ensure they are fresh, then add them one at a time to the cream cheese mixture. Mix on low speed, just until the eggs are incorporated; be careful not to overmix. Overmixing can introduce air bubbles, leading to cracks in the cheesecake as it bakes.
Step 5: Add the Melted Godiva Chocolate
Finally, melt the Godiva chocolate using a double boiler or microwave, allowing it to cool slightly before adding it to the mixture. Pour the melted chocolate into the cream cheese filling and mix on low speed until the chocolate is fully integrated, resulting in a silky, smooth mixture that is rich in flavor.
Step 6: Pouring the Filling into the Crust
With the filling prepared, pour it carefully into the cooled chocolate crust. Use a spatula to smooth the top, ensuring an even surface. This will not only enhance the appearance of your cheesecake but also help it bake evenly.
Step 7: Baking the Cheesecake
Preheat your oven to 325°F (160°C) for baking the cheesecake. Place the cheesecake in the oven and bake for about 60-70 minutes or until the edges are set while the center is still slightly jiggly. It will firm up as it cools. To prevent cracking, consider placing a shallow pan of water on the oven rack beneath the cheesecake, creating a humid environment that helps maintain moisture during the baking process.
As you embark on this decadent baking adventure, remember that patience is key. The Godiva Chocolate Cheesecake is a labor of love that rewards you with an indulgent dessert experience like no other. The combination of luxurious ingredients and careful preparation will culminate in a cheesecake that is not just a dessert but a memorable culinary experience.
Achieving a Light and Fluffy Texture with Heavy Whipping Cream
The secret to a luscious, light, and fluffy texture in your Godiva Chocolate Cheesecake lies in the use of heavy whipping cream. When incorporated correctly, it adds a delightful creaminess that elevates the overall mouthfeel of the cheesecake. Start by whipping the heavy cream until soft peaks form. This means that the cream should be thickening, but still have a bit of volume. Be careful not to over-whip, as this can lead to a grainy texture.
Once you’ve reached the soft peak stage, gently fold the whipped cream into the chocolate mixture. Folding, rather than stirring, will help retain the airiness of the whipped cream, ensuring that your cheesecake remains light and fluffy. This technique is essential for creating a cheesecake that doesn’t feel dense or heavy, allowing it to melt in your mouth with every bite.
The Role of Melted Chocolate in Flavor Depth and Visual Appeal
Melted chocolate serves a dual purpose in your decadent cheesecake. First, it infuses the dessert with rich, deep flavors that are synonymous with high-quality chocolate. In this recipe, using Godiva chocolate not only enhances the taste but also contributes to the cheesecake’s luxurious character. The higher the cocoa content, the more intense the flavor, so choose chocolate that satisfies your palate.
Secondly, melted chocolate adds to the visual appeal of the cheesecake. When incorporated into the cream cheese mixture, it creates a beautifully swirled pattern that’s not only delicious but also eye-catching. To melt the chocolate, use a double boiler or a microwave in short bursts, stirring frequently to ensure it melts evenly without burning. Once melted, allow it to cool slightly before mixing it into your cheesecake batter to maintain the right consistency.
Baking the Cheesecake to Perfection
Guidelines for Baking to Avoid Common Pitfalls
Baking a cheesecake can be intimidating, but with the right guidelines, you can achieve a flawless finish. To avoid common pitfalls like cracking, ensure that your oven is preheated to the right temperature, typically 325°F (163°C) for cheesecakes. A water bath, or bain-marie, can also help maintain moisture in the oven, preventing the cheesecake from drying out and cracking. Wrap the bottom of your springform pan with foil to prevent water from seeping in, and place it in a larger pan filled with hot water.
The “Jiggle Test” for Doneness
One of the best tests for determining if your cheesecake is done is the “jiggle test.” Gently shake the cheesecake pan. The outer edges should be set, while the center should have a slight jiggle. It’s important that the center remains a bit wobbly as it will continue to firm up while cooling. Overbaking can lead to a dry texture and cracks, so it’s best to err on the side of underbaking slightly.
Importance of Cooling in the Oven and Proper Chilling Times
Once the cheesecake is out of the oven, allow it to cool in the oven with the door slightly ajar for about an hour. This gradual temperature change helps prevent cracking. Afterward, transfer it to the refrigerator and chill for at least 4 hours, but preferably overnight. Chilling is crucial as it allows the flavors to meld and the texture to set properly, giving you that creamy, sliceable cheesecake that you crave.
Mastering the Ganache Topping
Step-by-Step Guide to Preparing the Chocolate Ganache
To create a stunning ganache topping for your Godiva Chocolate Cheesecake, begin by gathering your ingredients: high-quality chocolate (preferably Godiva for consistency), and heavy cream. Start by heating the heavy cream in a saucepan until it just begins to simmer. Remove it from the heat, then pour it over the chopped chocolate in a separate bowl. Let it sit for a few minutes to soften the chocolate, then stir gently until smooth and glossy.
The Right Proportions for a Glossy Finish
For a perfect ganache, the typical ratio is 2:1 chocolate to cream. However, depending on your preference for thickness, you might adjust this. For a thicker ganache, use more chocolate, while a thinner consistency can be achieved with more cream. Allow the ganache to cool slightly before pouring it over your chilled cheesecake, as this will help prevent it from sliding off the sides.
Techniques for Achieving a Smooth and Even Pour Over the Cheesecake
When pouring the ganache over the cheesecake, do so in the center, allowing it to naturally flow towards the edges. If you want a clean edge, you can gently spread the ganache using a spatula to ensure an even layer. To enhance the visual appeal, you can use a toothpick or skewer to create swirls in the ganache, which not only looks beautiful but adds texture.
Finishing Touches: Presentation and Garnishing
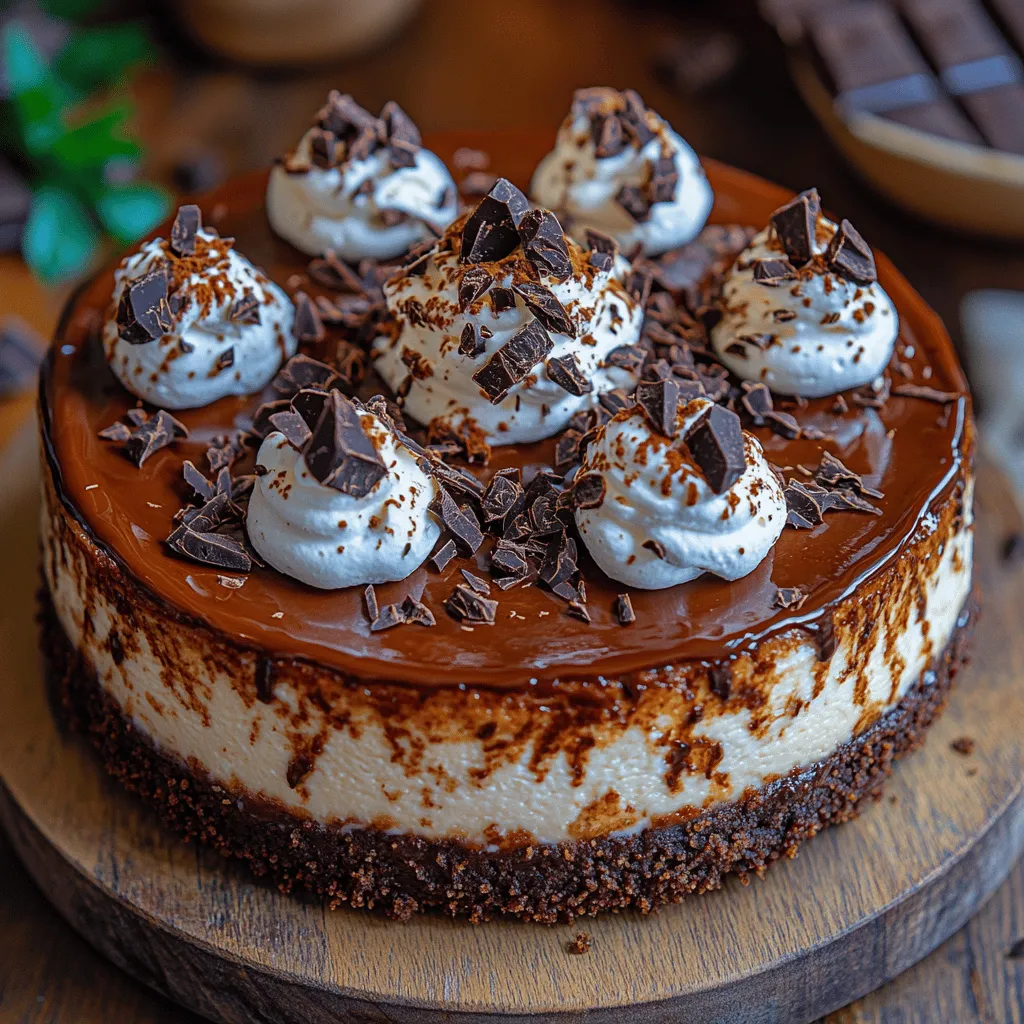
Suggestions for Garnishing the Cheesecake for a Professional Look
Presentation is key when it comes to desserts, and garnishing your Godiva Chocolate Cheesecake can elevate it from delicious to exquisite. Consider topping the cheesecake with fresh berries, such as raspberries or strawberries, which provide a pop of color and a tart contrast to the rich chocolate. Edible flowers can also make a stunning addition, offering a touch of elegance.
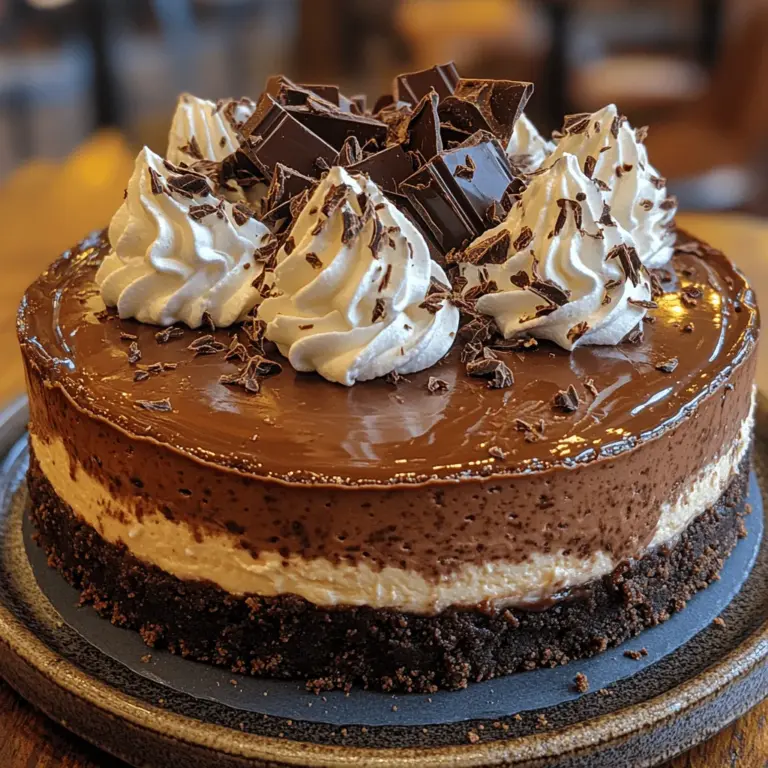
Ideas for Using Whipped Cream, Chocolate Shavings, and Dusting Cocoa Powder
Whipped cream is a classic topping that pairs beautifully with chocolate cheesecake. Pipe it around the edges for a decorative border, or place a dollop in the center of each slice. Chocolate shavings, made from a block of chocolate or a vegetable peeler, add a gourmet touch. For a final flourish, dust the cheesecake with unsweetened cocoa powder or powdered sugar for a refined look.
Importance of Presentation in Enhancing the Dining Experience
A beautifully presented cheesecake not only pleases the eye but enhances the overall dining experience. When guests see a well-garnished dessert, it sets the stage for indulgence and anticipation. Taking the time to plate and garnish thoughtfully shows that you care about every aspect of the meal, elevating the occasion.
Serving Suggestions and Pairings
Recommendations for Serving This Cheesecake
When it comes to serving your decadent Godiva Chocolate Cheesecake, presentation is everything. Slice the cheesecake into generous wedges, and serve it on elegant dessert plates. Pair each slice with a fork and a small glass of water or milk to cleanse the palate between bites.
Ideas for Complementary Beverages That Pair Well with Chocolate Cheesecake
Chocolate cheesecake pairs wonderfully with a variety of beverages. A rich coffee, whether it’s a cappuccino, espresso, or cold brew, can enhance the chocolate flavors. For a non-caffeinated option, consider serving a glass of cold milk or a dessert wine, such as a Port or a rich Merlot, which complements the sweetness of the cheesecake beautifully.
Suggestions for Occasions to Serve (Birthdays, Holidays, etc.)
This cheesecake is a showstopper, making it perfect for special occasions such as birthdays, anniversaries, and holiday celebrations. It’s also ideal for dinner parties or gatherings with friends and family. Any time you want to impress, this Godiva Chocolate Cheesecake will surely be the highlight of the evening.
Conclusion
In conclusion, the Godiva Chocolate Cheesecake is a sumptuous dessert that combines rich flavors with a creamy, light texture. Its decadent nature makes it a must-try for any chocolate lover or dessert enthusiast. With careful attention to detail in each step of the process—from achieving the perfect texture to mastering the ganache topping—you can create a stunning cheesecake that not only tastes divine but also looks like a work of art.
As you embark on your cheesecake-making journey, remember to enjoy the process. Cooking is not just about the final product but also about the joy of creating and sharing delicious food with loved ones. So gather your ingredients, put on your apron, and let the decadence of this Godiva Chocolate Cheesecake take center stage at your next dessert occasion. Happy baking!