Introduction
In the realm of comfort food, few dishes can compete with the irresistible allure of crispy teriyaki chicken bites. This recipe combines the savory flavors of teriyaki sauce with the satisfying crunch of perfectly breaded chicken, making it a popular choice for various occasions. Whether you’re hosting a gathering, looking for a quick weeknight dinner, or simply craving a delicious snack, these chicken bites are sure to impress. With easy-to-follow instructions and accessible ingredients, you’ll be able to create a mouthwatering dish that brings the taste of your favorite Asian takeout right to your kitchen.
Crispy teriyaki chicken bites are not only delicious but also versatile. They can be served as an appetizer, a main course, or even as a fun addition to a bento box lunch. Their balance of sweet and savory flavors, combined with the satisfying crunch from the coating, makes them a hit among both adults and children. Plus, the dish allows for creativity with dipping sauces and side dishes, giving you the freedom to customize it to your liking.
Understanding Teriyaki Chicken Bites
The Origin of Teriyaki Sauce
To appreciate crispy teriyaki chicken bites fully, it’s essential to understand the origins of teriyaki sauce. Teriyaki, which translates to “grilled” or “broiled” in Japanese, has deep roots in Japanese culinary traditions. The sauce itself typically consists of soy sauce, sake, mirin, and sugar, creating a sweet and umami-rich glaze that enhances a variety of dishes. Historically, the teriyaki technique involves marinating the protein before grilling or broiling, allowing the flavors to penetrate deeply into the meat.
As the dish traveled beyond Japan, it underwent several adaptations. In Western cuisine, teriyaki sauce often includes additional ingredients such as sesame oil, ginger, and garlic, resulting in a richer flavor profile. Today, teriyaki chicken is enjoyed worldwide, with many variations that reflect local tastes and preferences. This fusion of cultures has made teriyaki a beloved flavor, making it the perfect choice for creating crispy chicken bites that resonate with a wide audience.
Benefits of Using Chicken Thighs
When it comes to making crispy teriyaki chicken bites, the choice of chicken cuts can significantly affect the dish’s final outcome. While chicken breasts are a common choice for many recipes, using boneless, skinless chicken thighs offers several advantages. Chicken thighs are generally more flavorful than breasts, thanks to their higher fat content. This additional fat not only enhances the overall taste but also contributes to the juiciness of the meat, ensuring that each bite remains tender and succulent.
Moreover, chicken thighs are less likely to dry out during cooking, allowing for a more forgiving cooking process. This characteristic is particularly beneficial when frying, as the high heat can sometimes lead to overcooking chicken breasts. By opting for chicken thighs, you’ll achieve crispy bites that maintain their moisture and flavor, making them an excellent choice for this teriyaki-inspired dish.
Why Panko Breadcrumbs?
The texture of crispy teriyaki chicken bites is largely dependent on the type of breadcrumbs used for breading. While traditional breadcrumbs can yield a satisfactory crunch, panko breadcrumbs take the texture to a whole new level. Originating from Japan, panko is made from crustless white bread that is processed into larger, flakier crumbs. This unique structure allows panko to create a lighter, crispier coating that absorbs less oil during frying, resulting in a less-greasy finish.
Using panko breadcrumbs in your chicken bites not only enhances the crunchiness but also adds an appealing visual element to the dish. The larger crumbs create a delightful contrast to the tender chicken inside, making each bite a textural delight. If you’re looking for that extra crunch that elevates your teriyaki chicken bites, panko is the way to go.
Ingredients Breakdown
The Main Ingredients
To create the perfect crispy teriyaki chicken bites, you’ll need a selection of key ingredients that work harmoniously together.
1. Chicken Thighs: As previously mentioned, boneless, skinless chicken thighs are the star of this recipe. Their rich flavor and tenderness make them the ideal choice for frying and absorbing the teriyaki sauce.
2. All-Purpose Flour: This acts as the first layer of coating for the chicken. Dredging the chicken in flour helps the egg wash adhere better and creates a solid foundation for the panko breadcrumbs.
3. Eggs: Beaten eggs are used as a binding agent, helping the panko breadcrumbs cling to the chicken. This step is crucial for achieving that coveted crispy texture.
4. Panko Breadcrumbs: The key to a crunchy exterior, panko breadcrumbs provide the light and crispy coating that distinguishes these chicken bites from others.
5. Teriyaki Sauce: Whether you choose store-bought or homemade, teriyaki sauce is essential for flavoring the chicken bites. Its sweet and savory profile enhances the overall taste of the dish.
Seasoning Essentials
In addition to the main ingredients, the seasoning plays a vital role in elevating the flavor profile of your teriyaki chicken bites. Here are the essential seasonings to include:
– Salt: Enhances the overall flavor of the chicken and balances the sweetness of the teriyaki sauce.
– Black Pepper: Adds a subtle heat and complexity, complementing the other flavors in the dish.
– Garlic Powder: Provides a rich, aromatic quality that pairs beautifully with the teriyaki sauce.
– Onion Powder: Offers depth and sweetness, enhancing the savory notes of the chicken.
Together, these seasonings work to create a well-rounded flavor that ensures each bite is packed with taste, making your crispy teriyaki chicken bites an unforgettable dish.
The Teriyaki Sauce: Store-bought vs. Homemade
When it comes to teriyaki sauce, you have the option of using store-bought or homemade varieties. Each has its advantages, and your choice will depend on your personal preference and available time.
Store-bought Teriyaki Sauce: This option is undoubtedly convenient and consistent in flavor. Many brands offer a variety of teriyaki sauces, from sweet to savory, allowing you to select one that suits your taste. However, some store-bought versions may contain preservatives or high levels of sugar and sodium, so it’s essential to read the labels if you’re concerned about dietary restrictions.
Homemade Teriyaki Sauce: Making your teriyaki sauce at home can be a rewarding experience. By combining ingredients such as soy sauce, sake, mirin, and sugar, you can customize the flavor to your liking. Homemade sauces are often fresher and can be tailored to suit dietary preferences, such as reducing sugar or sodium levels. Additionally, the aroma of simmering homemade teriyaki sauce adds an extra layer of satisfaction to the cooking process.
Ultimately, whether you choose store-bought or homemade teriyaki sauce, the key is to select a quality product that complements your crispy chicken bites perfectly.
Preparation Steps
Preparing the Chicken
Now that you have a solid understanding of the ingredients and their roles, it’s time to dive into the preparation steps for your crispy teriyaki chicken bites. The first step is to properly prepare the chicken for maximum flavor absorption.
1. Trim and Cut the Chicken: Start by removing any excess fat from the chicken thighs, ensuring a clean and tender cut. Then, cut the chicken into bite-sized pieces, approximately 1 to 2 inches in size. This allows for even cooking and makes it easy to enjoy as finger food.
2. Season the Chicken: In a mixing bowl, combine the salt, black pepper, garlic powder, and onion powder. Sprinkle this seasoning mix evenly over the chicken pieces, making sure to coat them thoroughly. This step is crucial, as it ensures that the chicken is flavorful from the inside out.
3. Marinate (Optional): For added flavor, consider marinating the seasoned chicken in a small amount of teriyaki sauce for about 30 minutes. This will allow the flavors to penetrate the meat, enhancing the overall taste of your chicken bites.
4. Set Up the Breading Station: Prepare your breading station by placing three shallow dishes on your countertop. In the first dish, add the all-purpose flour. In the second dish, beat a few eggs until smooth. In the third dish, pour in the panko breadcrumbs, making sure they are evenly distributed.
5. Dredge the Chicken: Take each seasoned chicken piece and dredge it in the flour, shaking off any excess. Next, dip the floured chicken into the beaten eggs, ensuring it is fully coated. Finally, roll the chicken in the panko breadcrumbs, pressing gently to ensure the crumbs adhere well. Repeat this process for all the chicken pieces, placing them on a baking sheet lined with parchment paper.
With your chicken prepared and ready to go, you are now set to move on to the frying process and the final steps in creating these delightful crispy teriyaki chicken bites. Stay tuned as we continue to explore the next phases of this delicious recipe.
Setting Up a Breading Station
Creating an efficient breading station is crucial for achieving the perfect crunch in your crispy teriyaki chicken bites. A well-organized setup will streamline the breading process and ensure an even coating that enhances texture and flavor.
Components of a Breading Station
1. Ingredients: Gather your key ingredients: flour, beaten eggs, and panko breadcrumbs. It’s essential to measure these out in advance to avoid interruptions during the breading process.
2. Bowls: Use three separate bowls for your breading station:
– First Bowl: Fill this bowl with all-purpose flour mixed with salt and pepper for seasoning. This initial step is vital for flavor and helps the egg adhere better to the chicken.
– Second Bowl: Beat a few eggs in this bowl. The egg acts as the adhesive that holds the breadcrumbs to the chicken, creating a crispy coating.
– Third Bowl: Place the panko breadcrumbs in this bowl. Panko is crucial for achieving a light and crispy texture, setting your chicken bites apart from those coated with regular breadcrumbs.
3. Dredging Process: Arrange your bowls in order: flour → egg → panko. This setup makes it easy to coat each chicken bite fully and efficiently.
4. Baking Sheet: Prepare a baking sheet lined with parchment paper to place the breaded chicken bites before frying. This will prevent sticking and make it easier to transport them to the frying pan.
Breading Techniques
Properly breading your chicken bites is essential for achieving that signature crunch. Follow these steps to ensure an even coating of flour, egg, and panko.
Step-by-Step Breading Instructions
1. Coat with Flour: Take a chicken bite and dip it into the flour mixture, ensuring it is fully coated. Shake off any excess flour to avoid clumping and create a smoother base for the egg.
2. Dip in Egg: Next, dip the floured chicken into the beaten egg. Make sure it is entirely submerged for an even coating. Allow any excess egg to drip off, as this will help the breadcrumbs stick better.
3. Panko Coating: Finally, roll the chicken bite in the panko breadcrumbs. Press gently to ensure the breadcrumbs adhere well. This step is crucial for achieving that crispy texture that everyone loves.
4. Resting Period: Once all chicken bites are breaded, let them rest for about 10-15 minutes. This allows the coating to set and reduces the chances of it falling off during frying.
Frying: The Key to Crispiness
Frying is where the magic happens, transforming your breaded chicken bites into crispy perfection. Follow these tips to master the frying process.
Temperature Control
1. Preheat the Oil: Use a deep pan or a heavy-bottomed skillet to fry your chicken bites. Pour enough oil to cover the bottom of the pan, about 1-2 inches deep. Heat the oil over medium-high heat. The ideal frying temperature is between 350°F to 375°F (175°C to 190°C). You can test the temperature by dropping a small piece of bread into the oil; it should sizzle and turn golden brown in about 30 seconds.
2. Avoid Overcrowding: Fry the chicken bites in small batches to avoid lowering the oil temperature. Overcrowding can lead to soggy bites rather than crispy ones. Fry for about 3-4 minutes per side or until they are golden brown and reach an internal temperature of 165°F (74°C).
3. Drain Excess Oil: Once fried, transfer the chicken bites to a paper towel-lined plate to drain any excess oil. This step is essential to maintain the crispy texture and prevent greasiness.
Glazing and Serving
The Art of Glazing
Glazing your fried chicken bites in teriyaki sauce elevates the dish, adding a glossy finish and enhancing the overall flavor. Follow these steps for perfect glazing:
1. Prepare the Teriyaki Sauce: If you are using store-bought teriyaki sauce, ensure it’s high-quality for the best flavor. If you prefer homemade, combine soy sauce, mirin, sake, and sugar in a saucepan and simmer until thickened.
2. Glazing Process: In a large mixing bowl, add the fried chicken bites and pour the teriyaki sauce over them. Toss gently to coat each bite evenly. Aim for a light coating to avoid sogginess while still infusing the chicken bites with flavor.
3. Final Touch: If desired, return the glazed chicken bites to the pan for an additional minute on low heat. This will help set the glaze and enhance the flavor without making the bites soggy.
Garnishing for Presentation
Enhancing the visual appeal of your dish can elevate the dining experience. Here are some garnishing ideas:
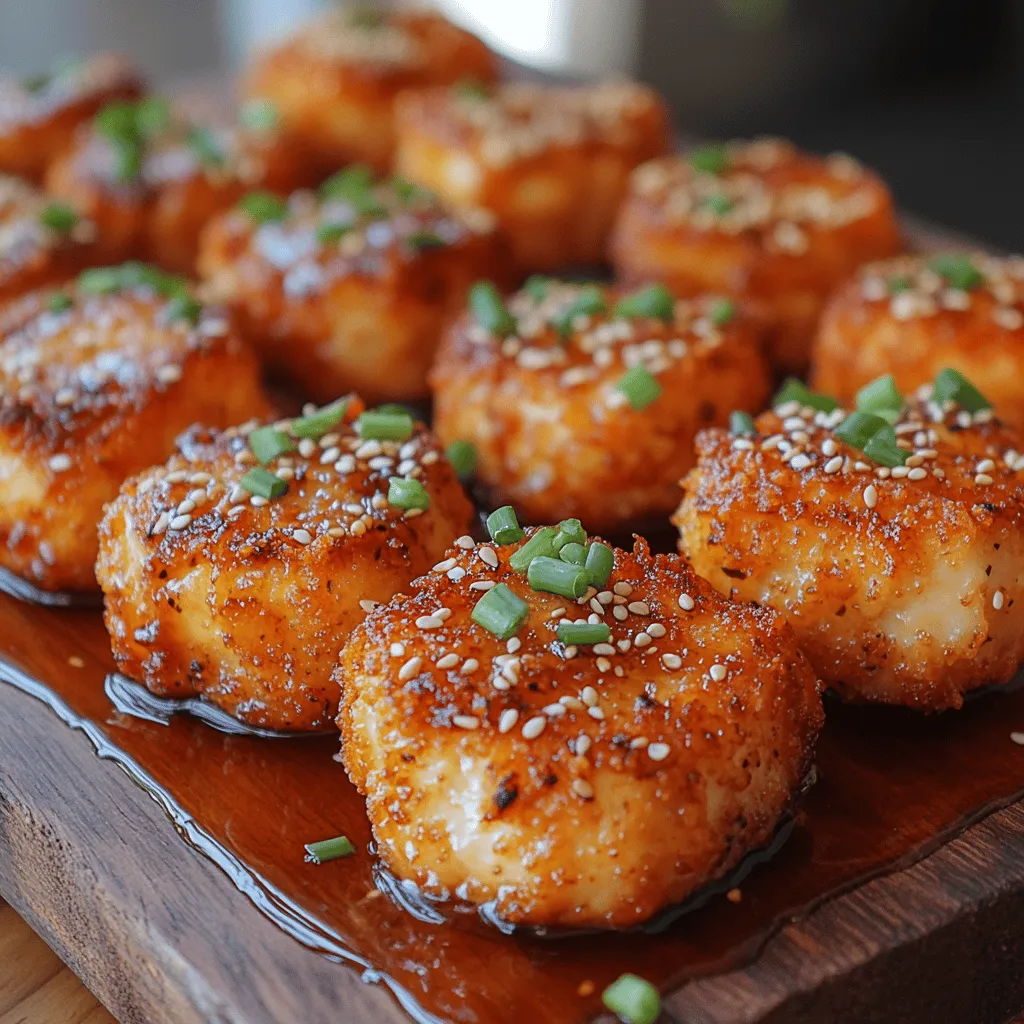
– Sesame Seeds: Sprinkle toasted sesame seeds over the glazed chicken bites for a nutty flavor and extra crunch.
– Chopped Green Onions: Finely chop green onions and scatter them over the top. This adds a pop of color and freshness that complements the savory teriyaki sauce.
– Lime Wedges: Serve with lime wedges for an optional zesty kick that pairs well with the sweetness of the teriyaki sauce.
Recommended Serving Suggestions
To create a complete meal experience, consider pairing your crispy teriyaki chicken bites with complementary side dishes and beverages:
– Steamed Rice: Serve over a bed of fluffy white or brown rice to soak up the delicious teriyaki glaze.
– Stir-Fried Vegetables: Add a side of stir-fried vegetables, such as broccoli, bell peppers, and snap peas, to balance the meal with nutrients and colors.
– Asian Slaw: A refreshing slaw made with cabbage, carrots, and a light vinaigrette can provide a crunchy contrast to the tender chicken bites.
– Beverages: Pair with a cold, refreshing beverage like iced green tea or a light lager beer to complement the flavors of the dish.
Nutritional Information
Caloric Overview
Understanding the nutritional content of your crispy teriyaki chicken bites can help you enjoy them more mindfully. Here’s a basic breakdown per serving (based on approximately 4-5 bites):
– Calories: 350-400 calories
– Protein: 25-30 grams
– Fat: 15-20 grams
– Carbohydrates: 25-30 grams
These values may vary based on the specific ingredients and cooking methods used.
Healthier Modifications
If you’re looking to lighten up this dish while maintaining flavor, consider the following modifications:
– Baking Instead of Frying: Instead of frying, you can bake the breaded chicken bites. Preheat your oven to 400°F (200°C) and place the breaded chicken on a baking sheet lined with parchment paper. Spray lightly with cooking oil and bake for about 15-20 minutes, flipping halfway through, until golden and cooked through.
– Alternative Flours: Use whole wheat flour or almond flour for a healthier breading option. These alternatives can provide more nutrients and fiber compared to regular all-purpose flour.
– Lower Sugar Sauce: You can also create a lighter teriyaki sauce by reducing the sugar content or using a sugar substitute, ensuring you maintain the flavor profile without the extra calories.
Conclusion
Crispy teriyaki chicken bites are not only a delicious addition to your recipe repertoire but also an enjoyable cooking experience. By understanding the key components and techniques involved in this dish, you can replicate the flavors you love from your favorite restaurants in the comfort of your own home. With just a few simple steps, you can create a dish that is sure to become a family favorite, perfect for any occasion. Enjoy the delightful crunch and savory flavor of these teriyaki chicken bites, and let them transport your taste buds to new culinary heights.