The Art of Perfectly Crispy Chicken Cutlets
Chicken cutlets are a beloved dish enjoyed in kitchens around the world. Their versatility makes them suitable for a variety of cuisines and occasions—from a comforting family dinner to a quick lunch or a fancy dinner party. The beauty of chicken cutlets lies not only in their ease of preparation but also in the possibility of achieving that coveted crispy texture while keeping the chicken inside tender and juicy. This perfect balance is what elevates a simple dinner into a delightful dining experience.
In this article, we will take you through the step-by-step process of making Crispy Oven-Baked Chicken Cutlets. We’ll cover everything from selecting the right ingredients to the techniques that ensure your cutlets are perfectly crispy every time. By the end, you will have a reliable recipe that can easily become a staple in your culinary repertoire.
Understanding the Ingredients: The Foundation of Flavor
The success of your crispy oven-baked chicken cutlets starts with understanding the ingredients involved. Each component plays a crucial role in creating a dish that is not only flavorful but also has that satisfying crunch. Let’s delve into the key ingredients you’ll need for this recipe.
Boneless, Skinless Chicken Breasts
The star of our dish is the boneless, skinless chicken breast. This cut of meat is favored for its lean profile and ease of cooking. When selecting chicken breasts, look for pieces that are firm and have a pinkish hue. Avoid any that appear slimy or have a foul odor. For even cooking, choose breasts that are similar in size. If you want to ensure they cook uniformly, consider pounding them to an even thickness before breading.
All-Purpose Flour
All-purpose flour plays a pivotal role in the breading process. It acts as the first layer that helps the egg adhere to the chicken. When choosing flour, opt for a finely milled variety, which will coat the chicken evenly without clumping. Additionally, seasoning the flour with salt and other spices can enhance the overall flavor of the cutlets.
Eggs
Eggs serve as the binding agent in the breading process. The protein in eggs helps the breadcrumbs stick to the chicken, providing that essential crispy coating once baked. For the best results, use fresh eggs, and whisk them thoroughly to ensure a smooth application over the chicken.
Breadcrumbs
The choice of breadcrumbs can significantly impact the texture and crunch of your chicken cutlets. Traditional breadcrumbs are fine and create a classic coating, while panko breadcrumbs are coarser and yield a lighter, airier crunch. If you’re looking for maximum crispiness, panko is the way to go. You can also toast the breadcrumbs lightly before using them to enhance their flavor and crunch.
Seasonings
Flavor is key in any recipe, and the seasonings you choose can elevate your chicken cutlets from ordinary to extraordinary. Common seasonings include garlic powder, onion powder, paprika, and oregano. Adding grated Parmesan cheese to the breadcrumb mixture can introduce a delightful nuttiness and depth of flavor, further enhancing the overall experience.
Olive Oil
A light drizzle of olive oil is the secret weapon in achieving crispy, golden-brown cutlets. Not only does it help with browning, but it also adds a healthier fat option compared to traditional frying methods. Ensure your olive oil is of good quality; extra virgin olive oil is particularly flavorful and will complement the dish beautifully.
Preparation Steps: Setting Up for Success
Now that we’ve explored the ingredients, it’s time to prepare for the cooking process. Proper preparation is key to achieving the perfect crispy chicken cutlets. Here are the initial steps to get you started.
Preheating the Oven
The first step in making crispy oven-baked chicken cutlets is preheating your oven. Set it to 425°F (220°C). A hot oven is crucial for creating that crispy exterior quickly while sealing in the moisture of the chicken.
Preparing the Chicken
Before you start breading, it’s essential to prepare the chicken properly. If you haven’t already, trim any excess fat from the chicken breasts and then pound them to an even thickness. This step ensures that they cook evenly and prevents any dry or undercooked spots. Aim for a thickness of about ½ inch. You can use a meat mallet or the bottom of a heavy pan for this task.
Creating a Breading Station
Setting up a breading station is a vital part of the process. It involves organizing your ingredients into three distinct bowls: one for flour, one for the egg wash, and one for the breadcrumbs. This streamlined approach makes the breading process efficient and prevents a messy kitchen.
1. Flour Mixture: In the first bowl, combine all-purpose flour with salt and your chosen seasonings. This seasoned flour will add flavor right from the start.
2. Egg Wash: In the second bowl, crack a couple of eggs and whisk them until the yolks and whites are fully combined. This mixture should be smooth to allow for easy coating of the chicken. If you like, you can add a splash of water or milk to the egg wash for a lighter texture.
3. Breadcrumb Mixture: In the final bowl, combine your breadcrumbs with any additional seasonings, such as garlic powder, onion powder, paprika, and grated Parmesan cheese. Mix well to ensure an even distribution of flavor.
With your ingredients prepped and your breading station set up, you’re ready to move forward and transform these components into delicious crispy chicken cutlets.
Bread the Chicken: Techniques for a Perfect Coating
Achieving that perfect crispy coating on chicken cutlets is essential for a delightful dining experience. The breading process can seem daunting, but with the right techniques, you’ll be well on your way to making delicious crispy oven-baked chicken cutlets.
Step-by-Step Process for Breading Chicken Cutlets
1. Prepare the Breading Stations: You’ll need three shallow dishes or plates. In the first dish, place 1 cup of all-purpose flour, seasoned with salt and pepper. The second dish will hold 2 large beaten eggs, and the third dish will contain 1 to 2 cups of breadcrumbs (panko breadcrumbs are recommended for extra crispiness).
2. Coat the Chicken: Take one chicken cutlet and dip it into the flour, ensuring it’s completely covered. Shake off any excess flour; this helps the egg adhere better.
3. Dunk in Egg: Move the floured chicken into the beaten egg, allowing it to soak for a moment. This layer of egg acts as a glue for the breadcrumbs.
4. Final Breadcrumb Layer: Transfer the egg-coated chicken to the breadcrumbs, pressing down gently to ensure even coverage. This step is crucial for maximizing the adhesion of the breadcrumbs.
Importance of Shaking Off Excess Flour and Egg
One of the key elements to a perfect breading is ensuring that you shake off excess flour and egg. If too much flour remains, it can create a clumpy texture. Similarly, excess egg can lead to soggy breadcrumbs. This simple step is essential for achieving that desired crispy texture.
Tips for Pressing Breadcrumbs onto Chicken for Better Adhesion
Pressing the breadcrumbs firmly onto the chicken is important. Use the palm of your hand to gently press down on the chicken cutlet while it’s in the breadcrumb dish. This not only helps in coating the cutlet evenly but also ensures that the breadcrumbs adhere during the baking process.
Arranging Breaded Cutlets on the Baking Sheet: Best Practices
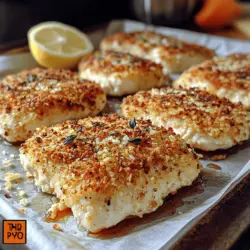
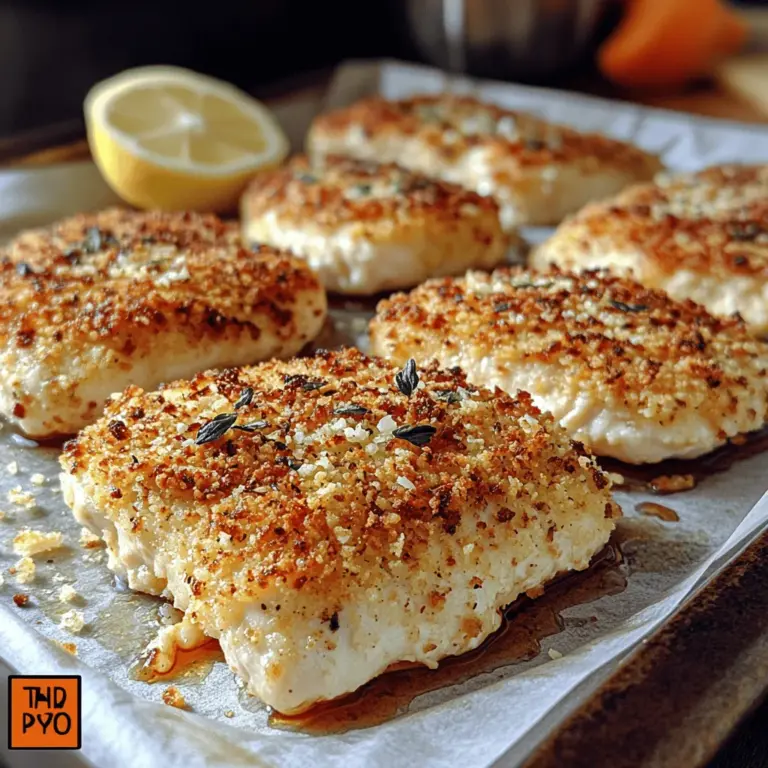
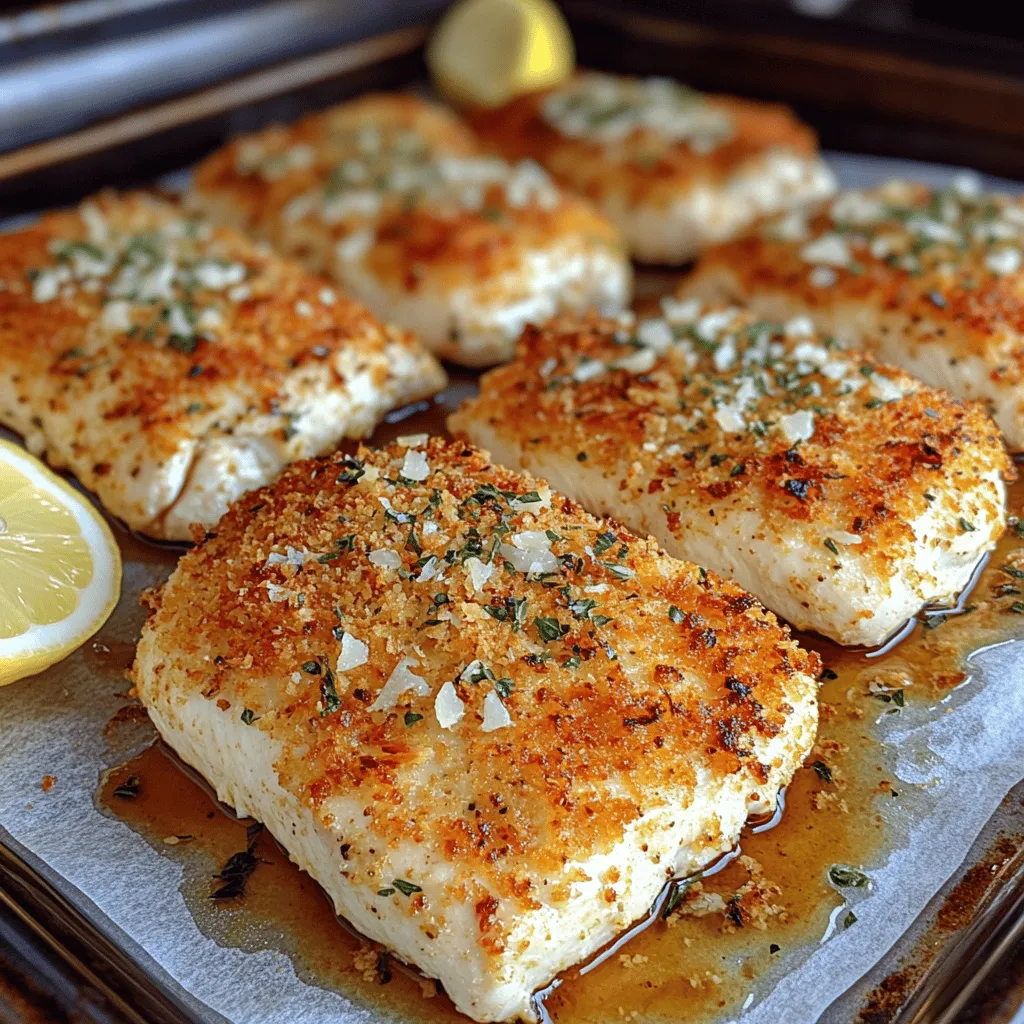
Once your chicken cutlets are breaded, it’s time to arrange them on the baking sheet. Use a parchment-lined baking sheet to prevent sticking and make cleanup easier. Space the cutlets apart, allowing hot air to circulate around each piece. This arrangement promotes even cooking and contributes to that crispy finish.
Achieving Maximum Crispiness: The Role of Oil
The role of oil in achieving a golden, crispy chicken cutlet cannot be overstated. It not only enhances flavor but also contributes to the browning process.
Discussing the Benefits of Using Olive Oil Spray vs. Drizzling Olive Oil
For a healthier option and to avoid excess oil, consider using an olive oil spray. This method allows for a light, even coating that can help the breadcrumbs crisp up nicely. If you prefer to drizzle, aim for about 1 to 2 tablespoons of olive oil over the cutlets before baking. Both methods can yield great results, so choose based on your preference.
How Oil Contributes to the Browning and Crispiness of the Chicken Cutlets
Oil conducts heat and facilitates the Maillard reaction, which is responsible for that beautiful brown color and delicious flavor. This means that ensuring your cutlets are well-oiled, whether by spray or drizzle, is imperative for achieving that perfect crispy texture.
Timing and Methods for Flipping Cutlets During Baking
Baking your chicken cutlets requires some attention to timing. Bake them at 400°F (200°C) for about 15-20 minutes. Halfway through the baking process, flip the cutlets using tongs or a spatula. Flipping them allows for even cooking and ensures both sides get that golden-brown finish.
Baking the Cutlets: Timing is Everything
Baking chicken cutlets is an art and science, and getting the timing right is crucial for optimal results.
Recommended Baking Temperature and Time for Optimal Results
Preheat your oven to 400°F (200°C). This temperature is perfect for ensuring the chicken cooks through while allowing the breadcrumbs to achieve that desirable crispy texture. Bake for 15-20 minutes, turning halfway through.
Indicators of Doneness: How to Tell When Chicken is Fully Cooked
To ensure your chicken cutlets are fully cooked, the internal temperature should reach 165°F (74°C). Use a meat thermometer for accuracy. Alternatively, cut into one of the cutlets; the meat should be opaque and the juices should run clear.
Tips for Achieving an Even Golden-Brown Finish
To achieve an even golden-brown finish, ensure that the cutlets are arranged in a single layer on the baking sheet, without overcrowding. Additionally, rotating the baking sheet halfway through cooking can help achieve uniform browning.
Serving Suggestions: Elevating Your Meal Experience
Once your crispy oven-baked chicken cutlets are ready, it’s time to think about how to elevate the meal experience through serving suggestions.
Ideas for Dipping Sauces That Complement Crispy Chicken Cutlets
Dipping sauces can take your chicken cutlets to the next level. Here are some delicious options to consider:
– Honey Mustard: A sweet and tangy sauce that pairs beautifully with crispy chicken.
– Garlic Aioli: Creamy and rich, this sauce adds a gourmet touch.
– Spicy Sriracha Mayo: For those who enjoy a kick, mix mayonnaise with sriracha for a spicy creaminess.
Suggestions for Side Dishes (Salads, Pasta) That Pair Well
To create a well-rounded meal, consider pairing your chicken cutlets with:
– Caesar Salad: Crisp romaine lettuce, creamy dressing, and croutons complement the cutlets perfectly.
– Pasta Primavera: Lightly sautéed seasonal vegetables tossed with pasta and olive oil offer a fresh contrast to the crispy chicken.
– Roasted Vegetables: Seasonal roasted veggies add color and flavor, balancing the richness of the chicken.
Creative Plating Ideas to Enhance Visual Appeal
Presentation matters! Here are some creative plating ideas:
– Stacked Cutlet: Stack two cutlets on top of each other, garnished with fresh herbs or a drizzle of sauce.
– Bento Box Style: Use a divided plate to serve cutlets alongside various sides for a colorful presentation.
– Garnish with Lemon Wedges: A few lemon wedges not only add brightness but also provide a fresh squeeze of flavor.
Conclusion: Enjoying Your Crispy Oven-Baked Chicken Cutlets
In summary, the journey to creating crispy oven-baked chicken cutlets involves careful preparation, attention to detail during breading, and mindful baking techniques. Remember to shake off excess flour, use an appropriate amount of oil, and monitor cooking times for the best results.
Don’t hesitate to experiment with spices in your breadcrumb mixture or try different dipping sauces and sides to personalize your dish. Chicken cutlets are incredibly versatile, making them a staple in any home cook’s repertoire. Enjoy your culinary adventure, and savor the deliciousness of your crispy oven-baked chicken cutlets!