Grilled School Lunch Sandwich Melt Recipe: A Delicious and Nutritious Option for Kids
School lunches have long been a cornerstone of childhood nutrition, serving as a pivotal opportunity to provide balanced meals that fuel young minds and bodies. With the right ingredients, a school lunch can be more than just a quick meal; it can be a delightful experience that kids look forward to. Enter the Grilled School Lunch Sandwich Melt—an easy-to-make, flavorful option that combines taste and nutrition seamlessly. This sandwich is not just a treat for picky eaters, but it also delivers essential nutrients that support healthy growth and development.
The Importance of Nutritious School Lunches
Balanced meals play a critical role in children’s energy levels, focus, and overall health. When kids consume the right combination of nutrients, they are better equipped to concentrate in class, participate in physical activities, and maintain stable energy levels throughout the day. A well-rounded school lunch typically consists of whole grains, lean proteins, healthy fats, and plenty of fruits and vegetables. This combination is vital for sustaining growth and ensuring that children receive the vitamins and minerals necessary for their development.
Sandwiches, particularly those crafted with whole grain bread and lean proteins, can serve as an excellent base for a nutritious meal. Whole grains provide fiber, which is essential for healthy digestion and can help keep kids feeling full longer. Lean proteins, such as turkey breast, offer the building blocks for muscle development, while fresh vegetables add a burst of flavor and a variety of nutrients that are crucial for a child’s diet.
The Grilled School Lunch Sandwich Melt is designed to tick all these boxes. Its combination of ingredients not only satisfies cravings but also nurtures growing bodies, making it an ideal choice for school lunches.
Getting Started with the Grilled School Lunch Sandwich Melt
Before diving into the specifics of this delicious sandwich, it’s essential to take a closer look at the key ingredients that make this recipe stand out. Each component has been selected not just for its flavor but also for its nutritional benefits. Let’s explore what goes into crafting the perfect Grilled School Lunch Sandwich Melt.
Whole Grain Bread
The foundation of any great sandwich starts with the bread, and whole grain varieties are the best choice for a nutritious school lunch. Whole grain bread is rich in fiber, which aids in digestion and helps maintain steady energy levels. Unlike white bread, which often lacks essential nutrients due to the refining process, whole grain bread retains the bran and germ, providing vitamins B1, B3, and B5, as well as iron and magnesium. Incorporating whole grains into your child’s diet can promote heart health and reduce the risk of chronic diseases later in life.
Unsalted Butter
To achieve that perfect golden crust and mouthwatering flavor when grilling, unsalted butter is a must. While it may seem like a simple ingredient, butter plays a crucial role in both texture and taste. Unsalted butter allows for greater control over the seasoning, ensuring that the sandwich remains balanced without excessive salt. Additionally, it is a source of healthy fats, which are essential for brain development in children.
Cheddar Cheese
Cheddar cheese is a beloved ingredient that adds richness and melty goodness to the Grilled School Lunch Sandwich Melt. Beyond its delicious flavor, cheddar is a powerhouse of nutrition. It is packed with calcium, which is vital for building strong bones and teeth, as well as protein, which supports muscle growth and repair. Moreover, cheese can be a source of probiotics when made from whole milk, contributing to gut health.
Turkey Breast
For a lean source of protein, turkey breast is an excellent choice. Low in fat and high in protein, it provides essential amino acids that are necessary for growth and development. Turkey is also a good source of B vitamins, which play a key role in energy production and the formation of red blood cells. Including turkey in the Grilled School Lunch Sandwich Melt not only enhances the flavor but also ensures that the meal is satisfying and nutritious.
Pesto Sauce
Pesto sauce adds a unique flavor profile to the sandwich, elevating it beyond the ordinary. Typically made from fresh basil, garlic, pine nuts, Parmesan cheese, and olive oil, pesto is rich in antioxidants and healthy fats. The fresh herbs in pesto provide a burst of flavor and numerous health benefits, including anti-inflammatory properties. This sauce also introduces a vibrant green color to the sandwich, making it visually appealing for kids.
Tomato
Incorporating fresh tomato slices into the sandwich not only adds juiciness but also enhances its nutritional value. Tomatoes are an excellent source of vitamins C and K, as well as potassium. They contain lycopene, a powerful antioxidant linked to numerous health benefits, including heart health and reduced risk of certain cancers. The fresh, tangy flavor of tomatoes complements the sandwich beautifully, contributing both taste and nutrition.
Arugula or Spinach
Adding a layer of arugula or spinach to the sandwich introduces a nutrient-rich element that enhances both flavor and health benefits. Leafy greens are packed with vitamins A, C, and K, along with iron and calcium. They are also low in calories and high in fiber, making them a perfect addition to balance out the richness of cheese and butter. Plus, the peppery taste of arugula or the mild flavor of spinach can add a delightful crunch to each bite.
Salt and Pepper
While salt and pepper may seem like basic seasonings, they play a vital role in enhancing the overall flavor of the sandwich. A sprinkle of salt can bring out the natural flavors of the ingredients, while freshly cracked pepper adds a hint of spice. It’s important to use these seasonings judiciously, especially when preparing meals for children, to ensure that the sandwich remains healthy without compromising taste.
The Initial Steps
With a strong understanding of the ingredients, you’re now ready to start preparing the Grilled School Lunch Sandwich Melt. The initial steps involve gathering your ingredients and tools, as well as preparing the fillings to ensure that your sandwich is packed with flavor and nutrition.
1. Gather Your Ingredients: Make sure you have all the ingredients laid out on your kitchen counter. You’ll need whole grain bread, unsalted butter, cheddar cheese, turkey breast, pesto sauce, fresh tomatoes, arugula or spinach, salt, and pepper.
2. Prep the Vegetables: Slice the tomatoes and rinse the arugula or spinach thoroughly. Pat them dry with a paper towel to remove excess moisture, ensuring that your sandwich remains crisp and does not become soggy.
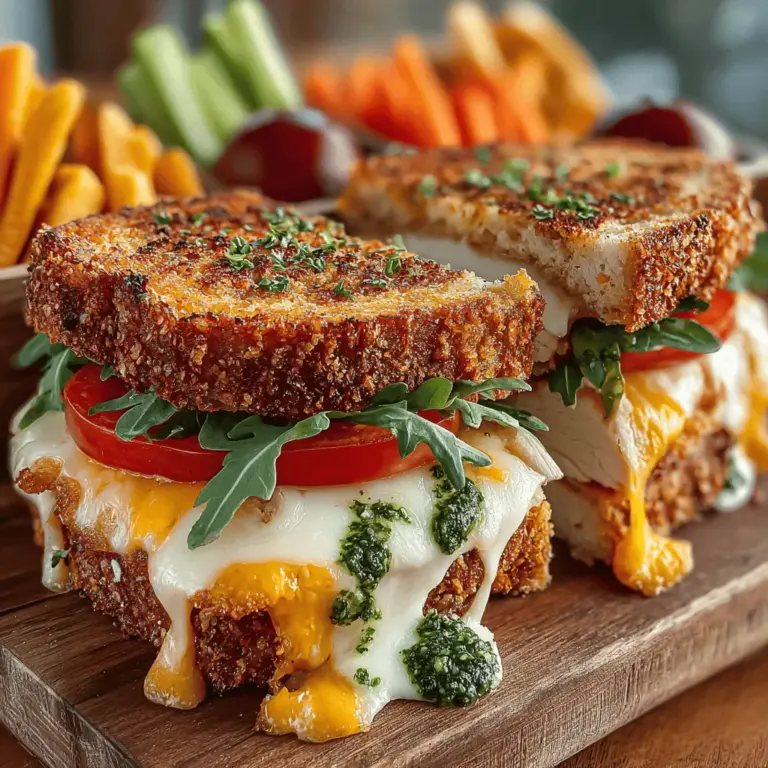
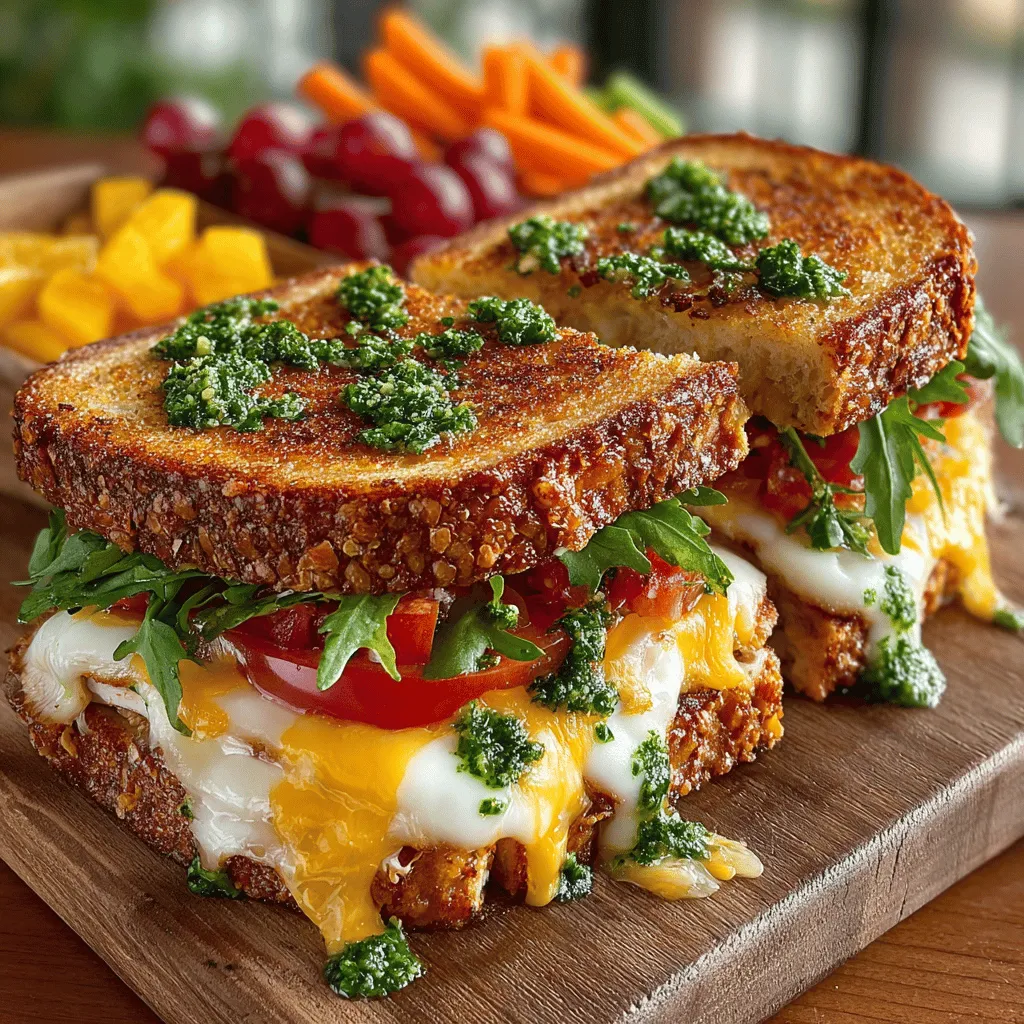
3. Assemble Your Sandwich: Start by spreading a generous layer of pesto sauce on one slice of whole grain bread. Layer slices of turkey breast over the pesto, followed by the cheddar cheese, tomato slices, and a handful of arugula or spinach. Top it off with another slice of whole grain bread, creating a beautiful sandwich ready for grilling.
4. Butter the Bread: Spread a thin layer of unsalted butter on the exterior of both slices of bread. This will help achieve that perfect golden-brown crust while grilling.
5. Prepare to Grill: Preheat a skillet or griddle over medium heat. Once hot, place the sandwich in the skillet, allowing it to sizzle and begin cooking.
By following these initial steps, you’re on your way to creating a mouthwatering Grilled School Lunch Sandwich Melt that your kids will love. This recipe not only caters to their taste buds but also ensures they enjoy a meal packed with essential nutrients, setting them up for a successful day at school. Stay tuned for the next part, where we will cover the grilling process and additional tips to make this sandwich even more appealing.
The Grilled School Lunch Sandwich Melt is not just a delicious meal; it’s a culinary experience that brings comfort and joy to both kids and adults alike. This sandwich is perfect for school lunches and can easily be prepared in advance, making it a go-to choice for busy parents. Let’s dive into the details, focusing on the steps to create this mouthwatering sandwich, tips for customization, and reasons why it’s an ideal option for school lunches.
Optional Mayo
Adding mayo to your Grilled School Lunch Sandwich Melt is an option that can elevate the flavor profile significantly. Mayo brings a rich creaminess that balances the savory ingredients, enhancing the overall taste. When spread between the layers, it not only provides moisture but also helps create a delightful texture that compliments the crispy exterior of the grilled bread. If you’re a fan of flavors, consider mixing in spices like garlic powder or paprika into the mayo for an extra kick.
Step-by-Step Guide to Making the Grilled School Lunch Sandwich Melt
Preparing the Bread
Start by selecting your bread. Whole grain, sourdough, or classic white bread all make excellent choices. For the best results, make sure to use fresh bread that has a good structure to hold the ingredients.
1. Butter the Slices: Generously spread softened butter on one side of each slice of bread. Butter adds not only flavor but also helps create that irresistible golden-brown crust when grilled. The fat in the butter enhances the bread’s texture, making it crispy and mouthwatering.
Assembling the Sandwich
Now that your bread is ready, it’s time to layer your sandwich.
1. Layering the Ingredients: Place the unbuttered side of one slice on a clean surface. Start with a slice of cheese; cheddar, mozzarella, or a blend works beautifully. Next, add your choice of protein—sliced turkey, ham, or even grilled chicken. Follow this with another layer of cheese to ensure everything melts together beautifully. Finally, add any veggies like spinach or tomatoes for a burst of freshness.
2. Final Touch: Top the sandwich with the second slice of bread, buttered side up. This layering method ensures that the cheese melts evenly and that every bite is packed with flavor.
Grilling the Sandwich
For a perfect Grilled School Lunch Sandwich Melt, grilling is crucial.
1. Heat the Pan: Preheat a skillet or frying pan over medium heat. A too-high temperature can burn the bread before the cheese melts, while too low will leave you with soggy bread.
2. Cook Time: Carefully place the sandwich in the pan. Grill for about 3-4 minutes on one side or until it’s golden brown. Keep an eye on it to prevent burning.
Flipping and Finishing
Flipping the sandwich can be a delicate process, but with the right technique, it’s easy.
1. Use a Spatula: Gently slide a spatula underneath the sandwich. Hold the sandwich together with your other hand and flip it over in one smooth motion. This technique helps prevent ingredients from spilling out.
2. Finish Grilling: Grill the second side for another 3-4 minutes until it’s also golden brown and the cheese has melted. If you want to ensure the cheese melts thoroughly, you can cover the pan with a lid for the last minute of grilling.
Serving Suggestions
To create a balanced meal, consider pairing your Grilled School Lunch Sandwich Melt with nutritious sides.
– Veggie Sticks: Carrot, cucumber, or bell pepper sticks not only add a crunch but also a refreshing contrast to the warm sandwich.
– Fruit Options: Fresh fruit like apple slices or grapes complements the savory sandwich and adds a touch of sweetness.
These sides not only enhance the meal’s nutritional value but also make it visually appealing, encouraging kids to enjoy their lunch.
Tips for Customizing Your Sandwich
This sandwich is incredibly versatile, allowing for endless customization to suit your family’s preferences.
– Cheese Varieties: Experiment with different cheeses like pepper jack for a spicy kick or gouda for a smokier flavor.
– Protein Substitutes: Swap out turkey for ham, roast beef, or even a plant-based protein for a vegetarian option.
– Sauces and Spreads: Try using pesto, hummus, or mustard in place of mayo for varied flavor profiles. Each spread brings its own unique taste, making your sandwich exciting each time.
– Seasonal Vegetables: Add seasonal veggies like zucchini, roasted peppers, or even arugula for a fresh crunch.
Encouraging kids to participate in customizing their sandwiches can also make lunchtime more enjoyable and interactive.
Why This Sandwich is Perfect for School Lunches
The Grilled School Lunch Sandwich Melt is a fantastic choice for school lunches for several reasons:
1. Convenience: You can make this sandwich ahead of time. Simply prepare it the night before, grill it, and store it in an airtight container. It can be enjoyed cold or reheated, making it perfect for busy mornings.
2. Portability: The sandwich holds together well, making it easy to pack in a lunchbox without falling apart. It’s a mess-free option that kids can enjoy on the go.
3. Balanced Meal: With the option to include sides like fruits and veggies, this sandwich can form part of a balanced meal, ensuring your child gets a nutritious lunch.
4. Kid-Friendly: The gooey cheese and crispy bread appeal to children’s taste buds, making it a lunch they will look forward to.
Conclusion
The Grilled School Lunch Sandwich Melt is more than just a meal; it’s a delightful combination of flavors and textures that appeals to both kids and adults. With its nutritional value, ease of preparation, and versatility, it stands out as an ideal option for school lunches.
Encouraging your family to explore different ingredient combinations can enhance the experience and help develop healthy eating habits. So, gather your ingredients, follow the steps, and create this melting masterpiece. Share your experiences and variations with friends and family, fostering a community of healthy eating among families. Try this recipe today and watch as it becomes a beloved staple in your household!
