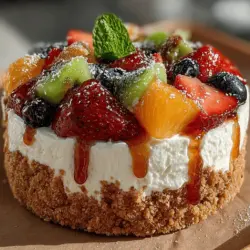
Sunny Delight No-Bake Summer Fruit Tart Recipe
As the sun shines brighter and temperatures rise, the allure of summer beckons us to indulge in refreshing treats that capture the season’s essence. One such delight is the Sunny Delight No-Bake Summer Fruit Tart, a dessert that embodies the vibrant flavors of ripe, seasonal fruits while offering a light and satisfying finish to any summer meal. Perfect for gatherings, picnics, or simply enjoying on a warm afternoon, this no-bake tart is an easy yet elegant option that requires minimal effort and maximum enjoyment.
The Joy of No-Bake Desserts
No-bake desserts have earned their popularity due to their convenience and simplicity. As the heat of summer makes the thought of turning on the oven less appealing, no-bake recipes shine as a practical alternative. They often require fewer ingredients and less time, allowing you to whip up something special without the fuss. The Sunny Delight No-Bake Summer Fruit Tart exemplifies this ease, making it possible to create a stunning dessert that impresses without the stress.
Seasonal ingredients play a vital role in the appeal of summer desserts. Fresh fruits, bursting with flavor and color, are at their peak during the warmer months. Using an array of seasonal produce not only enhances the taste but also elevates the visual appeal of the tart, turning it into a centerpiece for any occasion. From juicy strawberries to sweet peaches, the vibrant colors and varied textures of summer fruits come together to create a delightful experience for the senses.
Moreover, a fruit tart is remarkably versatile, making it suitable for a wide range of events. Whether you are hosting a garden party, celebrating a birthday, or simply looking to treat your family, this no-bake tart can be customized to suit your needs. You can mix and match fruits based on what’s available at your local market, ensuring that your dessert is always fresh and exciting.
Ingredients Overview
To create the Sunny Delight No-Bake Summer Fruit Tart, you’ll need a few key ingredients that work harmoniously to build flavor and texture, making each slice a delightful experience.
Graham Cracker Crust
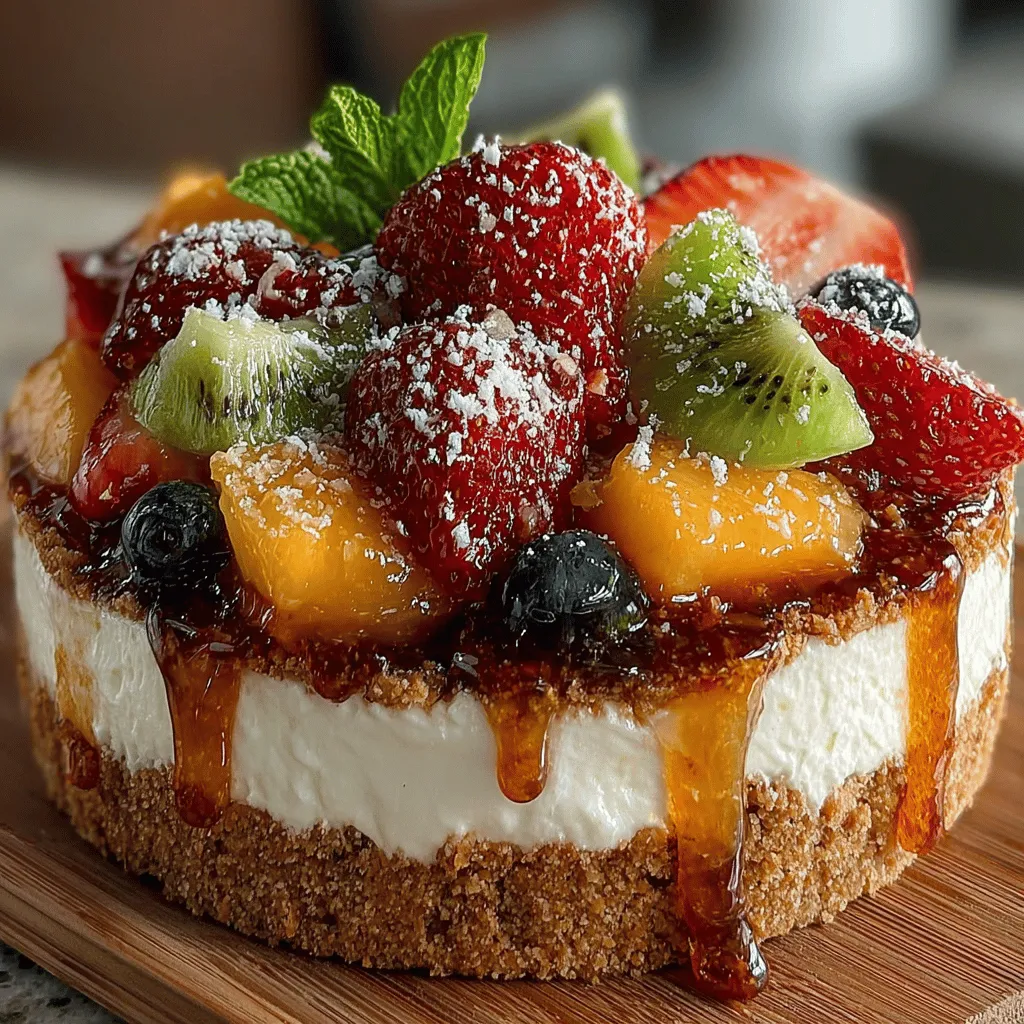
The foundation of this tart is the graham cracker crust, which provides a sweet and slightly crunchy contrast to the creamy filling and fresh fruit. The crust is easy to prepare, requiring just crushed graham crackers, butter, and a bit of sugar to enhance the flavor. The perfect crust should be both sturdy enough to hold the filling and crumbly enough to melt in your mouth.
Cream Cheese Filling
At the heart of this tart lies a rich and creamy filling made primarily from cream cheese. This ingredient is crucial for achieving the desired texture; it provides a luscious base that complements the sweetness of the fruits. Blending the cream cheese to a smooth consistency is essential, as it lays the groundwork for a light and airy filling. When whipped to perfection, the cream cheese becomes fluffy and indulgent, creating a delightful contrast with the tartness of the fruit.
Seasonal Fruits
No summer dessert would be complete without a bounty of fresh fruits. The choice of fruits can vary based on personal preference and seasonal availability, but popular options for this tart include strawberries, blueberries, peaches, and kiwis. Not only do these fruits add vibrant colors and textures, but they also deliver a punch of flavor that makes each bite refreshing and enjoyable. Using a mix of fruits also allows for a range of flavors, from sweet to tangy, ensuring that there’s something for everyone.
Apricot Preserves
To finish off the tart and enhance both its appearance and taste, a layer of apricot preserves is applied as a glaze. This glossy coating adds a touch of sweetness and helps to bind the fruits to the filling. The preserves not only enhance the visual appeal of the tart, giving it a professional finish, but also provide a delicious contrast to the rich creaminess of the filling and the freshness of the fruits.
Step-by-Step Guide to Making Sunny Delight No-Bake Summer Fruit Tart
Now that you understand the appeal of this delightful dessert and the role of each ingredient, let’s dive into the preparation process.
Preparing the Crust
Begin by preparing the graham cracker crust. In a mixing bowl, combine graham cracker crumbs with melted butter and a bit of sugar. The mixture should resemble wet sand; if it’s too dry, add a little more melted butter. Press the mixture firmly into the bottom and up the sides of a tart pan, ensuring an even layer for structural integrity.
Once the crust is shaped, it’s crucial to chill it in the refrigerator for at least 30 minutes. This step helps the crust firm up, making it easier to slice and serve later. While the crust chills, you can focus on making the cream cheese filling.
Making the Cream Cheese Filling
To create a light and creamy filling, start by beating the cream cheese in a mixing bowl until it becomes smooth and free of lumps. This step is essential, as any lumps will affect the texture of the filling. Once the cream cheese is creamy, gradually incorporate powdered sugar to sweeten it up, mixing until well combined.
Next, in a separate bowl, whip heavy cream until stiff peaks form. This technique adds air to the filling, ensuring a light texture. Gently fold the whipped cream into the cream cheese mixture, being careful not to deflate the airiness you’ve just created. The goal is to achieve a light and fluffy filling that will complement the tart fruits beautifully.
With the crust prepared and the filling complete, you are ready to assemble your Sunny Delight No-Bake Summer Fruit Tart. In the next section, we will explore how to layer the fruits and finish the tart with apricot preserves, creating a stunning dessert that is sure to be the highlight of your summer gatherings.
Assembling the Tart
Once your tart crust has cooled completely, it’s time to fill it with the luscious cream cheese mixture. Start by gently spooning the filling into the tart shell, ensuring it fills all corners and crevices. The importance of even distribution cannot be overstated; not only does it enhance the visual presentation of your tart, but it also ensures that each slice offers a balanced flavor experience.
To creatively arrange the mixed fruits, consider a pattern that highlights their colors and textures. For instance, you can start with larger fruits like peach slices or strawberries at the outer edge of the tart, then layer smaller berries like blueberries and raspberries towards the center. This arrangement not only creates a stunning visual appeal but also allows guests to enjoy a variety of flavors with each slice. You can even create a rainbow effect by using fruits in a color gradient, making your tart an eye-catching centerpiece for any summer gathering.
Glazing the Tart
To give your tart a professional finish, glazing is essential. Start by placing 1/4 cup of apricot preserves in a small saucepan over low heat. Stir continuously until the preserves are melted and smooth, which usually takes about 2-3 minutes. This process not only creates a glossy finish but also enhances the flavor of the fruits, providing a subtle sweetness that complements the tart’s filling.
Once your glaze is ready, use a pastry brush to gently apply it over the arranged fruits. This step adds a beautiful sheen and helps to protect the fruits from oxidation, keeping them looking fresh and vibrant. The advantage of glazing extends beyond aesthetics; it also enhances the overall flavor profile, making each bite more delightful.
Chilling and Serving
Once the tart has been assembled and glazed, it’s crucial to allow it to chill in the refrigerator for at least 2-4 hours, or until the filling has set. This setting time influences the texture of the tart, giving it a firm yet creamy consistency that holds together beautifully when sliced. A well-chilled tart makes for much easier serving and a more enjoyable eating experience.
When ready to serve, consider garnishing your tart with fresh mint leaves. Not only do they add a pop of color, but mint also provides a refreshing contrast to the sweet and creamy flavors of the tart. Simply place a few sprigs on top or around the edges to elevate the presentation.
Exploring Flavor Combinations
While the original recipe calls for a delightful mix of seasonal fruits, feel free to get creative based on what you have available. In summer, fruits like blackberries, cherries, or even tropical fruits like kiwi and mango can add an exotic twist to your tart.
Additionally, consider enhancing the cream cheese filling with various flavors. A hint of citrus zest from lemons or oranges can brighten the filling, while adding a dollop of yogurt can introduce a tangy note that pairs beautifully with the sweetness of the fruits. The versatility of this tart makes it a great canvas for experimenting with flavors.
Nutritional Aspects of the Tart
This Sunny Delight No-Bake Summer Fruit Tart not only provides a visual feast but also packs a nutritional punch. The fruits used—strawberries, peaches, blueberries, and more—are rich in vitamins, antioxidants, and fiber. Strawberries, for instance, are an excellent source of vitamin C, while blueberries are known for their high antioxidant content.
The balance between indulgence and health in desserts is often a challenge, but this tart manages to strike a delightful harmony. The cream cheese filling provides a creamy richness while also offering some protein, making it a satisfying dessert that feels indulgent without being overly heavy.
Serving Suggestions and Pairings
To enhance the experience of enjoying your tart, consider serving it with a side of whipped cream or a scoop of vanilla ice cream. The lightness of whipped cream complements the tart’s flavors, while ice cream adds a creamy, cold contrast that is especially refreshing on a warm day.
For beverages, a chilled glass of sparkling water or lemonade pairs wonderfully with the tart, highlighting its fruity freshness. If you prefer something a bit stronger, a light white wine or a fruity rosé can complement the dessert beautifully, making it a delightful ending to a summer meal.
Conclusion
Reflecting on the vibrant flavors and textures of the Sunny Delight No-Bake Summer Fruit Tart, it’s easy to see why this dessert has become a beloved choice for summer gatherings. Not only does it satisfy sweet cravings with its combination of fresh fruits and creamy filling, but it also celebrates the bounty of seasonal produce.
This simple yet elegant tart is a testament to the joys of summer cooking, inviting you to embrace the season’s offerings and share them with loved ones. Whether it’s a picnic, a barbecue, or a family dinner, this tart is sure to be a show-stopping addition that brings people together. So gather your favorite fruits, get creative with the flavors, and enjoy this delicious celebration of summer!