Introduction
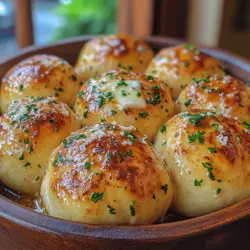
In the realm of culinary delights, few dishes evoke the same warmth and comfort as freshly baked garlic knots. These delectable morsels, with their buttery richness and aromatic garlic flavor, have a way of bringing people together. Whether served as an appetizer, a side dish, or a tantalizing snack, garlic knots are a beloved staple in many households. Their pillowy texture and savory taste make them a universal favorite that transcends cultural boundaries, making them a perfect addition to any meal, from family dinners to festive gatherings.
The Buttery Garlic Knots Delight recipe captures the essence of this beloved treat, transforming simple ingredients into a sensational experience. This article serves as your comprehensive guide to creating these mouthwatering knots from scratch. We will delve into the key ingredients that contribute to their unique flavor, the science behind the dough-making process, and the essential techniques needed to shape the knots perfectly. By the end of this guide, you’ll not only have a delicious dish to share but also a deeper understanding of the culinary art behind it.
Understanding the Ingredients
To create the ultimate Buttery Garlic Knots, it’s essential to recognize the role that each ingredient plays in the final product. Understanding these components will enhance your appreciation for the flavors and textures that come together in this dish.
Yeast: The Rising Star
At the heart of any great bread or dough lies yeast, the unsung hero that provides lift and texture. In the case of our garlic knots, we will use active dry yeast, a vital ingredient that ferments the dough. As yeast feeds on the sugars present in the flour, it produces carbon dioxide gas, causing the dough to rise and develop that desirable airy structure. Properly activating the yeast is crucial for achieving the perfect texture, as it ensures that your knots will be light and fluffy rather than dense and heavy.
Flour: The Foundation of the Dough
Flour is the backbone of our garlic knots, and in this recipe, all-purpose flour is the star. Its balanced protein content allows for adequate gluten development, providing structure and elasticity to the dough. When combined with water, yeast, and other ingredients, flour absorbs moisture and binds everything together, creating a cohesive dough. Choosing high-quality flour will directly impact the texture and final outcome of your garlic knots, making it an essential ingredient for success.
Butter: The Secret to Richness
Butter plays a dual role in our recipe, both as a key ingredient in the dough and as a flavorful topping. When melted and mixed into the dough, butter contributes richness and moisture, enhancing the overall flavor profile of the knots. For the finishing touch, melted butter is brushed over the knots after baking, infusing them with a decadent buttery flavor and a beautiful golden sheen. This two-fold use of butter ensures that every bite is a delightful experience, making it an indispensable part of the recipe.
Garlic and Herbs: Flavor Powerhouses
No garlic knot would be complete without the distinct taste of garlic and the freshness of herbs. Fresh garlic is essential for imparting that signature garlic bread flavor that we all crave. When baked, garlic develops a sweet and mellow profile, complementing the buttery notes of the knots. Additionally, chopped parsley and a blend of herbs will elevate the flavor, adding freshness and a pop of color to your finished dish. These ingredients are not just for taste; they also enhance the visual appeal, turning your knots into a beautiful centerpiece for any table.
The Science Behind the Perfect Dough
Creating the perfect dough is both an art and a science. Understanding the processes involved will help you master the craft of making garlic knots. Key steps include activating the yeast, kneading the dough, and allowing it to rise.
The Activation of Yeast
To activate active dry yeast, begin by dissolving it in warm water (about 110°F or 43°C) with a pinch of sugar. The warmth and sugar provide an ideal environment for the yeast to thrive. Allow the mixture to sit for about 5 to 10 minutes, during which you should see it froth and bubble—this indicates that the yeast is alive and ready to work its magic on your dough. Properly activating the yeast is crucial, as it sets the foundation for a successful rise.
Kneading Techniques
Kneading is a vital step in developing the gluten structure within the dough, which gives the knots their delightful chewiness. Once your ingredients are combined, turn the dough onto a lightly floured surface and begin kneading. Use the palm of your hand to push the dough away from you, then fold it back over itself. Rotate the dough a quarter turn and repeat this motion for about 8 to 10 minutes. The goal is to achieve a smooth, elastic dough that springs back when gently poked. If the dough feels sticky, sprinkle a little more flour as needed, but be cautious not to add too much, as it can affect the texture.
The Importance of Resting Time
After kneading, it’s time to let the dough rest and rise. Place the dough in a lightly greased bowl, cover it with a damp cloth or plastic wrap, and allow it to rise in a warm, draft-free area. This resting period is crucial, as it allows the yeast to ferment and produce carbon dioxide, causing the dough to double in size. Depending on the temperature of your kitchen, this can take anywhere from 1 to 2 hours. The longer the dough rests, the more flavor it develops, resulting in a more complex taste in your final product.
Shaping the Knots: A Step-by-Step Guide
Once your dough has risen and is ready to be transformed into garlic knots, the fun part begins. Shaping the knots is a simple yet rewarding process that adds a personal touch to your baking. Here’s a detailed walkthrough on how to shape your dough into beautiful knots:
1. Divide the Dough: After the dough has risen, gently punch it down to release the air. Turn it out onto a floured surface and divide it into equal portions, typically about 12 pieces for standard-sized knots.
2. Roll into Strips: Take one piece of dough and roll it into a long, thin strip, approximately 8 to 10 inches in length. Use your hands to gently stretch and elongate the dough, ensuring it remains even throughout.
3. Form the Knot: Once you have a long strip, take each end and cross them over each other to form a loop. Then, tuck the ends underneath the knot to secure it in place. This technique not only creates an appealing shape but also ensures that the knot holds its form during baking.
4. Repeat the Process: Continue shaping the remaining pieces of dough in the same manner until all have been formed into knots. Place the shaped knots on a parchment-lined baking sheet, ensuring they are spaced apart to allow for further rising.
5. Final Rise: Cover the shaped knots with a clean kitchen towel and let them rise for an additional 15 to 20 minutes. This final rise helps to create that fluffy texture we all love.
In the following sections, we will dive deeper into baking the knots to perfection and the essential finishing touches that will elevate your Buttery Garlic Knots Delight to new heights. Stay tuned for the final steps to complete this culinary masterpiece!
Dividing the Dough
Once your dough has risen beautifully, it’s time to divide it into manageable pieces. This step is crucial for ensuring that each garlic knot bakes evenly. To divide the dough, first, punch it down gently to release any trapped air. Lightly flour your work surface to prevent sticking, and then roll the dough into a log shape, about 18 inches long.
Using a sharp knife or a dough cutter, cut the log into equal pieces. For standard-sized garlic knots, aim for pieces that are about 1 to 1.5 inches in width. If you want larger knots, you can adjust the size accordingly, but be cautious not to make them too big, as they will take longer to bake.
To ensure uniform baking, it’s helpful to weigh each piece of dough. A kitchen scale can help you achieve consistency, especially if you’re preparing a larger batch. Keeping the pieces uniform will allow them to rise and brown at the same rate, resulting in perfectly baked knots.
Knotting Techniques
Now comes the fun part: tying the perfect knot! Take one piece of dough and roll it into a 6- to 8-inch rope, ensuring it’s even in thickness. Gently twist the rope into a knot, crossing one end over the other. Once you’ve formed the knot, tuck the ends underneath the knot itself to create a neat appearance.
This technique not only makes your knots look professional but also helps them hold their shape during baking. For added flair, you can create a double knot by looping the rope around itself before tucking the ends. This method results in a fluffier and more appealing garlic knot.
If you’re looking for a quicker method, you can simply roll the dough into a ball and flatten it slightly before baking. However, this traditional knotting method allows for better absorption of the garlic butter later, enhancing the overall flavor.
Preparing the Irresistible Garlic Butter
The secret to the delightful flavor of Buttery Garlic Knots lies in the garlic butter. This mixture transforms the dough from simple bread to an irresistible treat. Start with unsalted butter, as it allows you to control the saltiness of the final dish. Melt your butter in a saucepan over low heat, ensuring it doesn’t bubble or brown.
Next, add minced fresh garlic to the melted butter. For a batch of 12 knots, about 4-5 cloves of garlic should suffice, but feel free to adjust this based on your personal preference. Simmer the mixture gently for about 1-2 minutes, allowing the garlic to infuse the butter without burning.
To elevate the flavor even further, consider adding fresh herbs such as parsley or oregano. Chop these finely and stir them into the garlic butter just before you remove it from the heat. This addition not only enhances the flavor but also adds a vibrant pop of color to your garlic knots.
Balancing Flavors
When preparing the garlic butter, finding the right balance of flavors is key. If you prefer a more robust garlic flavor, don’t hesitate to add an extra clove or two. Conversely, if you’re sensitive to garlic, you can reduce the amount.
Herbs are also a matter of personal taste. While parsley is a classic choice, you might enjoy experimenting with basil or thyme. Remember that dried herbs can also be used but should be added sparingly, as they are more concentrated than fresh herbs.
Simmering for Aroma
Simmering the garlic butter mixture is critical for achieving the best flavor infusion. By keeping the heat low, you allow the garlic to release its oils and aroma without burning. This gentle simmer helps to create a fragrant base that will coat the garlic knots beautifully.
You’ll know the garlic butter is ready when it becomes aromatic, filling your kitchen with a mouthwatering scent. Once you’ve achieved this, remove it from the heat and let it cool slightly before drizzling it over your knots.
Baking the Knots to Perfection
With your knots shaped and your garlic butter prepared, it’s time to bake. Preheat your oven to 375°F (190°C). A consistent oven temperature is crucial for even cooking. If your oven runs hot or cold, consider using an oven thermometer to ensure accuracy.
Place your garlic knots on a parchment-lined baking sheet, leaving enough space between each one to allow for expansion. Brush the knots generously with the garlic butter mixture, ensuring that each knot gets a good coating. This will help them achieve that golden color and rich flavor.
Ideal Oven Temperature
Baking at the right temperature ensures that your garlic knots rise and cook evenly. At 375°F, the exterior will become golden and crispy while the inside stays soft and fluffy. If you prefer a more toasted exterior, you can increase the temperature slightly in the last few minutes of baking, but keep a close eye to prevent burning.
Determining Doneness
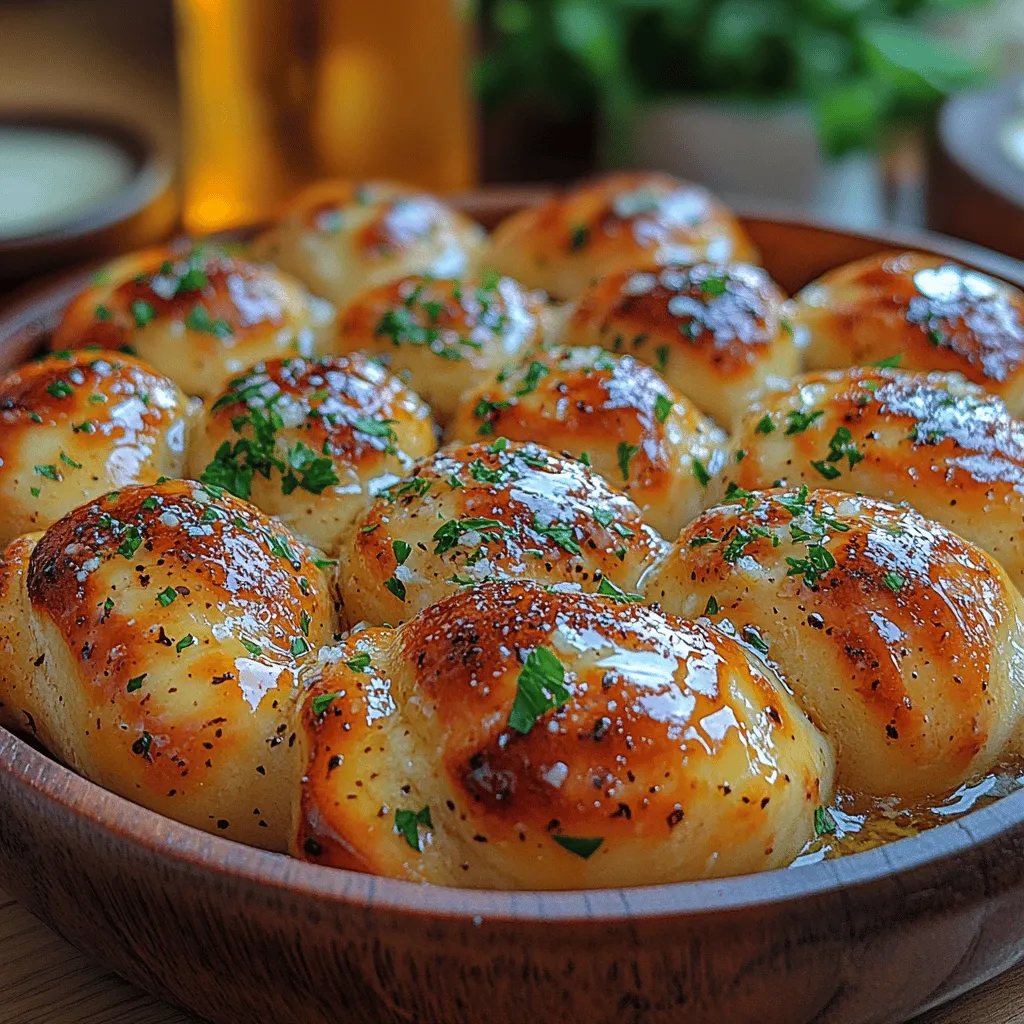
The baking time for your garlic knots will typically range from 15 to 20 minutes. To determine doneness, look for a beautiful golden-brown color on the surface. You can also tap the bottom of a knot; if it sounds hollow, it’s likely done.
A visual cue to look out for is the slight puffiness of the knots. They should have risen considerably and be soft to the touch. Once baked, remove them from the oven and immediately brush with any remaining garlic butter for an extra flavor boost.
Serving Suggestions and Variations
Your Buttery Garlic Knots are now ready to serve! They make a fantastic appetizer or side dish that pairs well with a variety of meals.
Classic Serving Suggestions
Consider serving your garlic knots with a side of marinara sauce for dipping. The tangy flavor complements the buttery richness of the knots perfectly. Alternatively, a garlic aioli or herb-infused olive oil can elevate the dining experience even further.
For a complete meal, serve your garlic knots alongside a fresh salad or a hearty pasta dish. They can also accompany a homemade pizza or be enjoyed as a snack on their own.
Creative Variations
If you’re feeling adventurous, try some creative variations of your garlic knots. For a cheesy twist, stuff each knot with mozzarella cheese before knotting. The result will be a gooey, delightful surprise in the center of each knot.
For those who enjoy a bit of heat, incorporate red pepper flakes into your garlic butter mixture or sprinkle them on top before baking. This will give your knots a spicy kick that pairs wonderfully with the buttery taste.
Another variation is to add different herbs or spices to the garlic butter. A pinch of smoked paprika can add depth, while fresh rosemary or thyme can introduce a fragrant touch.
Conclusion
Buttery Garlic Knots Delight are not just a side dish; they are an experience that brings warmth and joy to any table. With their simple ingredients and straightforward preparation, these knots are accessible to cooks of all skill levels. By following this detailed guide, you can create a batch of delicious garlic knots that will impress your family and friends, making every meal a little more special.
Embrace the art of baking and indulge in the comforting flavors of homemade garlic knots. Whether enjoyed fresh out of the oven or as part of a larger meal, these knots are sure to become a favorite in your kitchen. So roll up your sleeves, gather your ingredients, and get ready to delight your taste buds with these irresistible treats!