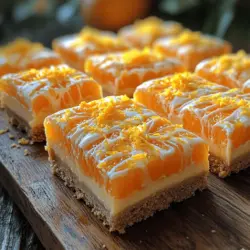
Silky Orange Creamsicle Bars Recipe
As the warm sun shines brightly and the days stretch longer, summer brings with it the sweet nostalgia of refreshing desserts that cool us down. Among these delights, few evoke as much fondness as the classic creamsicle, with its luscious orange flavor combined with a creamy vanilla center. The Silky Orange Creamsicle Bars take this beloved combination to a new level, transforming it into an easy-to-make, shareable treat that’s perfect for summer gatherings or a simple indulgence at home.
These bars are not just visually appealing; they pack a vibrant punch of flavor that dances on your palate. The creamy texture of the filling coupled with the zesty brightness of fresh oranges creates a delightful balance, making each bite a celebration of summer. Whether you’re hosting a backyard barbecue, enjoying a picnic in the park, or simply looking to satisfy your sweet tooth, these Silky Orange Creamsicle Bars are sure to impress.
Understanding the Ingredients
To create the perfect Silky Orange Creamsicle Bars, it’s essential to use fresh, high-quality ingredients. Each component plays a crucial role in achieving the ultimate flavor and texture. Here’s a closer look at the key ingredients you’ll need for this delightful recipe:
– Graham Cracker Crumbs: The base of your bars, graham cracker crumbs provide a sweet and slightly nutty flavor. They serve as the perfect foundation for the creamy filling while adding a satisfying crunch.
– Unsalted Butter: Butter is essential for binding the graham cracker crumbs together, creating a firm yet tender crust. Using unsalted butter allows you to control the flavor balance in your dessert.
– Sugar: A touch of granulated sugar sweetens the crust, enhancing the overall flavor profile without overpowering the zesty orange filling.
– Cream Cheese: The star of the creamy filling, cream cheese provides a smooth texture and rich flavor. It balances the sweetness of the sugar and complements the brightness of the orange.
– Fresh Orange Juice and Zest: For an authentic citrus flavor, fresh orange juice is a must. The zest adds an extra layer of aromatic intensity, elevating the overall taste and aroma of the bars.
– Whipped Topping: This light and airy ingredient contributes to the creaminess of the filling while keeping it light and fluffy.
When selecting your ingredients, opt for fresh oranges to squeeze your juice and zest. This ensures that the natural oils and vibrant flavors are captured, giving your creamsicle bars that signature taste that transports you back to sunny summers of your childhood.
Crafting the Perfect Crust
A great dessert begins with a solid foundation, and when it comes to Silky Orange Creamsicle Bars, the crust is no exception. While graham cracker crumbs are a classic choice, there are alternatives such as crushed vanilla wafers or even gluten-free options like almond flour for those with dietary restrictions. However, for traditionalists, graham crackers provide the ideal flavor and texture.
Here’s a step-by-step guide to preparing the crust:
1. Preheat the Oven: Begin by preheating your oven to 350°F (175°C). This ensures that the crust bakes evenly and achieves a golden color.
2. Prepare the Baking Pan: Line an 8-inch square baking pan with parchment paper, allowing some overhang on the sides. This will make it easier to remove the bars once they are set.
3. Mix Graham Cracker Crumbs, Sugar, and Butter: In a mixing bowl, combine 1 ½ cups of graham cracker crumbs with ¼ cup of granulated sugar. Melt ½ cup of unsalted butter and pour it into the crumb mixture. Stir until the crumbs are evenly coated and resemble wet sand.
4. Press the Mixture into the Pan: Pour the crumb mixture into the prepared baking pan. Use the back of a measuring cup or your fingers to press the crumbs firmly and evenly into the bottom of the pan. This step is crucial for achieving a sturdy crust that holds together once baked.
5. Bake the Crust: Place the pan in the preheated oven and bake for about 8-10 minutes, or until the crust is lightly golden and fragrant. Keep an eye on it to prevent over-baking, as a dark crust can overshadow the bright flavors of the filling.
6. Cool the Crust: Once baked, remove the crust from the oven and allow it to cool completely in the pan. This cooling time is essential for ensuring the filling sets properly later on.
To achieve the perfect texture, it’s important not to compress the crust mixture too tightly. A light hand will allow air to circulate, resulting in a crust that is both firm and tender.
Creating the Creamy Orange Filling
Now that your crust is prepared and cooled, it’s time to focus on the star of the show—the creamy orange filling. The key to a luscious filling lies in the combination of ingredients and the technique used to mix them.
1. Prepare the Cream Cheese: Start with 8 ounces of room-temperature cream cheese. This will make it easier to blend smoothly with the other ingredients. Beat the cream cheese in a mixing bowl until it’s creamy and free of lumps.
2. Add Sugar and Orange Flavor: Gradually mix in 1 cup of powdered sugar until well combined. This adds sweetness without the graininess of granulated sugar. Next, incorporate ¼ cup of fresh orange juice and the zest of one large orange to enhance the citrus profile.
3. Fold in the Whipped Topping: Finally, gently fold in 1 cup of whipped topping until fully combined. This step adds airiness to the filling, making it light and enjoyable.
4. Spread the Filling Over the Crust: Pour the creamy orange mixture over the cooled crust, spreading it evenly with a spatula. Take care to cover the entire surface to ensure every bite is filled with that delicious orange flavor.
5. Chill to Set: Place the pan in the refrigerator for at least four hours or until the filling is fully set. This chilling time is essential for allowing the bars to firm up, making them easier to cut into squares.
Creating the creamy orange filling is a simple yet rewarding process that beautifully complements the crunchy crust. By using fresh ingredients and taking the time to carefully blend them, you’ll unlock the vibrant flavors that make these Silky Orange Creamsicle Bars a standout summer dessert.
Stay tuned for the next part of the article, where we will explore the finishing touches and presentation of these delightful bars, ensuring they not only taste amazing but look stunning too.
Detailed Instructions on Achieving the Perfect Creamy Consistency
Creating the ultimate creamy filling for your Silky Orange Creamsicle Bars involves a few essential techniques that ensure a smooth and velvety texture. Start by gathering your ingredients, including heavy cream, powdered sugar, and fresh orange juice.
Mixing Techniques for Achieving Fluffiness
1. Chill Your Equipment: For the best results, chill your mixing bowl and beaters in the refrigerator for about 15 minutes before you start. Cold equipment helps the cream whip up faster and increases fluffiness.
2. Whipping the Cream: In your chilled bowl, pour in the heavy cream and beat on medium speed until soft peaks form—this should take about 2-3 minutes. Soft peaks mean that the cream will hold its shape but still have a velvety texture.
3. Incorporating Powdered Sugar: Gradually add the powdered sugar while continuing to whip the cream. The sugar not only sweetens the mixture but also stabilizes it. Aim for a balance between sweetness and the natural tanginess of the orange juice.
4. Adding the Orange Juice: Once your whipped cream is fluffy, gently fold in the fresh orange juice. Use a rubber spatula to incorporate the juice without deflating the whipped cream. This step is crucial, as it creates a light and airy filling that captures the essence of a creamsicle.
The Balance Between Sweetness from Powdered Sugar and Tanginess from Orange Juice
Finding the perfect balance between sweetness and tanginess is key. Aim for about 1/2 cup of powdered sugar per cup of heavy cream. Taste the mixture after folding in the orange juice; if it feels too tangy, you can add a bit more sugar to suit your palate.
Suggestions for Variations or Substitutions
Feel free to get creative with this recipe! Here are some suggestions:
– Different Citrus Fruits: Instead of oranges, you can experiment with other citrus fruits like blood oranges, lemons, or limes. Each fruit brings its unique flavor profile, creating a delightful variation of your creamsicle bars.
– Infusions: Consider infusing your cream with zest from the citrus you choose. This adds an extra layer of flavor that can elevate the overall taste of the bars.
Assembling the Bars
Once you have your creamy filling perfectly whipped, it’s time to assemble your Silky Orange Creamsicle Bars.
Instructions for Layering the Filling Over the Cooled Crust
1. Prepare the Crust: Ensure your crust has cooled completely. This step is vital to prevent the filling from melting into the crust.
2. Layering the Filling: Spoon the whipped cream mixture onto the cooled crust. Use an offset spatula to spread it evenly. Take your time to ensure the filling is smooth and reaches the edges, creating a beautiful layer.
3. Creating a Smooth Surface: For a polished look, gently smooth the top of the filling. This not only enhances the appearance but also ensures even distribution when cutting the bars.
Discussion on Optional Toppings
To elevate your bars further, consider adding toppings:
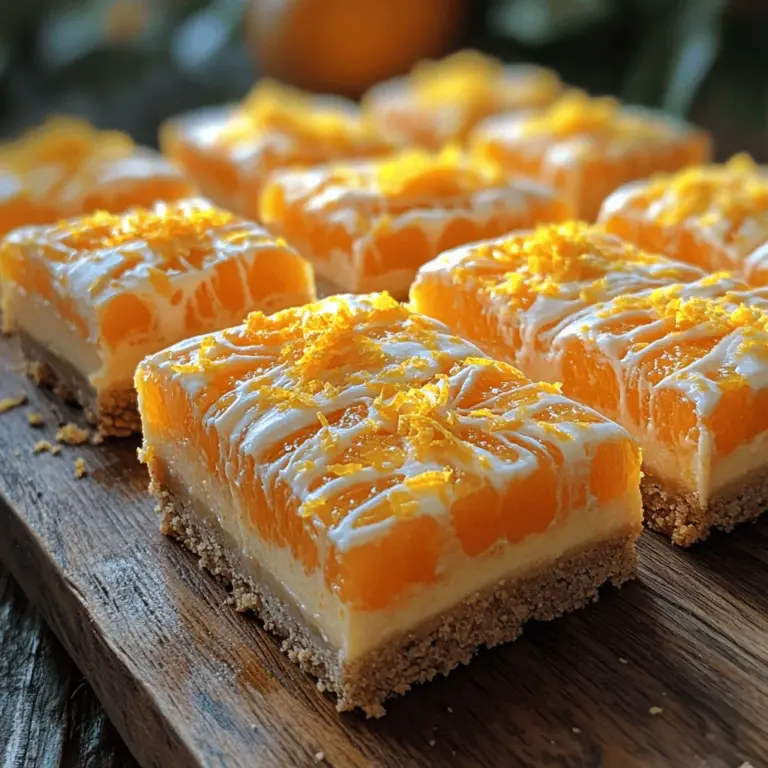
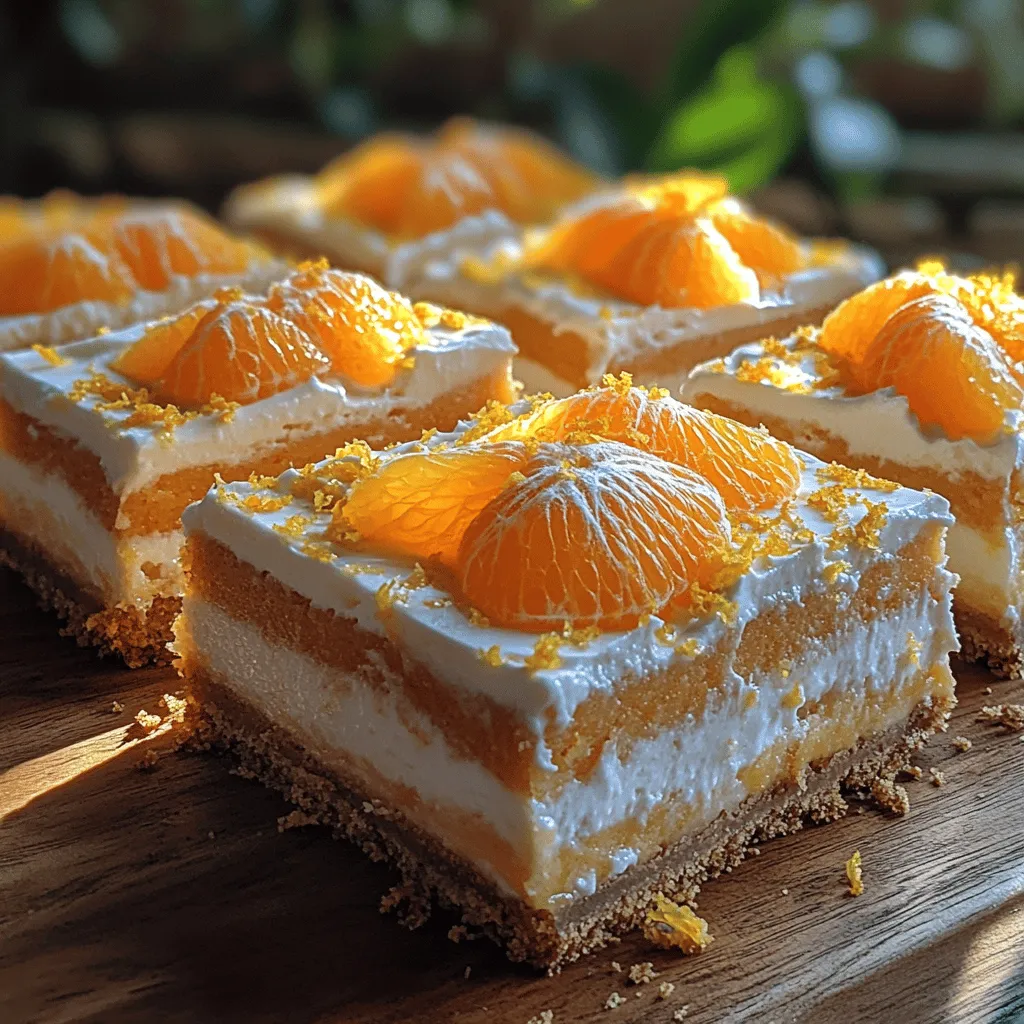
– Fresh Orange Segments: Arrange fresh orange segments on top for a burst of color and flavor.
– Additional Zest: A sprinkle of orange zest can add a beautiful pop of color and enhance the citrus aroma.
– Whipped Cream: A dollop of whipped cream on each bar before serving provides a classic touch and extra creaminess.
Tips for Achieving a Professional Finish and Presentation
For a professional touch, use a bench scraper to create clean edges on your bars. When garnishing, apply toppings uniformly to ensure each piece looks appealing. Presentation is key, so consider serving the bars on a decorative platter with vibrant garnishes.
Chilling and Setting the Bars
Chilling is a crucial step in the process, as it enhances the texture and flavor of your Silky Orange Creamsicle Bars.
Importance of Refrigeration for Texture and Flavor Enhancement
Refrigerating the bars allows the layers to set properly. The cold temperature solidifies the cream, ensuring that it holds its shape when sliced. Additionally, chilling enhances the flavors, allowing the sweetness of the cream to meld beautifully with the citrus notes.
Expected Time for Chilling and How to Know When the Bars are Set
Plan to chill the assembled bars for at least 4 hours, or ideally overnight. To check if they are set, gently press the center of the bars with a fingertip; it should feel firm yet slightly springy. If it feels too soft, give it some more time in the refrigerator.
Insights on the Science Behind Chilling Desserts and Its Impact on Flavors
Chilling desserts not only sets the texture but also allows flavors to develop. Cold temperatures can mute sweetness, making the overall taste more balanced and refreshing. This is why it’s essential to allow your creamsicle bars to chill adequately before serving.
Cutting and Serving Suggestions
Now that your bars are perfectly set, it’s time to cut and present them!
Techniques for Cutting the Bars into Perfect Squares or Rectangles
1. Use a Sharp Knife: A sharp, warm knife (run it under hot water and wipe it dry) will help you achieve clean cuts. This prevents the filling from sticking to the knife and ensures neat edges.
2. Cutting Strategy: Start by cutting into squares or rectangles, depending on your preference. Aim for uniform pieces to enhance the presentation.
3. Cleaning the Knife: Wipe the knife between cuts to maintain clean edges and prevent the filling from smearing.
Ideas for Garnishing and Presenting the Bars Creatively
For an eye-catching presentation:
– Plating: Serve the bars on a colorful platter, accompanied by garnishes like mint leaves or edible flowers.
– Drizzles: A light drizzle of melted white chocolate or a citrus glaze can add a sophisticated touch and additional flavor.
Recommendations for Serving
Consider pairing your Silky Orange Creamsicle Bars with refreshing beverages like iced tea or lemonade. They also complement other light desserts, making them an ideal choice for summer gatherings and celebrations.
Conclusion
Making and enjoying Silky Orange Creamsicle Bars is not just about the delightful flavors but also about creating memorable experiences. The creamy texture combined with the vibrant citrus notes makes these bars a refreshing treat that captures the essence of summer.
As you experiment with different flavors and presentations, remember that these bars can be a canvas for your creativity. Whether you’re hosting a summer party or simply enjoying a quiet evening at home, these creamsicle bars are sure to impress.
Encourage your friends and family to join in the fun of making these bars, sharing the joy of creating and enjoying a dessert that is both delicious and visually appealing. So, gather your ingredients, unleash your creativity, and enjoy the delightful flavors of Silky Orange Creamsicle Bars!