Introduction
There’s something truly enchanting about the aroma of freshly baked rolls wafting through your kitchen. Homemade rolls evoke a sense of warmth and comfort that store-bought alternatives simply can’t match. The process of kneading, rising, and baking allows you to create something not only delicious but also infused with your personal touch. Among the myriad of roll recipes, Herb & Garlic Swirl Rolls stand out as a particularly enticing option. These rolls are not just a side dish; they can elevate family dinners, gatherings, or any occasion where you want to impress guests with minimal effort.
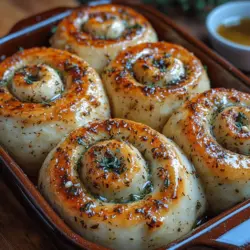
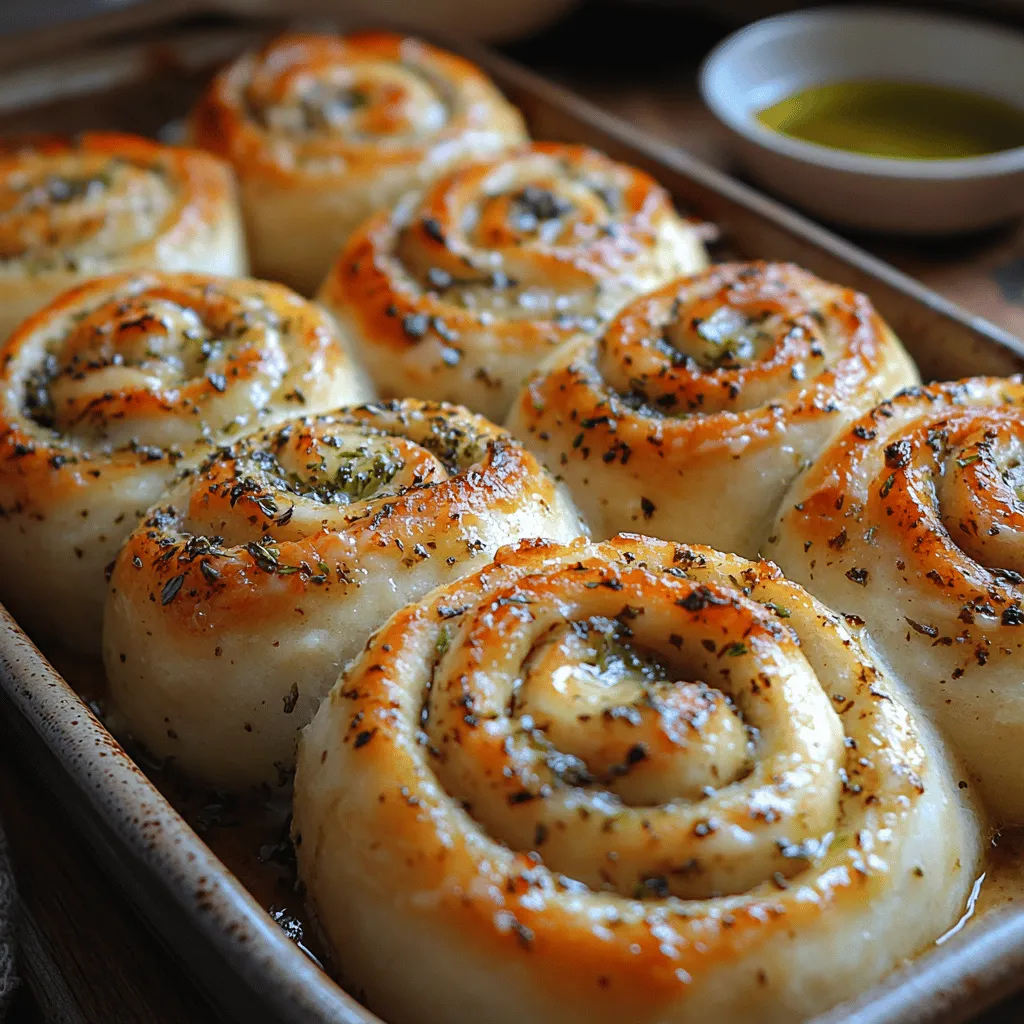
Herb & Garlic Swirl Rolls combine the rich, savory flavors of garlic and fresh herbs, creating a delightful swirl that captivates the palate. Their fluffy texture and aromatic filling make them a versatile addition to any meal. Whether served as a side dish for a hearty stew, a snack with some olive oil and balsamic vinegar, or even as a centerpiece for a festive gathering, these rolls are sure to please.
Understanding the Ingredients
Creating the perfect Herb & Garlic Swirl Rolls starts with understanding the essential ingredients that contribute to their delightful flavor and texture. The primary ingredients include all-purpose flour, yeast, milk, butter, and egg, each playing a crucial role in crafting the perfect dough.
Key Ingredients in the Dough
1. All-Purpose Flour: This is the backbone of your rolls, providing the structure and texture needed for a light and airy outcome. All-purpose flour is versatile, allowing for a good rise while maintaining a tender crumb. For the best results, consider using a high-protein flour, as it contributes to gluten development, which is essential for creating the chewy texture we desire in rolls.
2. Yeast: The fermentation process of yeast is what makes the dough rise, creating those delightful air pockets that make rolls fluffy. Active dry yeast or instant yeast can be used interchangeably in this recipe. Ensure that your yeast is fresh for the best results; expired yeast can lead to flat rolls that lack the desired lift.
3. Milk: Milk adds moisture to the dough and helps in achieving a rich flavor. The lactose in milk also aids in browning the rolls during baking, resulting in a golden crust. For a richer taste, you can opt for whole milk, but any milk will suffice.
4. Butter: Unsalted butter enriches the dough, adding a subtle flavor and making the rolls softer. The fat in the butter helps to create a tender texture by coating the flour particles, preventing the formation of too much gluten.
5. Egg: The addition of an egg not only adds richness but also contributes to the dough’s structure. Eggs provide moisture and fat, which helps in achieving that desirable soft texture. They also improve the overall flavor of the rolls.
Overview of the Filling Ingredients
The true magic of Herb & Garlic Swirl Rolls lies in the fragrant filling. The key components of the filling include garlic, fresh herbs, optional Parmesan cheese, and seasoning.
1. Garlic: Fresh garlic is a must for the filling. Its pungent aroma and flavor infuse the rolls with a savory depth that pairs beautifully with the herbs. Roasting the garlic before adding it to the filling can further enhance its sweetness and mellow its sharpness.
2. Fresh Herbs: Using fresh herbs is essential for delivering vibrant flavor. Popular choices include parsley, basil, dill, and thyme. Each herb brings its own unique profile, allowing you to tailor the filling to your tastes. Fresh herbs not only taste better than dried but also add a pop of color to your rolls.
3. Optional Parmesan Cheese: Adding grated Parmesan cheese is a great way to enhance the umami flavor of the rolls. While not necessary, the cheese melts beautifully and adds a rich, savory note that complements the garlic and herbs wonderfully.
4. Seasoning: Don’t underestimate the importance of seasoning! Salt and pepper are critical in baking, ensuring that your rolls are flavorful throughout. Salt strengthens the dough structure and balances the flavors, while pepper adds a subtle kick.
Step-by-Step Guide to Making Herb & Garlic Swirl Rolls
Now that we’ve covered the essential ingredients, it’s time to dive into the step-by-step process of making these delectable Herb & Garlic Swirl Rolls.
Preparing the Dough
1. Mixing Dry and Wet Ingredients: Begin by combining the dry ingredients. In a large mixing bowl, whisk together 4 cups of all-purpose flour, 2 teaspoons of salt, and 1 packet (2 ¼ teaspoons) of active dry yeast. In a separate bowl, warm 1 cup of milk until it’s slightly lukewarm (about 110°F). This temperature is ideal for activating the yeast without killing it. Add in 2 tablespoons of melted butter and 1 beaten egg, mixing until combined.
2. Combining the Mixtures: Gradually pour the wet ingredients into the dry ingredients, stirring with a wooden spoon or spatula until a shaggy dough forms. The dough should be slightly sticky but manageable. If it feels too wet, you can add a little more flour, a tablespoon at a time.
3. Achieving the Right Dough Consistency: Once you have a rough dough, turn it out onto a lightly floured surface. Knead the dough for about 8-10 minutes until it becomes smooth and elastic. To knead, push the dough away from you with the heel of your hand, fold it over, and repeat. The dough should become less sticky and more cohesive as you work. If it sticks to your hands too much, sprinkle in a little more flour, but be careful not to add too much, as it can lead to dense rolls.
Forming the Dough
1. Kneading: Kneading is a critical step that develops gluten, which gives the rolls their structure. You’ll know your dough is ready when it springs back slightly when pressed with a finger, and feels smooth and elastic.
2. First Rise: Once kneaded, shape the dough into a ball and place it in a lightly greased bowl. Cover the bowl with a clean kitchen towel or plastic wrap, and let it rise in a warm, draft-free area until it doubles in size, about 1 to 1.5 hours. This process allows the yeast to ferment, creating gas bubbles that give the rolls their light texture.
3. Creating a Warm Environment: To ensure optimal rising, preheat your oven to the lowest setting for just a couple of minutes, then turn it off. Place the covered bowl inside the warm oven. Alternatively, you can place the bowl in a sunny spot or near a heater.
Creating the Flavorful Filling
While the dough is rising, it’s the perfect time to prepare the herb and garlic filling.
1. Mixing the Herb & Garlic Filling: In a small bowl, combine 4-6 cloves of minced garlic (adjust based on your preference), 1 cup of finely chopped fresh herbs (like parsley and basil), and ½ cup of grated Parmesan cheese (if using). Season the mixture with salt and pepper to taste. This blend will create a fragrant and flavorful filling that will infuse the rolls once baked.
2. Discussion on Flavor Development: The combination of garlic and fresh herbs creates a symphony of flavors that enhances the overall taste of the rolls. Garlic provides a robust, aromatic base, while the herbs contribute freshness and brightness. The optional Parmesan adds a savory depth, making each bite an explosion of flavor.
With the dough rising and the filling prepared, you are well on your way to creating irresistible Herb & Garlic Swirl Rolls. The next steps will involve rolling out the dough, adding the filling, and shaping the rolls into their distinctive swirls. Stay tuned for the continuation of this delicious recipe journey!
Rolling Out the Dough
Once your dough has risen and doubled in size, it’s time to roll it out into a perfect rectangle, which is crucial for achieving those beautiful swirl rolls. Begin by lightly flouring your work surface to prevent sticking. Take your dough and gently punch it down to release the air before transferring it to the floured surface.
Techniques for Rolling Dough into the Perfect Rectangle
To roll out your dough into a rectangle, start by flattening it with your hands into a rough shape. Use a rolling pin to gently work from the center outward, applying even pressure to maintain a consistent thickness. Rotate the dough occasionally to ensure you are rolling it into a true rectangle—aim for approximately 12 inches by 18 inches.
Tips on Avoiding Sticking and Maintaining Even Thickness
To prevent sticking, keep a small bowl of flour nearby and dust your rolling pin and the dough as needed. Ensure that your work surface is well-floured, but be careful not to overdo it, as excess flour can make your rolls tough. Aim for an even thickness of about ½ inch throughout the rectangle; this consistency will help the rolls bake evenly.
Shaping and Baking the Rolls
Shaping the Rolls
Once your dough is rolled out into a rectangle, it’s time to shape the rolls. Spread the prepared herb and garlic mixture evenly across the surface of the dough, leaving about an inch border along the edges. This ensures that the filling doesn’t ooze out during baking.
Next, starting from one of the long edges, tightly roll the dough away from you, creating a log. As you roll, try to keep it as tight as possible without tearing the dough. Once fully rolled, pinch the seam closed to secure it.
Detailed Instructions on Rolling and Cutting the Dough
To cut the dough into individual rolls, use a sharp knife or a piece of dental floss for a cleaner cut. Mark the log into equal sections; typically, you can cut 12 rolls from this dough. Using the knife, slice through the dough, applying even pressure to avoid squishing the rolls. If using dental floss, slide it under the log, cross the ends over each other, and pull to create a clean cut.
Tips to Ensure Even and Uniform Slices for Consistent Baking
For uniform rolls, it’s best to measure your slices, aiming for about 1 to 1.5 inches thick. This ensures that all rolls bake evenly, resulting in a consistent texture. If you find some rolls are larger than others, you can gently reshape them after cutting to maintain their roundness.
Second Rise
Importance of This Step in Ensuring Fluffy Rolls
The second rise is a crucial step that allows the rolls to puff up and become light and airy. After shaping the rolls, place them in a greased baking dish or on a parchment-lined baking sheet, ensuring they are close but not touching. Cover them loosely with a clean kitchen towel or plastic wrap.
Best Practices for Covering and Letting the Rolls Rise
Let the rolls rise in a warm, draft-free area until they’ve doubled in size, which typically takes about 30 to 45 minutes. If your kitchen is cool, consider turning on your oven for a minute or two, then turning it off and placing the rolls inside. The residual warmth will create a perfect environment for rising.
Preheating the Oven
Discuss the Significance of Preheating for Even Baking
While the rolls are rising, preheat your oven to 375°F (190°C). Preheating is essential for ensuring that the rolls bake evenly from the start. If you place the rolls in an unheated oven, they may not rise properly during baking, resulting in dense rolls.
Baking the Rolls
Instructions on Brushing with Melted Butter and Adding Seasoning
Once the rolls have completed their second rise, it’s time to bake them. Before placing them in the oven, brush the tops generously with melted butter. This gives the rolls a beautiful golden color and adds a rich flavor. If desired, sprinkle additional garlic powder or herbs on top for extra flavor.
Tips for Knowing When the Rolls Are Perfectly Baked
Bake the rolls in the preheated oven for 20 to 25 minutes, or until they are golden brown and sound hollow when tapped on the bottom. An instant-read thermometer can also be used; the internal temperature should reach about 190°F (88°C). Once baked, remove the rolls from the oven and let them cool slightly before serving.
Serving Suggestions
Best Practices for Cooling and Serving the Rolls
Allow the herb and garlic swirl rolls to cool in the pan for about 10 minutes before transferring them to a wire rack. This prevents them from becoming soggy. These rolls are best enjoyed warm, but they can also be served at room temperature.
Pairing Ideas
These rolls pair beautifully with a variety of dishes. Serve them with a side of olive oil for dipping, or alongside hearty soups and fresh salads. They can also be the perfect accompaniment to pasta dishes or as part of a charcuterie board.
Presentation Tips for Serving at Gatherings or Special Occasions
For a stunning presentation, arrange the rolls on a beautiful platter or serve them in a basket lined with a cloth napkin. You can garnish the platter with fresh herbs or a sprinkle of sea salt for an added touch of elegance, making them perfect for gatherings or special occasions.
Variations and Adaptations
Suggestions for Customizing the Filling
One of the great things about herb and garlic swirl rolls is their versatility. You can easily customize the filling to suit your taste. Consider adding different herbs like rosemary or basil, or even some grated cheese for a richer flavor. A combination of feta and spinach can also elevate these rolls to a whole new level.
Ideas for Incorporating Spices or Other Flavor Elements
If you want to spice things up, consider adding a pinch of red pepper flakes for a kick or some finely chopped sun-dried tomatoes for a burst of flavor. Experimenting with spices can transform these rolls into your signature dish.
Discussing Dietary Adaptations
For those with dietary restrictions, these rolls can be adapted to suit various needs. Use gluten-free flour blends to make them suitable for gluten-sensitive individuals. Additionally, consider substituting the butter with olive oil or plant-based spreads to create a vegan version without sacrificing flavor.
Conclusion
The joy of making and sharing herb and garlic swirl rolls is truly unmatched. The process of kneading, rising, and baking creates not only delicious rolls but also a delightful experience in the kitchen. This recipe is a wonderful foundation for your baking journey—encouraging you to experiment and make it your own.
Whether you’re serving them at a family dinner, a casual gathering, or simply enjoying them with a cup of soup, these rolls bring comfort and satisfaction to the table. Embrace the art of homemade baking, and let these herb and garlic swirl rolls become a beloved staple in your culinary repertoire. Happy baking!