Introduction
Chili is more than just a dish; it’s a culinary tradition deeply rooted in Tex-Mex cuisine, celebrated for its bold flavors and comforting warmth. Originating in the heart of Texas, chili has evolved over the years, becoming a staple for gatherings, cook-offs, and family dinners alike. Its versatility allows for a myriad of variations, making it a favorite among home cooks and professional chefs. In Tex-Mex cuisine, chili often combines the rich, spicy flavors of the Southwest with elements like beans, tomatoes, and robust spices, resulting in a hearty meal that satisfies.
In today’s fast-paced world, convenience in cooking is paramount, and the Instant Pot has revolutionized how we prepare our meals. This multi-functional kitchen appliance not only allows for quick cooking times but also locks in flavors, making it the perfect tool for creating rich and complex dishes like chili. With the Instant Pot, you can achieve tender, flavorful chili in a fraction of the time it would typically take on the stovetop.
In this article, we’ll explore a delicious recipe for Spicy Tex-Mex Instant Pot Chili that highlights the ease of preparation while delivering vibrant flavors. Whether you’re a seasoned home cook or a beginner, this recipe is designed to be approachable and satisfying, making it an excellent addition to your weeknight dinner rotation.
Understanding the Ingredients
To create a memorable chili that truly embodies the spirit of Tex-Mex cuisine, it’s essential to understand the key ingredients and their roles in the recipe. Each component contributes not only to the flavor but also to the nutritional value of the dish.
Ground Meat: Beef or Turkey
The base of our chili is typically ground meat, either beef or turkey. Ground beef is a classic choice, lending a rich and robust flavor profile. It’s also higher in fat, which can contribute to the overall mouthfeel of the chili. On the other hand, ground turkey is a leaner option that provides a lighter alternative without sacrificing flavor. Both options are excellent sources of protein, essential for muscle building and repair, and they serve as the foundation for the chili’s hearty texture.
Beans
Beans are another critical ingredient in chili, adding both protein and texture. They help to thicken the chili while providing a creamy consistency that balances the dish’s spices. Common choices include kidney beans, black beans, and pinto beans, each bringing its unique flavor and nutritional benefits. Beans are an excellent source of fiber, which aids in digestion and promotes a feeling of fullness, making your chili not only delicious but also satisfying.
Fresh Vegetables
Fresh vegetables are essential for enhancing the flavor and nutritional profile of your chili. Onions and bell peppers are staples in many chili recipes, providing a sweet and savory base when sautéed. Other options, such as garlic, tomatoes, and jalapeños, can elevate the dish further by adding layers of flavor and a touch of heat. These vegetables are not only low in calories but also packed with vitamins and minerals, making your chili a well-rounded meal.
Spices: The Heart of Flavor
No chili is complete without a blend of spices that give it that signature kick. Chili powder, cumin, and smoked paprika are the holy trinity of Tex-Mex spices.
– Chili Powder: This spice blend—typically made from dried chili peppers, garlic powder, and other spices—provides the fundamental heat and depth of flavor that defines chili.
– Cumin: With its warm, earthy aroma, cumin enhances the overall flavor profile while adding a touch of nuttiness. It’s known for its ability to complement meat and beans beautifully.
– Smoked Paprika: This spice introduces a subtle smokiness that rounds out the dish, giving it a complexity that is often associated with slow-cooked meals.
Understanding how these ingredients work together will help you create a chili that’s not only delicious but also tailored to your taste preferences.
Preparation Steps for Spicy Tex-Mex Instant Pot Chili
Now that we’ve covered the essential ingredients, let’s move on to the preparation steps that will guide you in making Spicy Tex-Mex Instant Pot Chili. The Instant Pot allows for a streamlined cooking process, but there are still crucial steps that will enhance the flavor and texture of your dish.
Sauté Process
The first step in preparing your chili is to use the sauté function on your Instant Pot. This step is vital for building flavor, as it allows you to cook the foundational ingredients before pressure cooking.
1. Heat the Instant Pot: Start by selecting the sauté mode on your Instant Pot and allowing it to heat up. You may add a small amount of oil (such as olive or canola oil) to prevent sticking and help with the browning process.
2. Sauté Onions and Peppers: Once the oil is hot, add diced onions and bell peppers. Sauté them for about 3-5 minutes, or until they become soft and translucent. This process not only releases their natural sugars, enhancing sweetness but also deepens the overall flavor of the chili.
3. The Importance of Browning the Meat: After the vegetables are sautéed, it’s time to add your ground meat. Break it up with a spatula and let it brown, stirring occasionally. Browning the meat is crucial, as it initiates the Maillard reaction—a chemical reaction that occurs when proteins and sugars in the meat are exposed to heat, resulting in rich, complex flavors. Aim for the meat to be fully cooked and lightly browned for optimal flavor development.
Draining Excess Fat
Once your meat is browned, you may notice excess fat in the pot, especially if using ground beef. It’s essential to drain this fat to prevent your chili from becoming greasy.
1. Draining Method: Carefully tilt the pot and use a spoon to scoop out the excess fat, or transfer the meat to a colander set over a bowl to catch the drippings. This step is particularly important for maintaining a balanced texture in your chili.
Adding Spices
With your vegetables sautéed and meat browned, it’s time to enhance the flavor with spices.
1. Incorporate the Spices: Add your chili powder, cumin, and smoked paprika to the pot. Stir them into the meat and vegetable mixture, allowing them to toast for about 1 minute. This toasting process is key, as it helps to release the essential oils and flavors of the spices, making them more aromatic and impactful in the dish.
Combining Ingredients
Finally, it’s time to bring everything together.
1. Add Remaining Ingredients: To the sautéed mixture, add the beans, diced tomatoes (with their juices), and any additional ingredients such as beef broth or chicken broth. Stir everything well to combine, ensuring that the spices are evenly distributed throughout the mixture.
2. Pressure Cooking: Close the lid of the Instant Pot, making sure the valve is set to sealing. Select the pressure cook function and set the timer for 15 minutes. Once the cooking time is up, allow the pot to release pressure naturally for about 10 minutes before performing a quick release for any remaining steam.
This initial preparation stage is crucial for developing the deep, rich flavors characteristic of a great chili. The sautéing process not only adds complexity to the dish but also sets the stage for a satisfying meal that’s sure to impress your family and friends. In the next part of our series, we will delve into finishing touches, serving suggestions, and additional tips to personalize your Spicy Tex-Mex Instant Pot Chili. Stay tuned for more delicious details!
Importance of Layering Flavors and Proper Mixing
When creating a robust and flavorful dish like Spicy Tex-Mex Instant Pot Chili, the importance of layering flavors cannot be overstated. Layering involves adding ingredients at different stages of cooking to build depth and complexity in taste. Start by sautéing onions, garlic, and bell peppers until they are fragrant and slightly caramelized; this creates a savory base that will enhance the overall flavor profile of your chili.
Once you add your ground meat or protein alternative, season it generously with a combination of spices, such as cumin, smoked paprika, and chili powder. This not only infuses the protein with flavor but also allows the spices to bloom, creating a rich and aromatic essence.
Proper mixing is equally crucial. After adding your canned tomatoes, beans, and broth, ensure everything is thoroughly combined. This ensures that every spoonful of chili is packed with flavor and that the spices are evenly distributed throughout the dish. If you skip this step, you may end up with pockets of overpowering spices or bland areas, which can detract from the overall enjoyment of the dish.
Pressure Cooking for Perfection
Understanding the Pressure Cooking Process in the Instant Pot
The Instant Pot revolutionizes home cooking by utilizing pressure cooking, a method that cooks food quickly while retaining moisture and flavor. When you seal the lid and set the Instant Pot to high pressure, the temperature inside increases, which significantly reduces cooking time. For our Spicy Tex-Mex Chili, this means tenderizing the beans and meat in a fraction of the time it would take on the stovetop.
Benefits of Pressure Cooking for Tenderizing Ingredients and Infusing Flavors
One of the primary advantages of pressure cooking is its ability to tenderize tough ingredients. For instance, if you choose to use beef or pork in your chili, the high pressure breaks down connective tissues, resulting in tender, flavorful meat. Additionally, the sealed environment traps steam and aromas, allowing herbs and spices to permeate every ingredient, creating a cohesive and flavorful dish.
Natural Release vs. Quick Release: When and Why to Use Each Method
When it comes to releasing pressure, you have two options: natural release and quick release.
– Natural Release: This method allows the pressure to decrease gradually. It’s ideal for dishes like chili, as it continues to cook slightly and allows flavors to meld further. For the Spicy Tex-Mex Chili, letting it natural release for about 10 minutes after the cooking cycle finishes is recommended to achieve the best texture and flavor.
– Quick Release: This method involves manually releasing the pressure by turning the valve. Use this for delicate ingredients that could overcook if left in the hot environment.
Tips for Ensuring Successful Pressure Cooking Every Time
To ensure your Instant Pot chili turns out perfectly every time, consider these tips:
1. Sauté Ingredients First: Always use the sauté function to cook your aromatics and proteins before pressure cooking. This step adds depth to the flavor.
2. Don’t Overfill: Avoid overfilling your Instant Pot. The maximum fill line is crucial for safety and proper cooking. A good rule of thumb is to keep the liquid below the 2/3 mark for soups and stews.
3. Adjust Liquid as Needed: If you notice that your chili is too thick after pressure cooking, add broth to reach your desired consistency. Conversely, if it’s too thin, you can thicken it by simmering with the lid off using the sauté function.
4. Seal Properly: Ensure that the lid is sealed correctly before starting the pressure cooking process to prevent steam from escaping.
Serving Suggestions and Variations
Ideas for Serving the Chili: Traditional and Creative Toppings
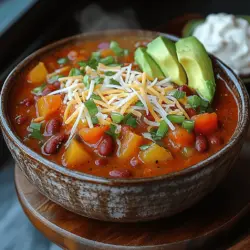
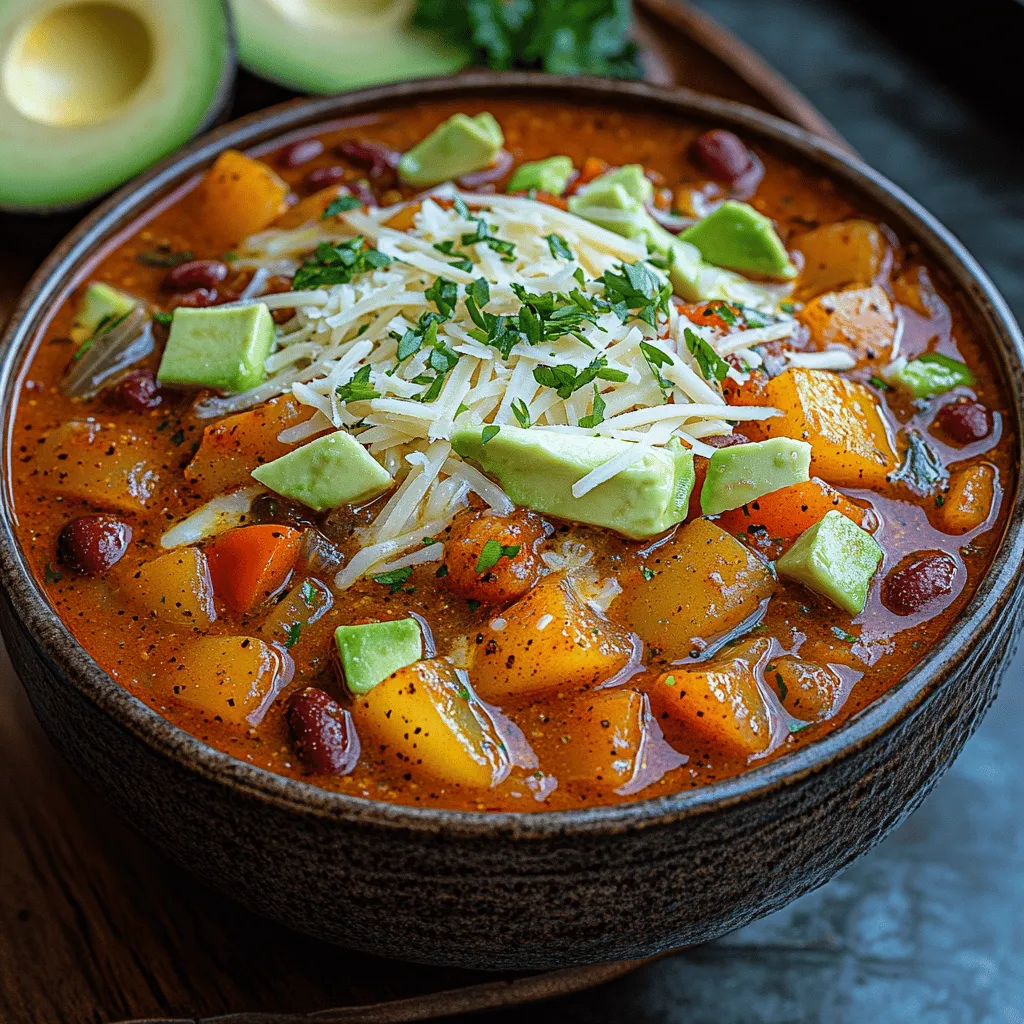
There’s no wrong way to enjoy your Spicy Tex-Mex Instant Pot Chili. Here are some traditional and creative topping ideas:
– Cheese: Shredded cheddar or Monterey Jack adds creaminess and a rich flavor that complements the spiciness of the chili.
– Sour Cream or Greek Yogurt: A dollop of sour cream balances the heat and adds a refreshing creaminess.
– Avocado: Fresh slices or guacamole bring healthy fats and a creamy texture that works well with the chili’s heat.
– Chopped Green Onions: They add a crisp, fresh note that brightens the dish.
– Cilantro: Fresh cilantro provides an herbal brightness that can enhance the overall flavor profile.
Benefits of Each Topping
Each topping contributes not only flavor but also texture and nutritional benefits. For example, the creamy nature of cheese and sour cream helps to temper the heat of the chili, making it more palatable for those sensitive to spice. Avocado not only adds a luxurious mouthfeel but provides healthy fats that are beneficial for heart health.
Variations to Suit Different Dietary Preferences
– Vegetarian/Vegan Option: To make a meat-free version, simply replace the meat with hearty vegetables like zucchini, mushrooms, or lentils. You can also add more beans to enhance protein content.
– Gluten-Free: This recipe is naturally gluten-free as long as you check your canned goods for gluten-containing additives. Most canned beans and tomatoes are gluten-free, making this dish safe for those with gluten sensitivities.
Customizing the Spice Level
Chili is all about personal preference, especially when it comes to heat. To adjust the spice level to your liking:
– Mild: Reduce the amount of chili powder and omit any additional hot peppers.
– Medium: Stick to the recipe as is, but consider adding sweet peppers for flavor without too much heat.
– Hot: Incorporate jalapeños, serrano peppers, or a dash of cayenne pepper. Always taste before adding more spice to ensure it fits your palate.
Storing and Reheating Chili
Best Practices for Storing Leftover Chili
If you find yourself with leftovers (which is likely, given how hearty and filling chili can be), proper storage is essential to maintain flavor and safety. Allow the chili to cool completely before transferring it to an airtight container.
– In the Fridge: Store chili in the refrigerator for up to 5 days. Ensure it’s in a sealed container to prevent any odors from permeating.
– In the Freezer: Chili freezes exceptionally well. Portion it into freezer-safe bags or containers, removing as much air as possible before sealing. It can be stored for up to 3 months. Label containers with the date for easy tracking.
Reheating Tips to Maintain Flavor and Texture
When it comes to reheating, you want to maintain the original flavor and texture of your chili:
– Stovetop Method: For best results, reheat on the stovetop over medium heat, stirring occasionally until warmed through. You can add a splash of broth if the chili thickens too much.
– Instant Pot Method: Place the chili in the Instant Pot, add a splash of water or broth to prevent burning, and set to the sauté function until heated. Stir frequently to ensure even heating.
Conclusion
In conclusion, Spicy Tex-Mex Instant Pot Chili is not only a delicious and satisfying meal but also an incredibly versatile and easy dish to prepare. Its ability to meld flavors through the pressure cooking process makes it a go-to for both busy weeknights and family gatherings. The convenience of the Instant Pot allows for tender, flavorful ingredients without the need for long cooking times, making it an essential tool in your kitchen.
This chili recipe is adaptable to suit various dietary needs and personal preferences. Whether you enjoy it with traditional toppings or prefer a creative twist, the possibilities are endless. We encourage you to experiment with different ingredients, spices, and toppings to make this recipe your own.
With its ease of preparation and rich flavors, Spicy Tex-Mex Instant Pot Chili is sure to become a staple in your weeknight dinner rotation. So gather your ingredients, fire up your Instant Pot, and enjoy a bowl of this comforting chili that brings warmth and satisfaction to every meal.