Introduction
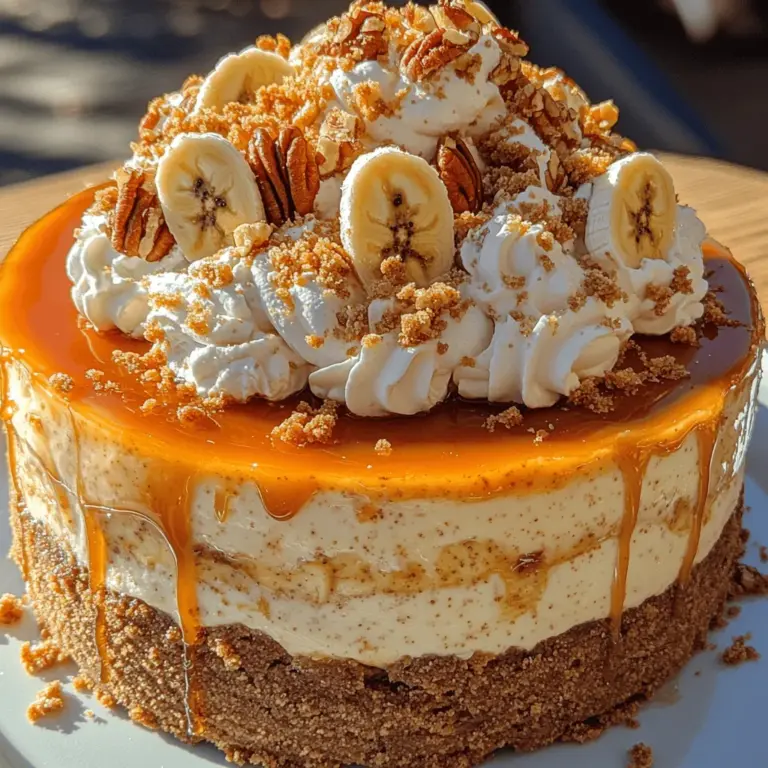
Banana Pudding Crunch Cheesecake is a delightful fusion of two beloved desserts that brings comfort and joy to any gathering. This recipe combines the rich creaminess of cheesecake with the nostalgic flavors of banana pudding, topped with a crunchy finish that adds an irresistible texture. Perfect for birthdays, holidays, or a weekend treat, this cheesecake promises to impress your family and friends with its layered complexity and delicious taste. In this article, we will explore the ingredients, preparation steps, and tips for creating this delicious dessert, ensuring you have all the guidance needed to bake your own Banana Pudding Crunch Cheesecake.
The Banana Pudding Crunch Cheesecake offers the best of both worlds: the creamy richness of traditional cheesecake and the light, airy sweetness of banana pudding. This dessert not only satisfies your sweet tooth but also evokes fond memories of childhood, making it a perfect choice for gatherings that require a delightful and nostalgic touch. Imagine slicing into a perfectly chilled cheesecake, revealing layers that tell a story of flavor and texture, from the crunchy base to the smooth, creamy filling topped with fresh banana slices. Each bite is a symphony of flavors that will leave you and your guests craving more.
Understanding the Components of Banana Pudding Crunch Cheesecake
Exploring the individual elements that make this cheesecake special enhances your appreciation and understanding of the flavors and textures involved. Each component of the Banana Pudding Crunch Cheesecake contributes to the overall experience, creating a dessert that is as visually appealing as it is delicious.
The Crust: A Sweet Foundation
The crust of a cheesecake is often its unsung hero, providing stability and a delightful contrast to the creamy filling. For our Banana Pudding Crunch Cheesecake, we use Nilla wafer crumbs, which bring a subtle sweetness and a hint of vanilla flavor that complements the other components perfectly. Nilla wafers are soft yet sturdy, making them an ideal choice for a cheesecake crust.
The importance of the crust cannot be overstated; it serves as the foundational layer that balances the creamy filling. The sweetness of the Nilla wafer crumbs, combined with a touch of melted butter, creates a rich base that enhances the overall flavor profile of the cheesecake. It also offers a satisfying crunch that contrasts beautifully with the smoothness of the filling, ensuring that each bite is a delightful blend of textures.
The Cheesecake Filling: Creamy Goodness
At the heart of this Banana Pudding Crunch Cheesecake lies the cheesecake filling, which is the true star of this dessert. The base is typically made from cream cheese, eggs, sour cream, and sugar, resulting in a rich and creamy mixture. Cream cheese is essential, as it provides the signature tanginess that distinguishes cheesecake from other desserts.
Every ingredient in the cheesecake filling plays a crucial role. The eggs act as a binding agent, helping to create a smooth and cohesive texture, while sour cream adds a luscious creaminess and depth of flavor. Ripe bananas bring a natural sweetness and fragrant aroma, blending seamlessly into the filling and enhancing the overall banana flavor. To achieve a smooth and creamy texture, it is vital to allow the cream cheese to come to room temperature before mixing. This prevents lumps and creates a velvety consistency that is irresistible.
The Banana Pudding Layer: A Nostalgic Touch
No Banana Pudding Crunch Cheesecake would be complete without the iconic banana pudding layer. This nostalgic element can be made using either instant or homemade banana pudding. Instant pudding offers convenience and ease, while homemade pudding allows for a richer flavor and a more authentic texture. Whichever option you choose, the banana pudding layer adds a delightful creaminess and enhances the banana flavor throughout the dessert.
Incorporating fresh banana slices into the pudding not only elevates the taste but also adds visual appeal. The slices soften slightly and infuse the pudding with their sweet flavor, creating a delightful layer that complements the cheesecake filling. This nostalgic touch harkens back to childhood memories of summer picnics and family gatherings, making every bite a trip down memory lane.
The Crunch Topping: A Flavorful Contrast
The final flourish of our Banana Pudding Crunch Cheesecake is the crunch topping, which adds a delightful contrast to the creamy layers below. This topping typically consists of crushed Nilla wafers, nuts, and a drizzle of caramel sauce. The crushed Nilla wafers provide an additional layer of crunch, while the nuts add a nutty flavor that enriches the dessert’s complexity.
Texture plays a crucial role in desserts, and the crunch topping is an essential element that elevates the overall experience. The combination of creamy cheesecake, smooth banana pudding, and a crunchy finish creates a harmonious balance that keeps your taste buds engaged. For those looking to get creative, variations of the crunch topping can include chocolate chips, toasted coconut, or even crushed pretzels for an unexpected salty-sweet twist.
Step-by-Step Instructions for the Perfect Banana Pudding Crunch Cheesecake
Now that we have explored the delicious components that make up the Banana Pudding Crunch Cheesecake, let’s dive into the step-by-step instructions for creating this masterpiece.
Preparing the Crust: The Base of Your Cheesecake
Ingredients:
– 1 ½ cups Nilla wafer crumbs
– ½ cup unsalted butter, melted
– 2 tablespoons granulated sugar
Instructions:
1. Preheat the Oven: Start by preheating your oven to 350°F (175°C). This will ensure that your crust bakes evenly and achieves the perfect golden brown color.
2. Combine the Ingredients: In a medium-sized mixing bowl, combine the Nilla wafer crumbs, melted butter, and granulated sugar. Use a fork or spatula to mix the ingredients until they are well combined. The mixture should resemble wet sand, holding together when pressed.
3. Press into the Pan: Lightly grease a 9-inch springform pan with cooking spray or butter to prevent sticking. Pour the crumb mixture into the pan and use the back of a measuring cup or your fingers to press it firmly into the bottom and slightly up the sides of the pan. Ensure that the crust is evenly distributed to provide a stable base for the cheesecake.
4. Bake the Crust: Place the crust in the preheated oven and bake for about 10 minutes, or until it is lightly golden and fragrant. Once baked, remove it from the oven and allow it to cool completely while you prepare the cheesecake filling.
This crust sets the stage for the creamy layers to come, and taking the time to prepare it properly will pay off in the final presentation and taste of your Banana Pudding Crunch Cheesecake.
In the next part of this article, we will delve into preparing the creamy cheesecake filling, layering the banana pudding, and finishing off with that crunchy topping to create a truly indulgent dessert. Stay tuned for an exciting continuation of this delectable recipe!
Detailed Instructions on Mixing and Pressing the Crust
The foundation of your Banana Pudding Crunch Cheesecake begins with a flavorful and perfectly textured crust. For this recipe, you will be using a combination of crushed vanilla wafers and melted butter. Start by gathering the following ingredients for your crust:
– 2 cups vanilla wafer crumbs (about 50-60 wafers)
– 1/2 cup unsalted butter, melted
– 1/4 cup granulated sugar (optional, for sweetness)
Step 1: Prepare the Crust Mixture
In a medium-sized mixing bowl, combine the crushed vanilla wafer crumbs and granulated sugar. The sugar is optional but adds a nice sweetness to the crust. Gradually pour in the melted butter while mixing with a fork or your hands until the mixture resembles wet sand. Ensure that all crumbs are evenly coated with butter, as this will help the crust hold together when baked.
Step 2: Pressing the Crust
Next, transfer the crumb mixture into a 9-inch springform pan. Using the bottom of a measuring cup or your fingers, firmly press the mixture into the bottom of the pan and slightly up the sides. The goal is to create a compact and even layer, which will serve as the base for your cheesecake. Make sure there are no gaps or loose crumbs, as this could lead to a soggy crust after baking.
Baking Tips to Achieve the Right Firmness
Baking the crust is crucial for achieving the right texture. Preheat your oven to 350°F (175°C) and bake the crust for 8-10 minutes, or until it is lightly golden. This step helps to firm up the crust and enhance its flavor. Keep an eye on it to avoid over-baking, as a burnt crust can negatively impact the taste of your cheesecake. Once baked, allow the crust to cool completely before adding the filling.
Making the Cheesecake Filling: Crafting the Creamy Layer
The cheesecake filling is the star of the show, and its creamy texture is essential for a delightful dessert. Here, we will guide you through the process of creating a smooth and luscious filling.
Ingredients for the Cheesecake Filling:
– 2 (8-ounce) packages cream cheese, softened
– 1 cup granulated sugar
– 1 teaspoon vanilla extract
– 3 large eggs
– 1 cup sour cream (or Greek yogurt for a lighter option)
– 1/4 cup all-purpose flour
Step 1: Mixing the Cream Cheese
In a large mixing bowl, beat the softened cream cheese with an electric mixer on medium speed until creamy and smooth, usually about 2-3 minutes. It’s important that the cream cheese is at room temperature to avoid lumps in your filling.
Step 2: Adding Sugar and Flavor
Add the granulated sugar and vanilla extract to the cream cheese. Continue mixing until well combined and the mixture is fluffy. Scrape down the sides of the bowl with a spatula to ensure everything is evenly mixed.
Step 3: Incorporating Eggs
Add the eggs one at a time, mixing on low speed until just combined after each addition. This technique prevents overmixing, which can incorporate too much air into the batter and lead to cracks during baking.
Step 4: Adding Remaining Ingredients
Gently fold in the sour cream and flour until fully incorporated. Be careful not to overmix at this stage; you want a smooth batter without any lumps. The flour helps stabilize the cheesecake and contributes to its firmness.
Assembling the Cheesecake: Layering for Flavor
Once your filling is ready, it’s time to assemble the cheesecake, combining the flavors of the cheesecake and banana pudding.
Step 1: Layering the Cheesecake and Pudding
Pour half of the cheesecake filling over the cooled crust in the springform pan. Spread it evenly, using a spatula for a smooth surface. Next, prepare your banana pudding (using instant banana pudding mix according to package instructions). Once set, layer the prepared pudding on top of the cheesecake filling.
Step 2: Completing the Layers
Carefully pour the remaining cheesecake filling over the banana pudding layer, ensuring that the layers do not mix. Use a spatula to smooth the top. This method allows for distinct layers of flavor, creating a beautiful presentation when sliced.
Baking the Cheesecake: Getting It Just Right
Baking is a critical step in achieving the perfect texture for your cheesecake.
Step 1: Baking Process
Preheat your oven to 325°F (163°C). Place the assembled cheesecake in the oven and bake for 55-70 minutes, or until the edges are set but the center is still slightly jiggly. The residual heat will continue to cook the center as it cools.
Step 2: Monitoring Doneness
To check for doneness, gently shake the pan. If the center wobbles slightly but is not liquid, it’s ready. Avoid overbaking, as this can lead to cracks and a dry texture.
Importance of Cooling Methods to Prevent Cracks
After baking, turn off the oven and crack the door open, allowing the cheesecake to cool slowly for about an hour. This gradual cooling method helps prevent cracks from forming on the surface. After that, remove the cheesecake from the oven and let it cool to room temperature before transferring it to the refrigerator.
Chilling the Cheesecake: The Key to Perfect Texture
Chilling is crucial for developing the flavors and achieving the ideal creamy texture of your cheesecake.
Why Chilling is Important
Chilling allows the cheesecake to firm up and set properly. It also enhances the flavors, making every bite even more delicious. Aim to chill the cheesecake for at least 4 hours, but overnight is ideal for the best results.
Recommendations for Chilling Times
If you’re short on time, a minimum of 4 hours will suffice, but overnight chilling will yield the best results, resulting in a firmer and creamier cheesecake.
Preparing the Crunch Topping: Adding the Finishing Touch
The crunch topping adds a delightful texture contrast to the creamy layers of your Banana Pudding Crunch Cheesecake.
Ingredients for the Crunch Topping:
– 1 cup crushed vanilla wafers
– 1/2 cup chopped pecans or walnuts (optional)
– 1/4 cup unsalted butter, melted
– 2 tablespoons brown sugar (optional)
Step 1: Combining Topping Ingredients
In a mixing bowl, combine the crushed vanilla wafers, chopped nuts, and brown sugar. Drizzle the melted butter over the mixture and stir until everything is evenly coated.
Step 2: Achieving the Right Consistency
You want the mixture to be crumbly but hold together slightly when pressed. If it appears too dry, add a touch more melted butter until the desired consistency is achieved.
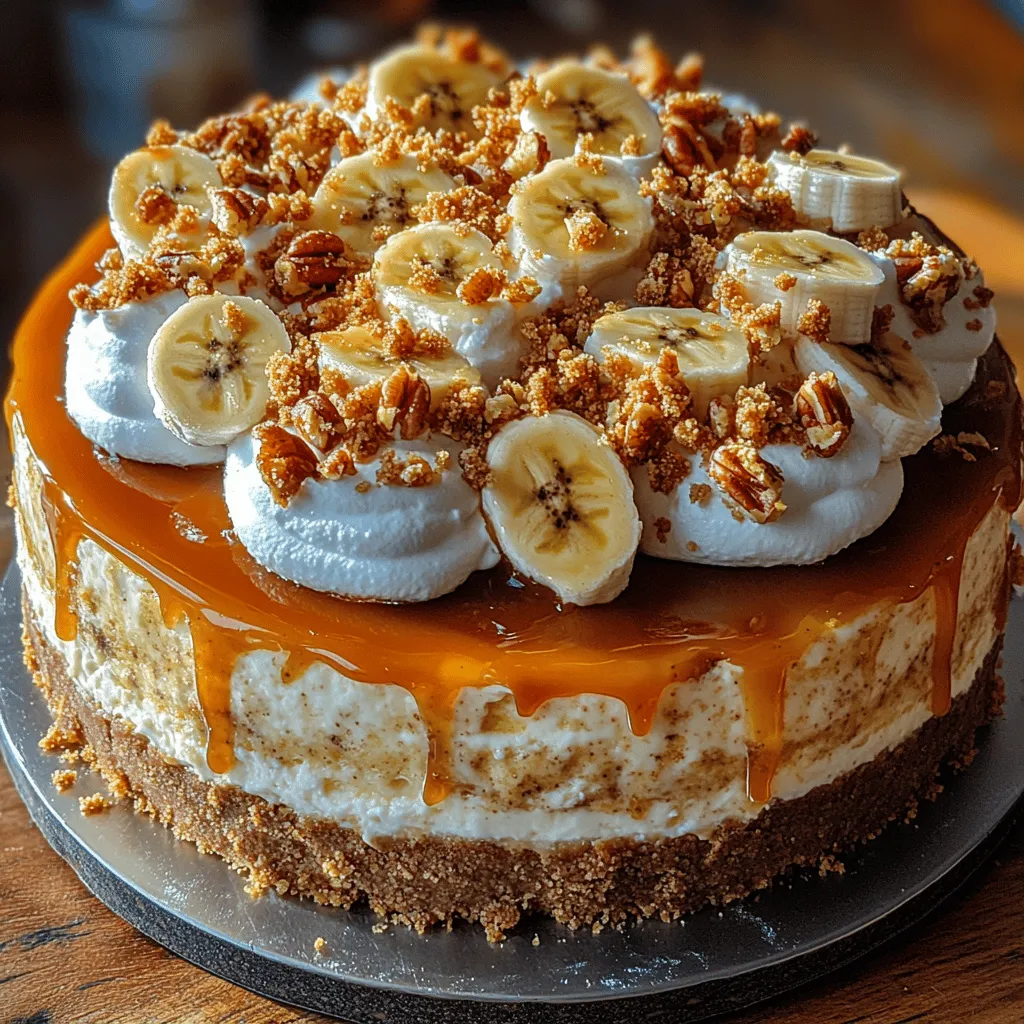
Serving Your Banana Pudding Crunch Cheesecake: Presentation Matters
Presentation can elevate your dessert, making it even more appealing to your guests.
Step 1: Removing from the Springform Pan
Once the cheesecake has chilled and set, carefully remove it from the springform pan. Run a knife around the edge to help release it, then unclasp the sides.
Step 2: Garnishing Suggestions
For garnishing, consider topping the cheesecake with whipped cream, banana slices, and a sprinkle of the crunch topping for added texture. Drizzle with caramel sauce for an extra touch of indulgence. Arrange the toppings artfully to enhance the visual appeal.
Nutritional Information: Understanding Your Indulgence
While the Banana Pudding Crunch Cheesecake is a delightful treat, it’s essential to be mindful of portion sizes and nutritional content. Here’s a general overview based on an 8-serving cake:
– Calories per slice: Approximately 350-400
– Fat: 25g
– Carbohydrates: 30g
– Protein: 5g
Insight into Serving Size and Moderation
Enjoying this cheesecake in moderation is key. Given its rich flavors and creamy texture, a small slice can satisfy your sweet tooth without overindulging. Pair it with fresh fruit or a light beverage for a balanced dessert experience.
Conclusion
Banana Pudding Crunch Cheesecake is an exquisite dessert that not only satisfies sweet cravings but also brings a sense of nostalgia with every bite. The combination of creamy cheesecake, flavorful banana pudding, and a delightful crunch creates a unique dessert experience that is sure to be a hit at any gathering. With this detailed guide, you are now equipped to create this delightful dessert in your kitchen, allowing you to share the joy of homemade cheesecake with loved ones. Enjoy the process, savor the flavors, and celebrate the sweet moments that come with each slice of this extraordinary Banana Pudding Crunch Cheesecake.
