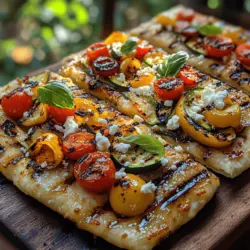
In the world of culinary delights, few things can surpass the satisfaction of a homemade grilled flatbread topped with fresh garden vegetables. The Grilled Garden Delight Flatbread is a harmonious blend of flavors and textures, perfect for a summer barbecue or a cozy dinner. With a crispy, golden crust and vibrant vegetables, this recipe is not just easy to prepare but also a feast for the eyes and palate. In this article, we will take a deep dive into crafting the perfect Grilled Garden Delight Flatbread, exploring the ingredients, preparation techniques, and the joy of grilling seasonal produce.
Understanding Flatbreads
Exploring Flatbread Varieties
Flatbreads have a rich history that spans cultures and continents, making them one of the oldest forms of bread known to humanity. Their simplicity and versatility have made them a staple in various cuisines, from Middle Eastern pita to Indian naan, and Italian focaccia to Mexican tortillas. Traditionally, flatbreads are made from unleavened or leavened dough and are often cooked on hot surfaces, such as griddles or grills. This cooking method allows for a delightful charred flavor that perfectly complements a variety of toppings.
The beauty of flatbreads lies in their adaptability. They can be enjoyed as a side dish, used as a wrap, or served as a base for an array of toppings, making them a favorite among home cooks and chefs alike. The Grilled Garden Delight Flatbread draws inspiration from these diverse traditions, offering a modern twist that celebrates fresh, seasonal ingredients.
Benefits of Homemade Flatbreads
Making flatbreads at home comes with a multitude of advantages. One of the most significant benefits is the nutritional value. By controlling the ingredients, you can create a healthier version that aligns with your dietary preferences. Homemade flatbreads often contain fewer preservatives and artificial additives compared to store-bought varieties, allowing you to enjoy a wholesome product.
Customization is another compelling reason to make flatbreads from scratch. You can experiment with different types of flour, such as whole wheat or gluten-free options, and incorporate various herbs and spices into the dough for added flavor. Furthermore, you have the freedom to choose your favorite toppings, making each flatbread uniquely your own.
Ingredients Breakdown
Flatbread Essentials
To create the perfect Grilled Garden Delight Flatbread, you’ll need a selection of essential ingredients that lay the foundation for both the dough and the toppings.
– All-Purpose Flour: This is the cornerstone of our flatbread dough. All-purpose flour provides the right balance of protein and starch, resulting in a tender yet sturdy crust. It allows the flatbread to rise without being too dense, creating that delightful airy texture we all love.
– Active Dry Yeast: The role of yeast in flatbread is crucial; it acts as a leavening agent that helps the dough rise, resulting in a light and fluffy texture. The yeast ferments the sugars in the dough, producing carbon dioxide bubbles that create air pockets, giving the flatbread its characteristic structure.
– Sugar: While sugar may seem like an optional ingredient, it plays a significant role in enhancing yeast activity. A teaspoon of sugar feeds the yeast, promoting fermentation, which leads to a better rise. Additionally, it adds a subtle sweetness to the flatbread that balances savory toppings.
– Salt: Often overlooked, salt is vital for both flavor and gluten development. It enhances the dough’s taste and strengthens the gluten network, resulting in a chewy texture. The right amount of salt can make a world of difference in the final product.
– Olive Oil: Olive oil not only adds moisture to the dough but also contributes to its flavor profile. The fat in the oil helps to create a tender crumb and enhances the overall taste, making each bite rich and satisfying.
Grilled Vegetables: The Stars of the Dish
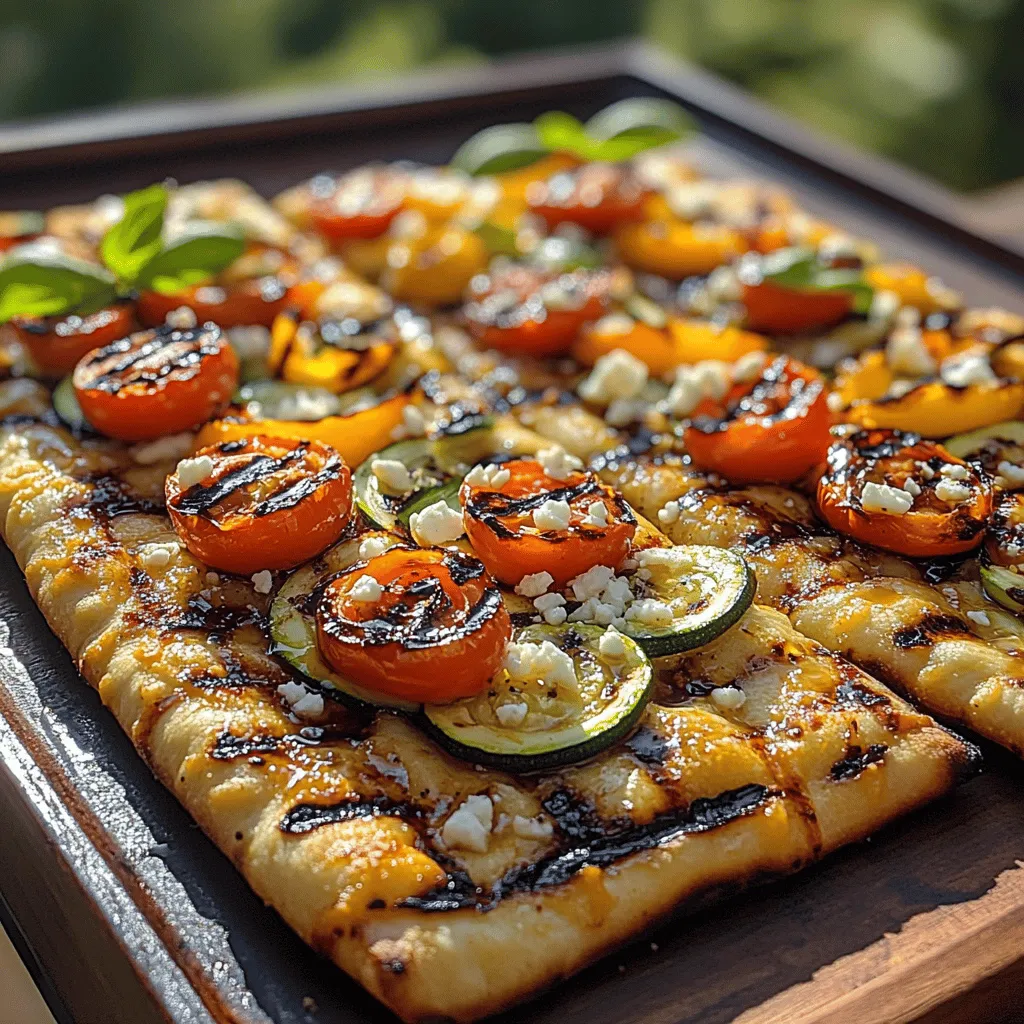
The beauty of the Grilled Garden Delight Flatbread lies in its vibrant toppings, featuring a medley of fresh vegetables that shine on the grill. Each vegetable brings its unique flavor, texture, and nutritional benefits to the dish.
– Zucchini: This versatile summer squash is low in calories and high in antioxidants. When grilled, zucchini develops a slightly sweet and smoky flavor, making it an ideal topping for flatbreads. Its tender texture complements the crispy crust beautifully.
– Bell Peppers: Available in a rainbow of colors, bell peppers add both sweetness and crunch to the flatbread. Red, yellow, and orange bell peppers are particularly sweet, while green peppers offer a slightly more bitter taste. Grilling enhances their natural sugars, resulting in a deliciously caramelized flavor.
– Red Onion: Known for its vibrant color and mild sweetness, red onion adds depth to the flatbread. When grilled, it becomes soft and slightly charred, contributing both flavor and a beautiful visual contrast to the dish.
– Cherry Tomatoes: Bursting with juice and acidity, cherry tomatoes are one of summer’s most delightful offerings. Grilling tomatoes intensifies their sweetness and brings out a rich, savory flavor that pairs wonderfully with the other toppings.
– Seasonings: To elevate the flavor profile of your grilled vegetables, consider adding a blend of herbs and spices. Fresh or dried herbs like oregano, thyme, and basil work wonders, enhancing the overall taste of the flatbread and bringing it to life.
Toppings that Elevate
While the grilled vegetables are the stars of the Grilled Garden Delight Flatbread, the right toppings can elevate the dish to new heights. Here are some suggestions to consider:
– Crumbled Feta Cheese: Feta cheese adds a creamy, tangy element that perfectly balances the sweetness of the vegetables. Its crumbly texture provides a delightful contrast to the soft toppings, and it pairs exceptionally well with grilled flavors.
– Fresh Basil: Adding fresh basil not only introduces aromatic qualities but also enhances the visual appeal of the flatbread. The vibrant green leaves offer a burst of freshness, making each bite even more enjoyable.
– Balsamic Glaze: A drizzle of balsamic glaze adds the perfect finishing touch to your flatbread. Its sweet and tart flavor enhances the grilled vegetables and cheese, creating a harmonious blend of tastes that will leave your guests craving more.
Making the Flatbread Dough
Now that we have explored the essential ingredients and toppings, it’s time to delve into the process of making the flatbread dough. A well-made dough is the foundation of a delicious flatbread, and following these step-by-step instructions will help you achieve the perfect consistency.
Step-by-Step Instructions
1. Mixing Ingredients for Perfect Dough Consistency: Start by combining the all-purpose flour, sugar, and salt in a large mixing bowl. In a separate bowl, dissolve the active dry yeast in warm water (about 110°F) along with a tablespoon of olive oil. Allow the yeast to bloom for about 5-10 minutes until it becomes frothy. This step ensures that the yeast is active and ready to work its magic.
2. Combining Dry and Wet Ingredients: Gradually pour the yeast mixture into the bowl with the flour, stirring with a wooden spoon or a spatula until the dough begins to come together. The mixture should be slightly sticky but manageable.
3. Kneading for Gluten Development: Transfer the dough onto a floured surface and begin kneading. Knead the dough for about 8-10 minutes, until it becomes smooth and elastic. This process is crucial for gluten development, which gives the flatbread its structure and chewiness. If the dough feels too sticky, add a little more flour, a tablespoon at a time.
4. Letting the Dough Rise Effectively: Once kneaded, shape the dough into a ball and place it in a lightly oiled bowl, turning it to coat the surface with oil. Cover the bowl with a clean kitchen towel or plastic wrap, and let it rise in a warm, draft-free area for about 1 hour or until it doubles in size. The warmth will activate the yeast, creating the air pockets that give the flatbread its light texture.
5. Shaping the Dough: After the dough has risen, gently punch it down to release any air bubbles. Transfer it to a floured surface, and divide it into equal portions depending on how large you want your flatbreads to be. Roll each portion into a ball and let them rest for about 10 minutes before rolling them out.
6. Rolling Out the Flatbread: Using a rolling pin, roll out each ball of dough into a flat, oval shape, about 1/4 inch thick. If desired, you can brush the surface with a little olive oil for added flavor before grilling.
As you embark on this culinary journey to create Grilled Garden Delight Flatbread, remember that the joy of cooking lies in experimenting and personalizing the recipe to suit your tastes. This flatbread not only serves as a delicious meal but also as a canvas for creativity, allowing you to showcase the flavors of the season and the satisfaction of homemade cooking. Stay tuned for the next part, where we will dive into the grilling process and how to assemble your delightful flatbread masterpiece.
Common Mistakes to Avoid
When embarking on your Grilled Garden Delight Flatbread adventure, it’s crucial to sidestep some common pitfalls related to dough preparation and grilling.
1. Over-kneading or Under-kneading the Dough: The consistency of your flatbread dough greatly influences its texture. Over-kneading can lead to a tough flatbread, while under-kneading prevents gluten development, resulting in a dense product. Aim for a dough that is smooth and elastic but still soft. To check for readiness, perform the “windowpane test”: stretch a small piece of dough between your fingers. If it forms a thin, translucent membrane without tearing, you’re good to go.
2. Not Allowing Enough Time for Rising: Patience is key when it comes to allowing your dough to rise. Underestimating the fermentation process can yield flatbreads that lack the desired airiness and chew. Ideally, let your dough rise in a warm, draft-free environment until it has doubled in size. This process not only enhances the flavor but also improves the texture.
Preparing Grilled Vegetables
The Art of Grilling Vegetables
Grilling vegetables is an art that can elevate your flatbread to new heights. Here’s how to prepare them properly.
– Prepping Vegetables for Grilling: Start by selecting fresh, seasonal vegetables such as bell peppers, zucchini, red onions, and asparagus. Wash and dry them thoroughly before cutting them into uniform pieces. This ensures even cooking and prevents some parts from burning while others remain undercooked. Tools like grills baskets or skewers can facilitate easy handling and flipping.
– Seasoning Tips for Maximizing Flavor: Season your vegetables generously with olive oil, salt, and pepper. Consider adding herbs like thyme or rosemary for an aromatic kick. Marinating the vegetables in your favorite vinaigrette for at least 30 minutes before grilling can also enhance their flavor.
– Grill Temperature and Timing for Optimal Results: Preheat your grill to medium-high heat (approximately 400-450°F). This temperature is ideal for achieving that signature char while keeping the vegetables crisp. Cook your vegetables for 5-7 minutes, turning them occasionally, until they are tender and have grill marks.
Health Benefits of Grilled Vegetables
Grilled vegetables not only taste amazing but also boast several health benefits:
– Nutritional Retention During Grilling: Grilling can preserve the nutrients in vegetables better than boiling or steaming. The high heat cooks them quickly, locking in vitamins and minerals. Moreover, the char from grilling adds antioxidants that are beneficial for health.
– The Role of Grilling in Enhancing Flavors: The Maillard reaction, which occurs when food is grilled at high heat, creates complex flavors and aromas that enrich the overall taste of the dish. This method of cooking brings out the natural sweetness in vegetables, making them more appealing to even the most reluctant eaters.
Shaping and Grilling the Flatbread
Techniques for Shaping Flatbreads
Once your dough has risen, it’s time to shape your flatbreads.
– Rolling vs. Stretching: Pros and Cons: You can either roll out your dough with a rolling pin or stretch it by hand. Rolling is great for uniform thickness but can sometimes lead to a denser texture. Stretching, on the other hand, is a gentler method that allows for air pockets to form, resulting in a lighter flatbread. Choose the method that feels right for you.
– Ensuring Even Thickness for Uniform Cooking: Regardless of the method you choose, ensure that your flatbread is an even thickness of about ¼ inch. This consistency allows for uniform cooking, preventing some areas from burning while others remain doughy.
Grilling Tips
Getting the grilling process right is essential for achieving the perfect flatbread.
– Importance of Preheating the Grill: Always preheat your grill before placing your flatbreads on it. A hot grill ensures that the flatbreads cook quickly, achieving a crispy exterior while remaining soft inside.
– Managing Cooking Time for the Perfect Char: Keep a close eye on your flatbreads as they grill. Cooking will typically take 2-3 minutes per side. Flip them when you start to see bubbles forming on the surface and golden brown grill marks.
Assembling the Flatbread
Layering for Flavor
Now that your flatbreads and grilled vegetables are ready, it’s time to assemble.
– Strategies for Distributing Toppings Evenly: Start with a base of olive oil brushed over the warm flatbread. This not only adds flavor but also creates a barrier that prevents the bread from getting soggy. Layer your grilled vegetables evenly, ensuring that each bite contains a bit of everything.
– Balancing Flavors and Textures for a Satisfying Bite: Incorporate a variety of textures and flavors by adding creamy feta cheese, fresh herbs, or a drizzle of balsamic glaze. This variety enhances the overall experience, making every bite a delight.
Serving Suggestions
Presentation plays a crucial role in any culinary endeavor.
– Presentation Ideas for a Visually Appealing Dish: Serve your Grilled Garden Delight Flatbread on a wooden board or a colorful platter. Garnish with fresh basil or parsley to add a pop of color. Consider cutting the flatbread into triangles or squares for easy sharing.
– Pairing Suggestions for Sides and Beverages: Complement your flatbread with a fresh salad or a light soup. For beverages, consider pairing it with a crisp white wine or a refreshing herbal tea. The aim is to enhance the fresh flavors of the dish without overwhelming them.
Nutritional Information
Understanding the caloric and nutritional content can help you enjoy your Grilled Garden Delight Flatbread mindfully.
Caloric Breakdown
– Analysis of the Nutritional Content Per Serving: A serving of Grilled Garden Delight Flatbread typically contains around 250-300 calories, depending on the specific toppings and portion sizes. It offers a healthy balance of carbohydrates from the flatbread and essential nutrients from the vegetables.
– Dietary Considerations and Potential Modifications: This flatbread can easily be adapted to suit various dietary needs. For a gluten-free version, use gluten-free flour for the flatbread. Vegans can omit the feta cheese or substitute it with a plant-based alternative, ensuring everyone can enjoy this delicious dish.
Conclusion
The Grilled Garden Delight Flatbread is more than just a meal; it is a celebration of fresh ingredients and the joys of home cooking. With its crispy flatbread base topped with grilled vegetables and rich feta cheese, this dish captures the essence of summer dining. By following the steps outlined in this article, you can create an unforgettable experience for yourself and your loved ones. Embrace the flavors of the garden and enjoy every bite of this delightful flatbread! Whether you prepare it for a casual family dinner, a summer barbecue, or a cozy gathering with friends, this recipe is bound to impress and satisfy. Happy grilling!