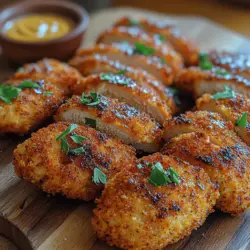
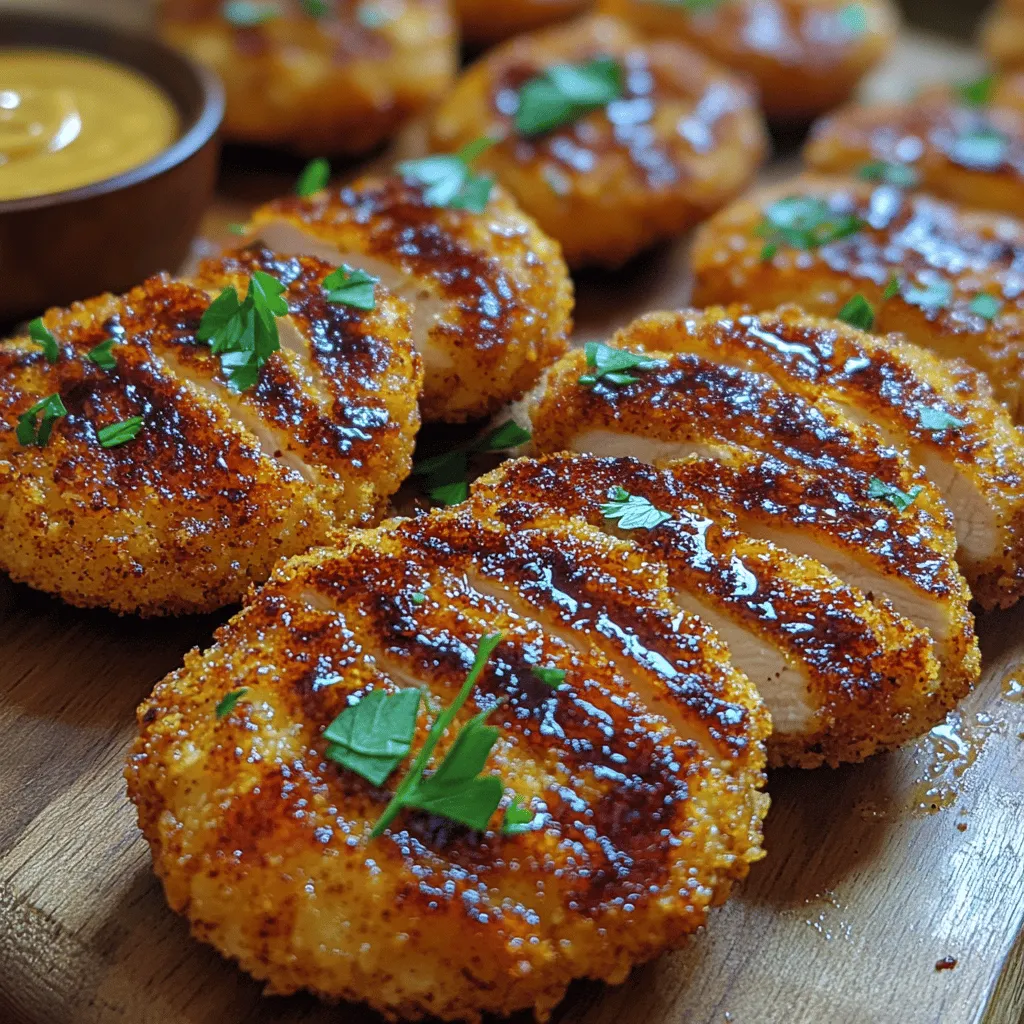
Crunchy Crunch Chicken Tenders: A Perfect Recipe for Any Occasion
Chicken tenders hold a special place in the hearts (and stomachs) of food lovers across the globe. Known for their succulent texture and delightful crunch, these bite-sized pieces of chicken are a versatile dish that can be served as a quick snack, a satisfying meal, or a crowd-pleasing party platter. Whether enjoyed on their own, dipped in your favorite sauce, or nestled in a sandwich, chicken tenders are a beloved staple in both home kitchens and restaurants.
In this article, we will dive into the world of “Crunchy Crunch Chicken Tenders,” a recipe that elevates this classic dish to new heights. With a perfect balance of flavor and an irresistible crunch, these chicken tenders are sure to impress anyone who tries them. The magic lies not just in the chicken itself but also in the careful selection of ingredients and the technique used to prepare them.
As we explore the recipe, we will emphasize the importance of flavor and texture, which are crucial for creating that perfect bite. The right combination of spices and a crunchy coating can transform a simple chicken tender into a culinary delight that keeps you coming back for more.
This article will guide you through each step of making Crunchy Crunch Chicken Tenders, from understanding the essential ingredients to detailed preparation steps. By the end of this guide, you will be equipped with all the knowledge you need to create your own perfect batch.
Understanding the Ingredients
To create the best Crunchy Crunch Chicken Tenders, it’s essential to use high-quality ingredients that contribute to both flavor and texture. Let’s take a closer look at the key components of this recipe:
Chicken Breast: Benefits and Selection Tips
The star of our dish is, of course, the chicken breast. This lean cut of meat is not only healthy but also incredibly versatile. When selecting chicken breast for your tenders, look for fresh, organic options whenever possible. Fresh chicken should have a pinkish hue and a firm texture. Avoid any that appear dull or have an off smell.
Using chicken breast results in tenders that are juicy and tender, especially when marinated correctly. This cut of meat absorbs flavors well, making it perfect for our flavorful marinade.
Buttermilk: Role in Marinating and Flavor Enhancement
Buttermilk is a key ingredient in this recipe, serving as both a marinade and a flavor enhancer. The acidity in buttermilk helps to tenderize the chicken, breaking down proteins and creating a more succulent piece of meat. Additionally, buttermilk imparts a slight tanginess that complements the spices used in the breading.
For best results, allow the chicken to marinate in buttermilk for at least 2 hours, or ideally overnight. This not only enhances the flavor but also ensures that the chicken stays moist during cooking.
All-Purpose Flour vs. Other Flours: Why It’s the Best Choice
When it comes to breading chicken tenders, all-purpose flour is the gold standard. It creates a light, crisp coating that adheres well to the chicken. While some recipes may call for alternative flours, such as whole wheat or almond flour, these can alter the texture and flavor profile of the tenders.
All-purpose flour provides a neutral base that allows the seasonings to shine while ensuring the final product has a satisfying crunch.
Panko Breadcrumbs: The Secret to Extra Crunchiness
If you want to achieve that ultimate crunch, panko breadcrumbs are a must. Originating from Japan, panko is coarser than traditional breadcrumbs, resulting in a light and airy texture. This unique quality makes panko the secret ingredient in our Crunchy Crunch Chicken Tenders, providing an extra layer of crispiness that will keep your taste buds tingling.
When using panko, consider toasting it lightly before coating your chicken. This simple step can enhance its flavor and crunch factor, taking your tenders to the next level.
Spices and Seasonings: The Importance of Flavor Balance
The right blend of spices is crucial for elevating chicken tenders from ordinary to extraordinary. In our Crunchy Crunch Chicken Tenders, we incorporate a variety of seasonings that create a well-rounded flavor profile:
– Garlic Powder: Adds a savory depth to the chicken.
– Onion Powder: Enhances the overall flavor and sweetness.
– Paprika: Provides a mild smokiness and vibrant color.
– Salt and Black Pepper: Essential for seasoning, ensuring the chicken is flavorful.
– Cayenne Pepper: Adds a subtle kick, bringing the dish to life.
Balancing these flavors is key to creating a delicious tender that is both flavorful and appealing.
Preparation Steps in Detail
Now that we have a solid understanding of the ingredients, it’s time to dive into the preparation process. Making Crunchy Crunch Chicken Tenders involves several important steps that will ensure your chicken is flavorful, tender, and perfectly crispy.
Marinating the Chicken
The first step in preparing your Crunchy Crunch Chicken Tenders is marinating the chicken. This step is crucial for achieving maximum flavor and tenderness.
1. Cut the Chicken: Begin by cutting the chicken breasts into uniform strips, about 1 to 1.5 inches wide. This ensures even cooking and consistent texture.
2. Prepare the Marinade: In a bowl, combine the buttermilk with a pinch of salt and a dash of cayenne pepper for an extra kick. You can also add a teaspoon of garlic powder and onion powder to the marinade for added flavor.
3. Marinate: Place the chicken strips in the buttermilk mixture, ensuring they are fully submerged. Cover the bowl with plastic wrap and refrigerate for at least 2 hours, or overnight for the best results. This step not only infuses the chicken with flavor but also helps tenderize the meat, making for an incredibly juicy bite.
Setting Up a Breading Station
Once your chicken has marinated, it’s time to prepare for the breading process. Setting up a breading station is essential for achieving a perfectly coated tender.
1. Gather Your Bowls: You’ll need three shallow bowls: one for the flour, one for the beaten eggs, and one for the panko breadcrumbs mixed with your chosen spices.
2. Prepare the Flour Mixture: In the first bowl, combine all-purpose flour with garlic powder, onion powder, paprika, salt, and black pepper. Mix well to ensure the spices are evenly distributed.
3. Prepare the Egg Mixture: In the second bowl, beat a couple of eggs until they are fully combined. This will act as the adhesive for the breadcrumbs.
4. Prepare the Panko Mixture: In the third bowl, combine panko breadcrumbs with a pinch of salt, pepper, and a dash of cayenne for heat.
This three-bowl system is crucial as it allows for a thorough coating process, ensuring each piece of chicken is evenly covered for maximum crunch.
Coating the Chicken
Now comes the fun part—coating the chicken! This step is where the magic happens, transforming your marinated chicken into crunchy tenders.
1. Dredge in Flour: Take a marinated chicken strip and shake off any excess buttermilk. Dredge it in the seasoned flour, ensuring it’s fully coated. This initial layer will help the egg adhere better.
2. Dip in Egg: Next, dip the flour-coated chicken into the beaten eggs, allowing any excess to drip off. This step is crucial for ensuring the panko sticks well.
3. Coat with Panko: Finally, roll the chicken strip in the panko breadcrumbs, pressing gently to ensure an even coating. Repeat this process for all your chicken strips.
Achieving an even and crispy coating is essential for that satisfying crunch.
In the next section, we will delve into cooking techniques that will ensure your Crunchy Crunch Chicken Tenders are cooked to perfection, maintaining their juiciness while achieving that desirable crispy exterior. Stay tuned for tips on oil temperature and cooking methods that will elevate your chicken tenders to a restaurant-quality dish.
Importance of Oil Temperature
When it comes to frying chicken tenders, the temperature of the oil plays a crucial role. Proper oil temperature ensures that the chicken cooks evenly and achieves that coveted crispy texture without absorbing too much oil. If the oil is too cool, the chicken will absorb more oil, resulting in greasy tenders. Conversely, if the oil is too hot, the outside may burn before the inside cooks through.
How to Test Oil Readiness Before Frying
To ensure your oil is at the right temperature, you can use a few simple methods:
1. Thermometer: The most reliable way is to use a deep-fry thermometer. Aim for an oil temperature of around 350°F to 375°F (175°C to 190°C).
2. Bread Test: If you don’t have a thermometer, drop a small piece of bread into the oil. If it browns in about 60 seconds, your oil is ready.
3. Wooden Spoon Method: Insert the handle of a wooden spoon into the oil. If bubbles form around it, the oil is ready for frying.
Frying the Chicken Tenders
Once your oil is at the ideal temperature, it’s time to fry the chicken tenders. Carefully add the coated tenders to the hot oil, ensuring not to overcrowd the pan. Overcrowding can lower the oil temperature, leading to uneven cooking.
Tips for Frying in Batches
– Batch Cooking: Fry the chicken tenders in small batches, usually 3-4 pieces at a time, depending on the size of your frying pot. This allows for better heat retention and more even cooking.
– Avoiding Splashing: When adding the tenders, lower them gently into the oil to avoid splashing.
Monitoring Cooking Time
The cooking time for chicken tenders typically ranges from 4 to 6 minutes, depending on their size. To achieve optimal crispiness and doneness:
1. Visual Cues: Look for a golden-brown color on the exterior of the tenders.
2. Flipping: Turn the tenders halfway through the cooking process to ensure even browning on both sides.
Using a Meat Thermometer
To guarantee your chicken tenders are cooked through and safe to eat, using a meat thermometer is essential. Insert the thermometer into the thickest part of the tender; the internal temperature should reach 165°F (74°C) for safe consumption.
Importance of Checking Internal Temperature
Checking the internal temperature not only ensures food safety but also helps maintain the juiciness of your chicken. Tenders cooked to the correct temperature will be moist and flavorful, while overcooked tenders will be dry and tough.
Serving Suggestions and Pairings
No chicken tender meal is complete without delicious sauces and sides. Here are some fantastic pairing ideas:
Sauces and Dips
– Honey Mustard: This sweet and tangy sauce pairs beautifully with crunchy chicken tenders, adding a delightful flavor contrast.
– Barbecue Sauce: For a smoky kick, serve your tenders with your favorite barbecue sauce.
– Ranch Dressing: Creamy ranch is a classic dip that complements the crispy texture of the chicken.
Suggested Side Dishes
To create a complete meal, consider these side dishes:
– French Fries: A classic pairing, crispy fries can be seasoned to match the chicken.
– Coleslaw: The crunchiness of coleslaw provides a refreshing contrast to the tenders, enhancing the overall meal experience.
– Fresh Salad: A light salad with mixed greens and a vinaigrette can balance the richness of the fried chicken.
Nutritional Information
Understanding the nutritional value of your meal can help with dietary considerations. Here’s an overview:
Overview of Nutritional Value
A serving of Crunchy Crunch Chicken Tenders (about 4 tenders) contains approximately:
– Calories: 350-400
– Protein: 25-30g
– Fat: 15-20g
– Carbohydrates: 30-35g
Dietary Considerations
For those monitoring their calorie intake or dietary restrictions, consider the following modifications:
– Baking Instead of Frying: For a healthier version, you can bake the chicken tenders. Preheat your oven to 400°F (200°C), place the tenders on a baking sheet lined with parchment paper, and bake for about 20-25 minutes, flipping halfway through.
Variations on the Recipe
To keep things interesting, you can explore various flavor profiles and coatings:
Flavor Variations
– Spicy Crunch Tenders: Add cayenne pepper or hot sauce to the breading mix for a spicy kick.
– Herb-Encrusted: Incorporate dried herbs like oregano, thyme, or rosemary into your flour mixture for a fragrant twist.
Alternative Coatings
– Cornmeal Coating: For a different texture, replace some of the flour with cornmeal. This adds a delightful crunch.
– Gluten-Free Options: Substitute regular flour with gluten-free flour or almond flour for a gluten-free version.
Creative Serving Ideas
– Chicken Tender Sandwiches: Stack the tenders in a bun with lettuce, tomato, and your favorite sauce for a satisfying sandwich.
– Chicken Salad: Chop the cooked tenders and mix them into a salad with greens, veggies, and a light dressing for a hearty meal.
Conclusion
Crunchy Crunch Chicken Tenders are a delightful recipe that brings joy to any gathering or casual meal. With their perfect crunch and juicy interior, they are sure to impress family and friends alike. Whether you serve them with classic dipping sauces or pair them with an array of side dishes, these tenders are a testament to the enjoyment of homemade comfort food.
We encourage you to try this recipe for your next family meal or gathering. The satisfaction of cooking a delicious dish from scratch is unparalleled, and your loved ones will appreciate the effort. Enjoy the process, experiment with flavors, and revel in the joy of cooking!